Various ways of manual and mechanical planting potatoes. Planting potatoes in spring - how and when to plant.
Each gardener spends a lot of time and effort in order to get a satisfying potato harvest. All have their own proven methods and secrets of landing. But each time, analyzing the past year, you can find some shortcomings. Therefore, for the next season need no less thorough preparation. Consider the most important points in planting this useful vegetable.
When to plant potatoes
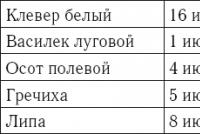
Planting potatoes in the spring in the first place you need to respect the terms. By the time of planting, soil temperature of 9 degrees Celsius is most appropriate. This temperature should be at a depth of about 10 cm. This period comes at a time when the birch is blooming and the small leaves that appear have reached the size of a penny coin.
Many gardeners adhere to landings in accordance with the phases of the moon. The influence of the satellite of our planet on biological processes has long been known. Therefore, it is useful to consider that it is better to plant potatoes when the Moon is waning.
Often, our ancestors also noticed that plants planted on dates corresponding to the Orthodox calendar grow differently. For example, no housewife planted anything on Pistol Thursday in the garden. Because all the same nothing will grow. But the pre-Easter Saturday is a very good day for landing. On this day, be sure to plant something. Naturally, this is especially true for potatoes.
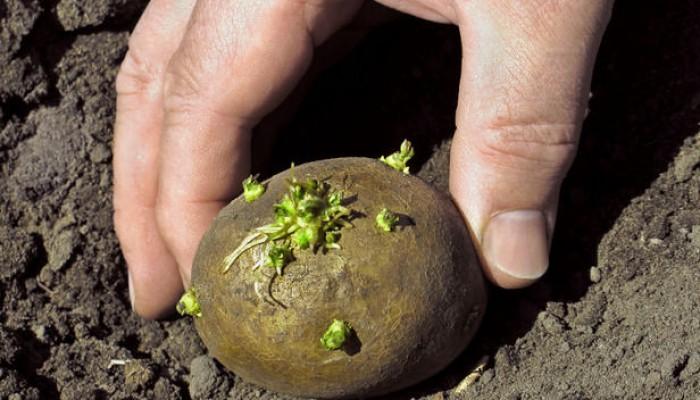
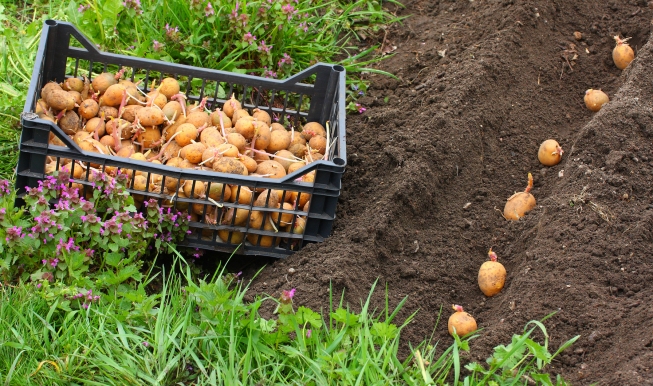
For proper planting potatoes, you must select the tubers of the desired size. The optimum size is considered not to exceed a chicken egg. If you take small potatoes, it can give weak sprouts and, accordingly, seedlings will be frail. But large tubers will not give a significant increase in yield, and besides, planting material is wasted in vain.
It is necessary to select potatoes for planting since autumn. And they are not immediately hidden in the basement, but laid out under a canopy so that they turn green. Only need to avoid direct sunlight on the tubers. Such a green potato cannot be eaten, but it will be stored for a long time and will spring much faster in the spring.
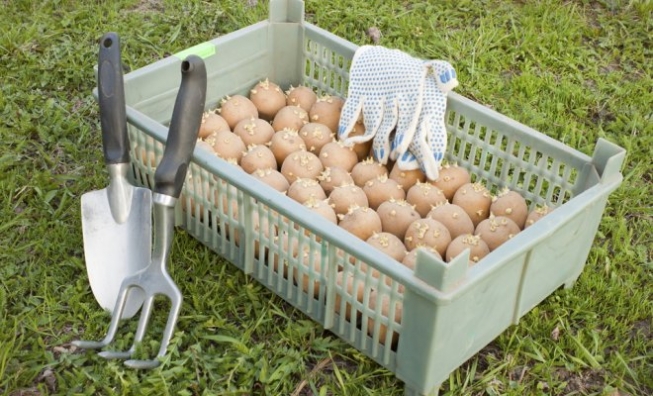
It is best to harvest potatoes for a month or even less. To disinfect it, it is necessary to dip it in a solution of manganese, dry it and put it in small layers in boxes. Faster washing process can be done by dipping tubers in batches, in small plastic boxes, by adjusting a bath or a large basin for the solution.
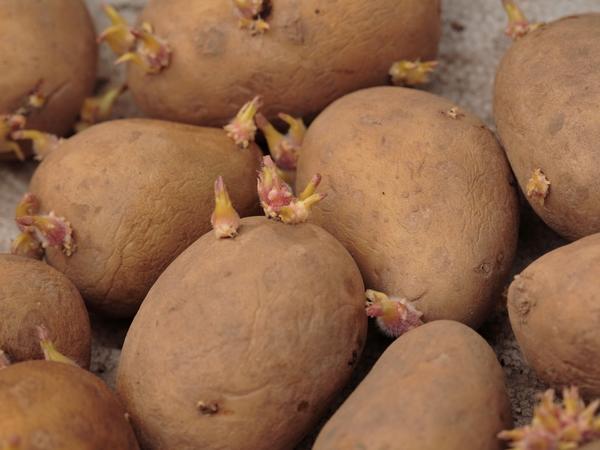
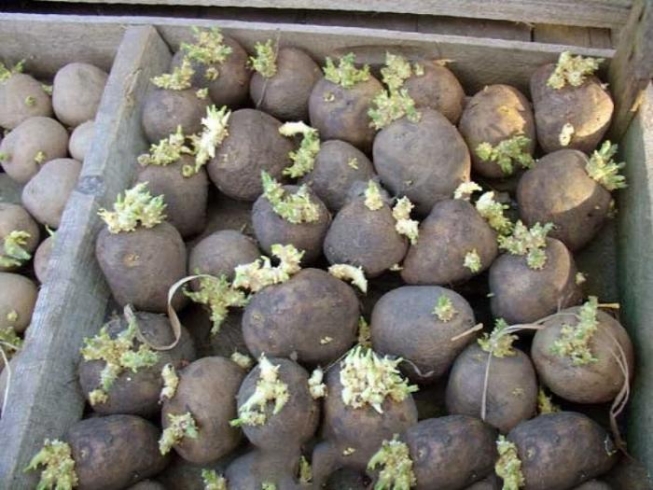
You need to germinate in the light and at room temperature. After the appearance of strong, green shoots, somewhere in two and a half weeks, planting material is better to make in a cooler place. It can be a glazed balcony or a greenhouse.
Before planting, the tubers are etched with a solution of boric acid from various soil diseases. To do this, it takes 20 g of acid to dissolve in one bucket of water. When dressing, you can gently fold the potatoes into a vegetable net and dip them in a bucket for a few seconds. Dried potatoes ready for planting.
To obtain good harvest potatoes, you need not only to fertilize the soil, but also from time to time to change the place of planting. After all, the sores accumulated in the ground will not allow the future harvest to develop normally. Poor will grow potatoes and clay soil. For the normal supply of oxygen to the tubers, it is necessary to introduce sand into such a soil before planting.
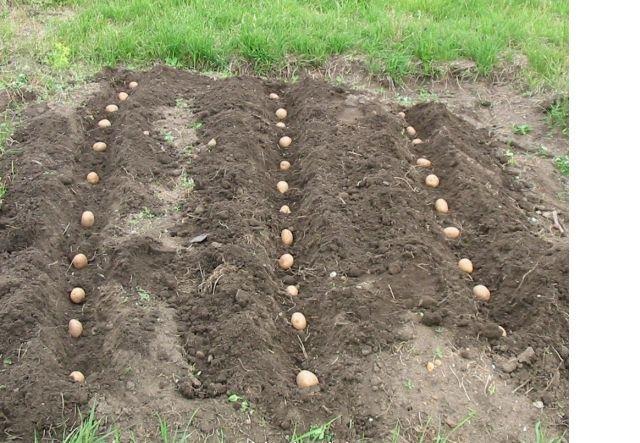
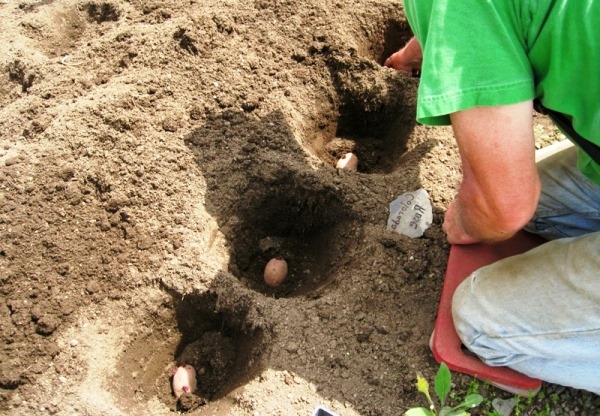
When planting potatoes between rows leave 90 cm wide gaps. The best depth for tubers is 10 cm. They plant potatoes in well-plowed soil so that its roots can easily develop. It is possible to dig a hole under each tuber and put humus and ashes there, and put a potato on top. Then all the holes are covered with earth and leveled with a rake.

With age, manual labor in the garden becomes a burden. But not only children or grandchildren can come to the rescue, but also modern technology. Very quickly, the potatoes can be planted with the help of motoblock. However, not every summer resident can immediately cope with such mechanization. After all the hinged equipment to the motor-block is on sale without instructions. Therefore, a neighbor in the country or the Internet can help here.
Planting a walker potato is not a big deal. To do this, the kit must have lugs with axle extensions, a hitch, and a double row or single row hiller. All this needs to be put on a walk-behind tractor and proceed to cutting grooves for potatoes. Previously, you can mark future rows with a special marker to make it easier to cut.
The marker is easy to make yourself. To do this, they do something similar to a rake, only wooden and with three teeth. Between the teeth, a distance equal to the width of the hillocks is made, that is, the width between the rows. After the first time held by the marker, the remaining strips are made, leading the extreme peg along the last row.
Having adjusted the walker to the marked area, at the first speed they begin to cut grooves. At the end of the markup, the unit is turned around and allowed in the opposite direction. You can go one okuchnik made furrow. If the ground is soft enough, it is better to cut the grooves in the following marks.
Cutting all the grooves, begin to lay out the potatoes. It is placed apart at a distance approximately equal to the length of the foot of an adult person. It is very convenient to go along the groove and put the potato through each step.
After that, the potatoes are poured with the same hillers. To do this, they deploy the side wings to the maximum width and, letting the walker along the ridges, fall asleep potatoes. If the stone graduate is single-row, then when filling the potato plantations you need to put on rubber wheels and walk along the center of the ridge. With this method may not turn out very smooth rollers of the earth, but they can be leveled with a hoe.
The same skillers will help a lot when the greenery of the potato appears above the ground. Putting on the unit grouser can easily spud potatoes. This will remove the weeds and cover the tubers with earth. With a single-row hiller put rubber wheels and pass the walker between the rows.
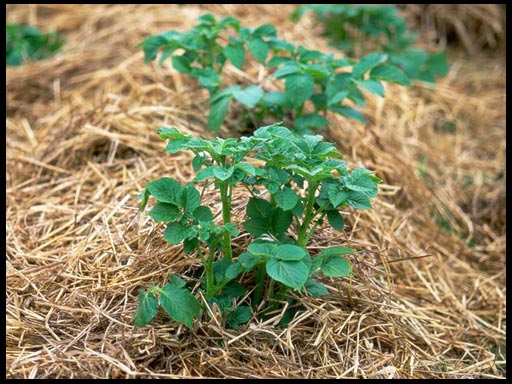
This method of planting potatoes can be useful for those who have no time to engage in the digging and digging of tubers. Potatoes planted under straw, develop even better than in the ground. To do this, and not digging the soil. In the selected area laid out in advance germinated potatoes and carefully cover with straw (20-30 cm).
And it covers not only the row itself, but all the aisles. Then do not have to weed weeds. And under the straw moisture will be well preserved after the rains and the soil temperature will not rise. If the rain in the near future is not expected, then you need to water the landing. But frequent watering is not required. Sprouts may at first be pale, but this is not scary. They will take their later.
Instead of straw, you can take mowed grass and garden residues. To increase the yield, it is good to pour peat or humus under potatoes. When at the end of the season the stalks of the crop dry out, the shelter is raised and harvested. It turns out a double benefit: a good harvest of potatoes and fertilizer garden.
On the pages of magazines revealed all the secrets of potato care and planting rules, but, nevertheless, with every good or bad harvest can be revealed completely new and unpredictable results. Especially if you are new to this business and you still do not know , how to plant potatoes.
For a good harvest you need quality seeds.
The first factor to consider in order to get a good harvest is quality seeds. Even with the proper planting process, the necessary care at the time of ripening, as well as the timely collection of potatoes, you can get a bad harvest. Often this happens because of the wrong selection of tubers. Selection of potatoes for planting should be in the fall, immediately after harvest. It is necessary to choose planting material from the most productive bushes, at least 4-5 cm in size. It should be added that the more potatoes selected for planting are, the earlier it will ripen and give a good harvest from each bush.
Summer residents use another trick - when planting potatoes, they cut potatoes in half and give it a little to dry in the sun, then cover it with ashes. This method gives a very good result. Be sure when landing it is important to take into account the weather, it should be a bit damp and warm. Otherwise, the entire planting material may simply rot, and not rising, and if you are lucky, the growth will be very weak.
How to prepare for planting potatoes
First you need to pay attention to the preparation and selection of places for the beds. Best harvest can get on:
- Cultivated gray forest soils.
- Hurry up.
- Light and medium loam.
- Properly fertilized and processed sod-podzolic.
Growing potatoes on sour soil is ineffective, because plants are subject to increased attack by pests and often get sick. An important factor is the presence in the soil of a sufficient amount of sand. If it is not there, the potatoes do not grow well and it makes sense to loosen the ground a little by adding sand. Before planting potatoes, the soil must be carefully fertilized - this is necessary so that good tubers are formed during the growth process. You can make a little saltpeter, urea and potassium salt for digging.
Planting constantly on the same bed is fraught with crop failure. Planting should be periodically transferred to another bed and do not forget about fertilizer and weeding. So the roots will get more oxygen.
Landing process
Two months before this, the potatoes must be removed from the cellar and placed in a warm, bright room. The temperature in it should be about 20C. After that, for about a week, the tubers are kept in a cooler room - where the temperature is only 10C. All this time it is best to keep the potatoes in boxes in one layer until eyes appear on it.
The best way to plant tubers is in rows. During landing early varieties It is desirable to maintain the distance between the bed half a meter, and between adjacent holes - about 30 cm. Late and mid-ripening varieties should be placed at a distance of 40 cm. In the work, you can use a walk-behind tractor if you need to plant a large bed with potatoes.
General rules for growing potatoes
To get a good harvest, you need to follow simple rules:
There are two methods of planting - directly into the ground or under hay. No matter which one you choose, you need to choose the right time for landing. It must be warm outside, warming up the soil to 20 ° C is desirable. Usually, potatoes are planted during the first few weeks of May, but some gardeners start the process of planting from the very beginning. The time of harvesting potatoes directly depends on the variety, usually 85 days pass from the moment of planting - then you can begin harvesting. The exact time for planting can be determined at its discretion, and given its own capabilities, the only important rule is that the land should not be frozen.
Observance of these simple rules will allow you to get a good harvest of potatoes!
Video how to plant potatoes
While on our summer cottages there, hunger does not threaten us. Boiled, fried, stewed - it is loved by everyone and is suitable for everyone - children and adults, healthy and sick. Therefore, the question of how much potatoes this year will grow in the country is far from idle. And I think that no one will refuse to learn a few secrets to increase the harvest of the “second bread”.
But some secrets still remain ...
Secret 1: Disinfecting Planting Material
Planting material must be decontaminated. This is a useful prevention and pest damage during germination. And the addition of boric acid to the solution will serve as a useful growth stimulator.Such processing, undoubtedly, will affect the yield, as the planting material will become much more sustainable. Tubers can be processed in two ways - either soaked for 2-3 hours in disinfectant-nutrient solutions, or be treated by aerosol (that is, simply speaking, spray the tubers from a spray bottle).
- Recipe 1- disinfectant
- Recipe 2 - disinfecting and nourishing
- Recipe 3 - disinfecting and nourishing
- Recipe 4 - for aerosol treatment
Warning:aerosol treatment is done when the shoots have not yet "naklyulyus". If the sprouts are already there, it is advised to soak the tubers first and then spray twice with the diluted composition.
Secret 2: swimming in the nutrient solution
If 2 days before planting, sprouting potato tubers should be watered with a special nutrient solution, this will accelerate the emergence of shoots and the beginning of the formation of tubers. Such a simple way can increase the yield of potato bushes up to 10-13%!- Nutritional Solution Recipe
If you have to plant unsprouted tubers, such nutritional bathing is performed one day before planting.
Secret 3: Stimulating Incision
The yield of the potato bush can be increased by cutting the planting material in a special way. This will take time and some effort, but the result is worth it - the yield increase may exceed 12-13%.Special stimulating cuts on tubers are advised to do before germination of eyes (about 1.5-2 months before landing). Then germinated already incised tubers.
Cross cut
Due to this incision, not only the eyes located in the upper part of the tuber, but also in the middle and even in the lower parts, are moving into growth. But with standard germination technology they never germinate at all!A transverse incision is made on the tuber perpendicular to the axis. The incision is deep: only a small part of the tuber remains uncut - about 1 cm; it turns out like a jumper between the halves:
![]()
As a result, growth substances begin to be distributed evenly throughout the eyes, and each tuber gives a strong shrub with many stems. You can also conduct your experiment - part of the tubers can be cut, and some of them should be germinated in the usual way. Then compare the results and determine how the “operation” affected the yield. The data of the experimental station of the Moscow SA named after K.A. Timiryazev showed a 17% increase in yield, and the experiments of the children's group “Ecologists-researchers” in the Olonets station for young naturalists — more than 20%.
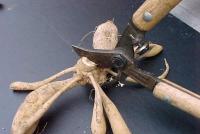
Ring cut
This incision is also made to stimulate the growth of the maximum number of shoots. The potato tuber is incised along the entire circumference to the depth of the phloem layer - 1 cm (this is easier to do by attaching a limiter to the blade of the knife at this distance).The annular cut can be transverse and longitudinal.
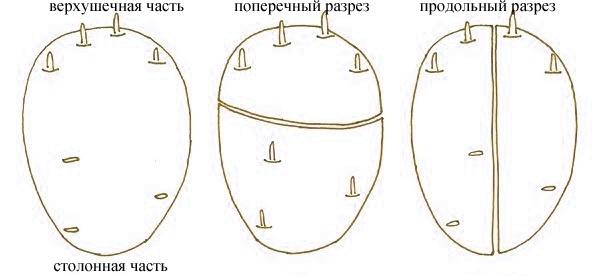
When the annular incision of the tuber is blocked nutrient and growth substances to the apical part of the tuber, these substances are sent to the side of the lower kidneys, which stimulates their activation and germination. As a result, the number of stems increases, which directly affects the number of tubers in the bush.
Experiments have shown that with a transverse annular incision on the lower part of a tuber, those eyes that would remain inactive are activated and germinate, and with a longitudinal annular incision, sprouts in the stolon part do not develop, but in the apical part they begin to develop noticeably more actively.
The effect will be greatest if the “banded” tubers are kept for 25-30 days warm - at temperatures of +14 ... + 18 degrees Celsius (which is quite possible both in a private house and in a city apartment). Ring cuts are worth doing when early forcing potatoes.
Warning: In order to prevent the transfer of diseases from tuber to tuber, it is recommended to select only healthy root vegetables for cutting, and periodically disinfect the knife during treatment with potassium permanganate, Lysol or formalin.
Secret 4: geographic
Many experienced gardeners believe that the most "fruitful" direction of potato furrows on the site is from North to South.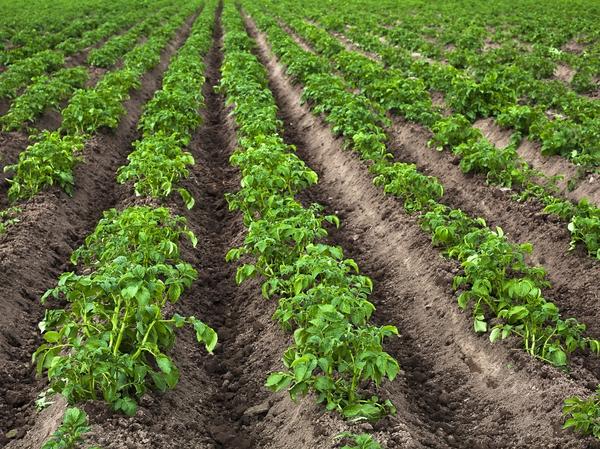
Then in our latitudes before noon the sun will warm and illuminate completely one side of the rows - the eastern, and in the afternoon - the other, western. This will allow the entire plantation to receive a maximum of light and heat, and, therefore, will have a positive effect on the increase in yield.
Secret 5: and still watering
Very detailed and interesting different opinions, technologies and benefits of irrigation of potatoes are discussed in the article and comments to it.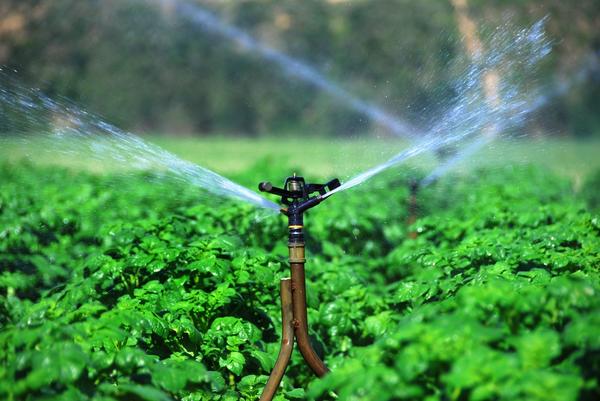
Regardless of belief, if you have the opportunity to water, then it should not be neglected. Moreover, the potato is not, and it is enough to water it for the whole season 1-3 times. And if during the period of flowering and the formation of tubers hot dry days fell out, watering one hundred percent will increase the yield of potato bushes!
How to water a large plantation of potatoes, in the next video shows and tells an experienced gardener Gennady Myagkov
Secret 6: nutritional menu
In order for the potatoes to feed us all winter and spring, we must at least once a year also arrange him three meals a day - feed him with “breakfast, lunch and dinner”.
Here is one of the options for such a three-time feeding for the whole season:
I dressing
Most effective during the active growing season, especially if the stems are weak and thin. Experienced gardeners advise the use of green fertilizer - it is well supported by the active growth of the stems. You can use the following tried recipe:organic - it can trigger an outbreak of disease and stimulate growth.
The following video will show how you can feed potatoes with dry fertilizers and solutions.
Secret 7: tricky breakdown
This secret is 137 years old. And it belongs to the famous Russian gardener Richard Ivanovich Schroeder. According to his advice, if 14-20 days after flowering the stems are broken at a height of about 10-15 cm from the soil, the harvest of the potato bush will increase significantly. The break should be such that without losing integrity, the stem, however, would not be able to rise anymore.What's the secret? And the fact that the nutrients rushing to the top of the stems, reaching fracture, "unfold" and go straight to the tubers. Plant, nevertheless, it does not fade, the process of photosynthesis does not stop - that is, the vital activity of the potato bush continues.
A warning: such breaks will be effective on healthy bushes. If plants are affected by diseases and pests, it is hardly worth waiting for positive results.
Secret 8: double harvest
Early planting potatoes are dug up in early June, the largest tubers are carefully chosen, and small ones are left on the roots. And ... immediately again put on their own place! A half-bucket of water is poured into the prepared hole, and the roots of the bush are placed directly in the soil slurry. Spud and observe - in 5-7 days the bushes take root and until the fall they manage to please the owners with another crop. Try it))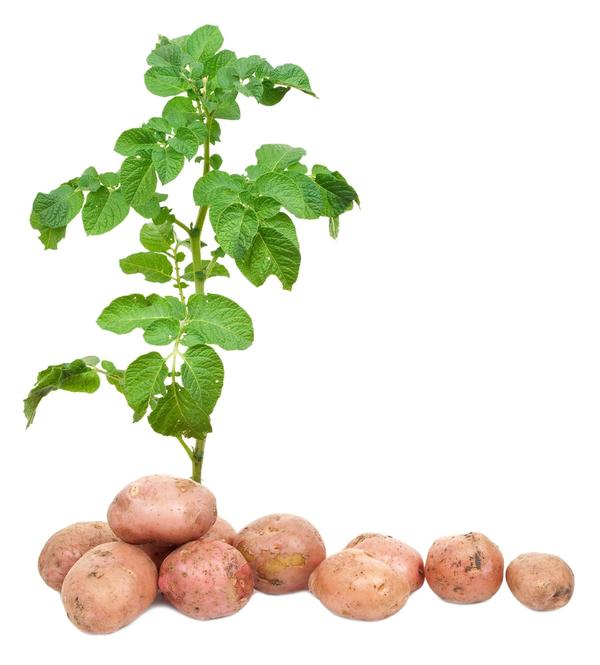
In the summer cottage notebook
- The best location for the potato plot is the south slope, which is closed from the northwest. And, of course, not obscured by anything. Then the harvest will be maximum.
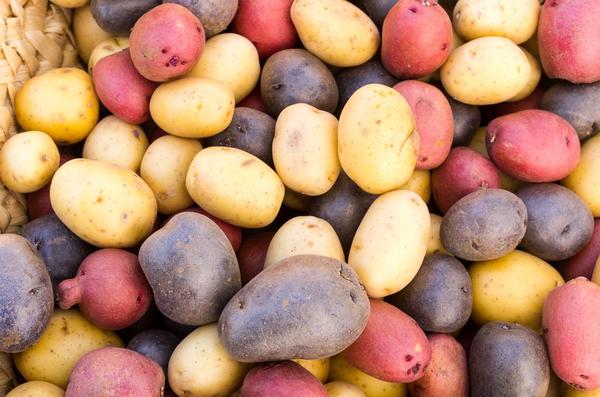
- If you want to protect yourself in case of crop failure, drop off several different varieties potatoes - some sort will certainly please. In addition, you get different in starch content of tubers.
- If you want to upgrade a potato variety, multiply it with sprouts.
- Potatoes reproduce quite easily by cuttings. To do this, freshly cut stems 20-25 cm long are quite suitable. It is enough to remove the leaves and plant the cutting in damp soil, leaving 5-8 cm above the surface. A week of regular watering and the cutting has taken root! You can spud and wait for the harvest)
pests
To get a good harvest of potatoes, you need to plant it properly. Potatoes are very tasty root vegetables, so they are planted in all parts of the country. In this article, tips on proper landing.
Potato seeds
Potato harvest depends on quality planting material. Good seeds are harvested in the fall when harvesting. The size of the tubers should be 4-5 cm. The larger the tuber is, the sooner it will ripen and the harvest will be higher from each bush. To make a good harvest from sliced potatoes, you need warm and wet weather.
And if after planting sliced potatoes the weather will be rainy and cold, then there is a very high probability that the planted potatoes will rot.
Planting potatoes
Potatoes growing on acidic soils are most susceptible to diseases and pests. During tuberization, potatoes especially need nutrients. Preparing the ground for planting next year should begin at the end of this summer.
It is necessary to fertilize under the digging:
- 15 g / m² double granular superphosphate
- 13 g / m² of ammonium nitrate or 10 g / m² of urea
- 10–13 g / m² 30–40% potassium salt
How to plant potatoes
When the potatoes were taken for planting, it must be greened in a bright place. This is done so that the tubers develop poison from the corned beef, which allows the potato to last for a long time. In this case, you need to ensure that direct sunlight does not fall on the potatoes. Germinate potatoes need to start 20-30 days before planting. Tubers before planting should be washed in a solution of potassium permanganate. Planting material is decomposed into boxes in one or two layers.
Boxes are placed in a bright place. Air temperature is 20-22 degrees. Potatoes must be green. The length of sprouts is no more than 1-1.5 cm. After two or three weeks, the boxes are transferred to a cooler place with a temperature of 10-14 degrees. Tubers must be sprayed every other day. Reduces the risk of potato disease, stimulates its growth by spraying with a solution of water, a solution of mineral fertilizers and a solution of ash.
For the treatment of potatoes from the aggressiveness of the soil environment, a solution of 20 g of boric acid in 10 liters of water is used. Tubers are immersed in this solution for a few minutes and then dried.
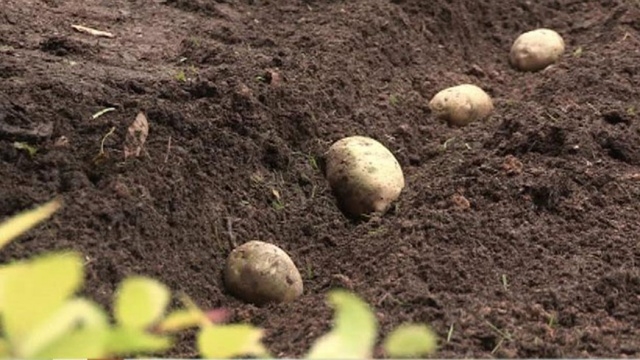
It also happens that potatoes are ready for planting, and the earth has not yet warmed up. In this case, you need to put the potatoes in the prepared grooves. From above humus, sawdust or ordinary earth is poured. You can cover the groove with a film. So tubers can lie 1-2 weeks. After the earth warms up the potatoes must be planted in a permanent place.
Planting potatoes
It is wrong to plant potatoes at the same place for several years in a row. To get a good harvest, the soil must be fertilized. Poorly growing potatoes, if the land is not enough sand. In this case, you need to make sand in the ground. Sand promotes oxygen to the tubers. Folk sign says that you need to plant potatoes when birch leaves become the size of a penny.
Potatoes land at a depth of 8-10 cm. The beds are located from north to south. Planting pattern 80 * 35 cm. Indent between rows 90 cm. When planting, ash and humus are added to the well, and then potatoes are lowered. After laying the hole covered with earth and rake level.
How to cut potatoes for planting
Potatoes intended for planting, it is not recommended to cut. Using a knife when cutting, you can infect all the tubers. From this the harvest will suffer. If you still cut the seed potatoes, then it should be cut lengthwise, and the knife must be periodically disinfected in a solution of manganese or 5% of the vitriol. Potatoes for planting should be with a chicken egg. By following all these simple tips, you will get excellent potato harvest. You have a rich harvest!
By following the simple rules for the care of potatoes, you will ensure a good harvest. After a week after planting, begin to loosen the soil: this will destroy the weeds and give you the necessary access of oxygen. When the height of the tops reaches 15 cm, you need to pile up the bushes for the first time, after another two weeks - the second. In order to grow potatoes to achieve high yields, spend root dressing.
It can be prepared, for example, from nettle: for 100 liters of water you will need 10 kg of nettle. The mixture is infused for about five days. Before use, the composition should be stirred and used in the amount of 1 l per bush. You can use the infusion of cow or bird droppings, they should be watered around the bushes, not allowing it to fall on the leaves. The formation of tubers can be accelerated as follows: during the flowering period, if the landing area large, scatter dry fertilizers on the site or, if the area is small, add a glass of humus under each bush.
Straw potatoes
Getting the harvest requires from the owner a sufficient investment of labor in his plot. However, there is another method to grow potatoes: it is suitable for those who do not have enough time for traditional cultivation. The method "under the straw" is as follows: germinated tubers are laid out on the soil that has not been dug up and covered with a layer of straw (about 20-30 cm), for this cut weeds or leaves are also suitable.
No more work until the autumn is required: a layer of plant residues retains moisture well and protects against heat. The grown crop is harvested in the fall when the tops begin to dry: they remove the straw layer and collect the tubers.
Use the walker together shovels
Over time, not only planting and potato maintenance methods will be improved, but also methods of tillage. One of these methods is the use of a motoblock, which will facilitate the cultivation of potatoes. With its help, the time-consuming process of planting potatoes can be greatly facilitated and accelerated. Today it is used even on small summer cottages. It is convenient and simple to use the walker in the process of planting potatoes:
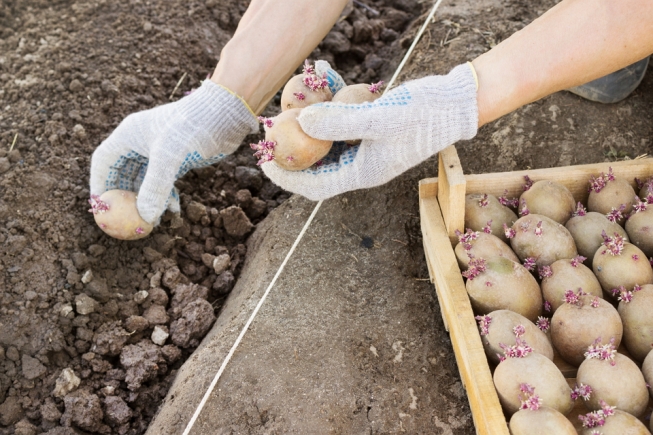
- To make the first furrow even, draw a line on the ground with the help of a tensioned cord and run a walk-through tractor along it. If this is not done, the first one and the rest of the furrows may turn out uneven.
- Then manually put the tubers into the furrow at a distance of about 20 cm from each other, and also using the motoblock, the furrow with potatoes is filled up. And, having connected a potato-planter to the motoblock, you will completely save yourself from manual labor during planting.
The use of modern methods of planting potatoes will facilitate your work on the site and allow you to grow a tasty crop with minimal costs. Many gardeners, despite the rather time-consuming process of caring for potatoes, still prefer to grow it on their own. Purchased potatoes cultivated on an industrial scale, in most cases do not have good taste, unlike home grown potatoes.
How to get a rich harvest?
In order to get a rich crop of tubers, you need to know how to plant potatoes properly. Listen to the following tips: - planting potatoes is best at a time when the temperature of the soil at a depth of about 10 cm is no lower than + 8 ... + 9 degrees.
Usually, optimal timing for landing are the last days of April - the beginning of May. If you plant potatoes in cold ground, the culture will spend a lot of strength on germination; - not every potato is suitable for planting.
Planting material should have small eyes, while the potato should be of medium size and should not be soft (sluggish). To increase the crop yield, you need to pay attention to which varieties grow best on a particular type of soil.
Tubers from those bushes that gave the maximum yield in the current year should be selected for planting next season; - good results can be achieved if you plant potatoes from another region or at least exchange planting material with your neighbor; - potatoes should be planted of different varieties, In this they must have a different ripening period. This contributes to long-term storage of the crop, as early ripe varieties usually spoil pretty quickly.
Therefore, first of all you need to eat early potatoes, and later ones can be saved for the winter. A prerequisite for obtaining a good harvest is the alternation of crops. The potatoes are best planted in those places where legumes, cucumbers, zucchini or squash, pumpkin, cabbage were grown in the previous year or onions. But in place of potatoes on next year it is better to plant pumpkin crops, that is, pumpkin, zucchini or cucumber.
We plant correctly
Two weeks before disembarking, transfer the planting material to a warm room with good lighting. So by the time planting on the tubers sprouts appear. Before planting, it is necessary to disinfect the tubers, for which you should place the potatoes in a solution of boric acid.
Keep the tubers in solution should be at least half an hour. This will prevent the development of pests that can spoil the crop. You can also increase the yield if you soak the planting material in diluted manure.
To get a good result in this solution, potatoes should be left for two days.
- the ridges should be located in the direction from north to south and plant tubers according to the 80x35 scheme at a depth of about 10 cm; for each tuber, you can additionally pour fertilizer, wood ash and humus, cover it with a layer of earth or sawdust, level the soil with a rake.
Potatoes should be planted in sunny and open areas. You should not plant this crop in the shade, as well as in the lowlands, where there is a high probability of water stagnation and fog formation. When planting potatoes in areas with closely located groundwater, tubers should be planted on ridges. If planting is carried out in a dry area, then it should be planted in a trench.
Cut or not?
Should I cut a potato? This is the right to choose every gardener. Some believe that if you cut a tuber, it will lose a large amount of nutrients.
In fact, this is not the case, because in every potato there is a so-called “vershok” in which all the most powerful shoots are concentrated. Consequently, it is possible to save planting material, while retaining some of the potatoes for food. The negative point of the cut of tubers is the high probability of infection of healthy potatoes.
This can significantly reduce the yield. Therefore, if you cut the tainted part of the potato, periodically disinfect the knife in a solution of potassium permanganate or in a copper sulfate. If you plan to cut the tuber and plant both halves, then you should cut along. Otherwise, you will separate the potato "vershok", which in the future will bring you a harvest, and the second half will either give a small number of tubers, or will not bear fruit at all.
Care of seedlings
Mandatory point in the care of the seedlings of potatoes is hilling bushes. Changing day and night temperatures can be quite harsh, which adversely affects root system potato and can adversely affect the yield. Therefore, sprouting potato bushes need to be spud so that only a crown of 2-3 cm is left on the surface.
- Login or register to post comments.
More articles about cottage and garden
Potatoes are the most unpretentious and most eaten vegetable from our beds. Planting potatoes is a grateful business, it will always be eaten, and it’s easy to grow after it, the care is small. There are so many ways of planting potatoes.
What is better, it is difficult to answer, perhaps new methods of planting potatoes, invented either from lack of space in the dacha plots, or from enthusiasm for organic farming. In any case, gardening experiments are always interesting and there are always results.
The main thing is not to forget to write them down. One of these experiments and the desire to get early harvest, led to the fact that the potato flock grown through seedlings. In order to get an early harvest of potatoes, it is necessary to take care of the seedlings. Yes - yes, even potatoes can be planted on seedlings.
To do this, we take the largest peat pots, pour the ground in them and plant the prepared tubers with sprouts in pots. Prepare the tubers beforehand - we lay them out on a sunny place to sprout.
The day you spread the potato seeds to germination and is considered the day of planting. This can be done in early April.
How to plant potatoes.
I like the classic way of planting potatoes, which begins with the preparation of seeds. To land, select good seeds potatoes, and germinate eyes, so that there is a white spine.
For this week, put the potatoes in the sun or simply lay out on the newspaper in the hallway. If the potato is large, then it can be cut.
But in such a way that a sprouting spine remains on each part. In the plot, the place for planting potatoes in the garden needs to be dug up to the depth in a bayonet of a shovel, to make humus or compost. Walk along the ground with a rake. Next, you need to make shallow holes with a shovel, about half a bayonet of a shovel, at a distance of 40 cm from each other.
In the hole you can additionally make humus, onion peel and put in her potato seeds or a pot of grown seedlings. Ground from digging holes in the next row, cover the seeds of the first row. This is the most classic way to plant potatoes properly.
After planting, if you have a lot of potatoes, then watering is not necessary, you can wait for the rain. Planting time potatoes.
- the beginning of April, for growing through seedlings, the end of April - the first of May for planting in open ground.
The time to plant potatoes is highly dependent on the year of planting and the temperature of the earth. The earth must be warm enough, in the early spring, it happens at the end of April. What varieties of potatoes to plant:
- Superearly Liga League, according to reviews very happy gardeners, Nevsky - sredneranny grade, Zhukovsky early - can be planted in the ground already on May 1, Luck - early, productive variety, long potatoes are yellow, it has to be searched for a long time in the ground, potatoes are even, there are practically no small ones, they are stored well. Lugovskiy is moderately early, more compact and more tasty varietyLucky than pink oval potatoes, fruitful, well stored, tubers of the same size, little things small.
It is worth noting that the same potato variety on different lands shows itself in different ways, not to mention its taste.
|
Ways of planting a great variety of potatoes. And with each season their number only increases. In different regions, people find their own, optimal ways. In addition to traditional methods of “under the shovel,” there are many mechanized ones that we will not dwell on. So, the main question of the gardener: “How to plant potatoes?” The answer of a wit-humorist: “And you ask her yourself!” By the way, he ( humorist) not far from the truth. After all, by and large, potatoes, and any plant, grows on its own, and a person only watches the growth, draws conclusions and then tries not to hinder him from growing by helping with fertilizers, irrigation and mechanical tillage. From the variety of planting methods Consider the most common: - square-nest; - chess; - according to Mitlayder. In case of square-cluster method of planting, the distance between the rows is 70 cm, and 50 cm in the row between the holes. It is approximately. These distances can be reduced or increased depending on the availability of free space, the amount of planting material and, most importantly, the size of the "spreading" of adult tops. The chessboard order is shown in the lower figure: It compresses the fit about one and a half times, but it is more difficult to spud. Mitlayder is a modified chess method, with a dramatic change in distance. Shown in the bottom image. Here, the distance between the rows is increased to 1 meter, and from the beam of planting spreading potato varieties - to 1.1 meter. And at the same time the distance between the holes is significantly reduced - up to 30 cm. With this method, the best illumination of plants, the convenience of hilling and, moreover, with the correct hilling, a groove for watering potatoes in the dry season remains in the center of the row. This groove is mulched against drying out. At what depth to dig holes? Of course the depth of planting tuber - 7-8 centimeters! But no. If the season is expected to be dry and watering is not provided for you, do not be lazy and make the hole deep, up to 12-15 cm. The hole was dug. You can throw a tuber. Hurry up again, dear gardener! First, do not throw, but carefully lay, trying not to break off the sprouts. And secondly (and here we are moving away from the Mltlider method, which fertilizes planting with ready-made fertilizers: our own, henchmen is cheaper), dig a hole to the full depth of a shovel (20cm), then throw half a hoop of humus into it, then a handful of soft litter of forest type a needle-bed, then a handful of wood ash (it is the product of the combustion of wood, and not polyethylene film, old roofing material and automobile tires), then pour it all with water. And only then - we put the tuber in the hole and fill it with earth. Is it difficult? Yes. But the result will pay off, believe experienced people. Yes, there was a time, I remember myself as a boy, when we easily threw potatoes into the hole and covered them with earth from a new hole. The whole family planted a garden of twenty hectares for four hours. But after all, where I lived before, the earth is black earth! And did not have to worry about feeding the soil. They said about such a soil: “Stick a stick — it will germinate!” That's the whole, as they say, process. Well, the fact that planting potatoes, that is, digging holes, must be rovnenko, on a string, remind unnecessarily. Then it will be nice to spud and dig the crop. And yet, it is important that the rows are located from north to south. With this arrangement, the potato tops will be lit by the sun from different directions from sunrise to sunset. If the planting material is small, a method of cutting the tubers before planting is very useful. The tuber is cut across into two approximately equal parts, dipped in a cut into wood ash (it disinfects the cut place) and planted in the prepared hole with a cut down. This season (2012), part of the potato was planted in a new way, having read this method in the "Homestead Newspaper" for April 2012: they made a creamy talker consisting of 2 liters of thick clay (instead of clay they used greasy dirt from a nearby swamp), 2 liters of water, 2 liters of sifted wood ash, 1 l of mullein, 1 ampoule "Epin-extra", 1 l of whey and sachets " Zemlin "(60g) is against wireworm. When planting, they dipped potatoes into this talker and planted them along Mitlayder. And quite a bit, as an experiment, they laid the potatoes on the ground without burying them, but covered them with a thick layer of straw (10-12 cm) followed by watering. Let's look at the results. August 2012. Potatoes are a miracle! All tubers are large, more than two in the palm can not hold! Little things at all. On the seeds left the tubers the size of a goose egg. Next spring we will plant on the same technology, with a talker. But under the straw of potatoes was not at all. Maybe something was wrong? In conclusion, I recommend to financially well-off people disks from professionals who have more experience than mine - a DVD with a video shot directly on the site. Below is a banner with changing images. To delay the change of images and read what is written on the banner, just hover over it. To go to the selling site, click on the banner at the moment when it will have the image of the disk you need: |
What would you like to read on the site? Write to email: [email protected] Questions on the topic ask on the forum Comments on the article (in reverse order):
Land preparation for plantingPotatoes are planted, as a rule, everyone who has a cottage, because it is simple, useful and the harvest is always useful in the family. First of all, you need to choose the right plot in the country, garden, where it will be nice to grow potatoes. So, remember the following rules for planting potatoes correctly: (See also: How to plant potatoes correctly)
At the same time, do not forget that it is easy to plant potatoes if you remember the elementary rules. For example, you can not fertilize the soil with fresh manure, even if you do not have humus! Preparing potatoes for plantingIt is important to prepare in advance not only the soil, but also the potato itself for planting on the plot. Preparatory work begins, as a rule, in March-April. Try not to tighten too much with this moment, so what do you need? First of all it is necessary to sort the potatoes:
Options for preparing potatoes for planting are very diverse. If you are taught how to plant potatoes, do not forget to remember how to prepare it, otherwise the harvest will be weak. The most popular options for preparing tubers for planting in the soil are:
It is worth noting that in order to properly plant potatoes, it must be protected from diseases and weaknesses. Use for this copper sulphate (1 tsp. On 3 l. Of water), ready or home fertilizer (1 tbsp of superphosphate, 1 tbsp of ammonium nitrate, 10 l. Of water), nitrophoska, etc. Before planting tubers, it is worth making a little ash in ready pits. (See also: How to Cook Potatoes) Planting potatoes under hay and strawAn interesting method of planting potatoes is becoming more and more popular - under hay or under straw. However, it is worth being careful with him in regions with low humidity, where forests often burn and the temperature heats to dangerous limits, for example, in the Volga region. Meanwhile, planting potatoes under straw is very simple, it is convenient and the harvest is excellent. With this option, you can not dig up the ground: it is bad for the back, and the potato does not come in handy. However, it is still necessary to prepare the potatoes: pick it up, warm it up and germinate. Place the potato tubers in rows in the selected plot of land in the garden. Potatoes are placed directly on the surface of the soil, no need to dig the beds or dig the ground. After that, place the straw on top of the tubers. Straw can reach a height of 40, and 50, and all 70 cm, depending on your capabilities. Potatoes with this type of planting grows well, it is very easy to collect it, and it is just as easy to remove straw in the autumn. To do this, you can take a rake, collect the straw and take it out or dispose of it. If you decide to plant potatoes under straw, then you get a number of advantages of this method:
If you are not worried about the yield of the earth, then you can sprinkle the potatoes on the soil lightly with a mixture of simple earth with fertilizers to improve the yield and protect against the soreness of tubers. As a rule, potatoes grown under straw are stored longer than those grown in soil. It is believed that the Colorado potato beetle does not touch the potato tubers under the straw, this is not always the case, but the percentage of risk of this misfortune is really less. (See also: How to simmer potatoes) Planting potatoes with motoblockIf you have a big garden and you plan to plant potatoes in large quantities, you should resort to using special equipment. You should plant potatoes with a walker - it is convenient, fast and much less energy consuming. With the help of the tiller, you can plow the land until the autumn after harvesting potatoes, and spud the beds with potatoes, and plant these potatoes, collect it, weed the plot and much more. Anyone who has tried himself once in this business with a walk-behind tractor no longer takes a shovel! Although in small suburban areas, the motoblock will only take up space and extra time to work - it is better to use the old proven method. So, you should start planting potatoes with laying beds on a plot allocated for potatoes. In general, with this option, not holes or beds are used, but solid grooves. With the help of the tiller, it is necessary to first pave the grooves along the perimeter of the plot, and then pave the grooves to plant potatoes. Thanks to this preparation, further work will be much easier and faster. The average distance between 2 furrows for potatoes is 60-70 cm. You have two options for planting potatoes with a walk-behind tractor - the tubers can be laid manually, or you can also use a walk-behind tractor for this. It is convenient that you can fill up the beds - even and even can be done with the help of good machinery. But remember that the wheels of the motoblock need to be changed depending on your work, for example:
Before planting potatoes, the earth is dug up, in contrast to the version with straw. It is also worth cultivating the land, fertilizing it with useful minerals. They plow the ground in this case with the same motoblock, with which they plant potatoes, but use several options:
It is best to use the first option, because It is easier and more convenient. If you plow the land in a spiral, you will have to level it later, but on a large plot it is a difficult task. But to pile up the land is single-row tiller or hiller, while the formation of furrows is done by two-row technique, where one wing rises on the already created furrow, and the second is not a “clean” section, thereby creating a new groove. The article is the personal opinion of the author and is for informational purposes only. To solve your problem, consult a specialist. We welcome your comments! Rate this article: |