Christmas tree from a garland. How to make a nichnik with your own hands - various examples with photo ideas. Place a light garland on an old toy
We quickly buy new toys for the Yalinka, and sometimes we update the garlands. From this new lamp.
Materials:
- Sklyana prozora vase (small aquarium)
- Garland
- Yalinka games
- Mushura
- What it is - needles from a piece of yarn
The idea for a lamp from a vase was found here on the Internet. And then I just guessed...
We wash and wipe the vase dry.
Place some tinsel on the bottom

Place the end of the garland on a stake
Let's start putting away the toys.
It would have looked more original if the toys were placed in balls, then. The first one has the same balls, the other one has the same toys, and also the same ones. Or put yalin pins in another ball, and another toy in the third.
Unfortunately, I didn’t have any gilts - I didn’t have to grab the shredded thread from the top - I happened to be surrounded by tinsel and toys
We also place a garland on the ball of toys, and decorate the little ones with tinsel. I have a lot of tinsel, so I cut very short clothes – about five centimeters each
Golovne: Do not compact the balls! Place it loosely - so that there is air circulation.
Fill the vase up to the top. The garland is placed completely near the vase - the garland is no longer needed unless the flashing light bulbs switch modes. This is placed on the side of the lamp that will be your back.
Use the remaining tinsel ball to decorate the top and close the jumper

Let's put it on the right place and recharge in the pre-holiday mood!

And the axis shines so brightly in the dark
PS. After the publication of the article, there was a rich supply of food for the safety of such a dispute. I specially trimmed the lamp for about 6 years. During this hour there were no signs of overheating. The lamp has a lot of empty space - it is decorated with tinsel - so the air circulation there is bad.
I say it again - it’s more logical to ask the answer - the garland on the piece of paper isn’t glaring at you, is it? What if it lies right on the yalinka nails, so it just sticks with the toys and is hung with tinsel? In the meantime, you can safely buy light-colored garlands that won’t get hot or cause any problems.
The garland, which is most often used to decorate the new Yalinka, can be used as a storage component for the preparation of a lighting device. It’s easy to make a lamp from a garland with your own hands.
To make a lamp you will need a garland, a plastic lampshade and a stand.
With this lightening, the location will be soft. Such a lamp can be viewed as a chandelier. The designs of such self-contained lamps can be varied depending on the imagination and output materials.
Lamp with disks and garlands: preparation
The following materials are required:
- CDs or DVDs, which may offend both parties without any harm;
- garland for 15-20 light bulbs;
- glue and a gun for applying it.
The beginning of the formation of such a lightening device begins with the preparation of a geometric figure, for example, a cube or a volumetric pentacle, which will be the basis. For this purpose, apply glue to the disk and apply another layer. The disks are sequentially glued until the required figure is lost. But in order to make it easier to place in the middle of the cube, one of its sides is not sealed.

To secure the discs you will need a glue gun or something.
After all the disks are glued, place a garland in the middle. They should be put out in such a manner that the fork and the box that controls it are in the final position where they are assembled. Place the light bulb in the opening. The number of placements in the middle of the windows can be from 3 to 5 per position depending on the size of the light bulb. The elements that shine must completely fill the opening, thereby creating the necessary effect. I decided to place the garlands that did not fit in the openings evenly in the middle of the cube. Next, remove a few bulbs to get them across the remaining side, which is done after gluing the remaining disk.
For ease of installation in the middle of the openings, they can be secured together with tape or insulating stitch. In addition, the group that has been created can be additionally secured with additional glue or sealant while they are being placed in the disks of the lamp.
After all the openings are filled with light bulbs, then glue the remaining part of the lamp cube. The remaining disk is filled with excess light bulbs.
As a stand, you can install another disc. Glue the cube onto it using additional glue, tear it off, and place it on the edge. Such placement allows the lighting fixture to stand firmly at a distance. When this is done, fold it over so that the socket and control box are placed at the bottom and are not glued together.
Once the structure is installed on the stand and the adhesive remains firmly set, the lamp is ready for use.
Lamp made from plastic packaging and garlands

Scheme for decorating a garland near a lamp.
In order to prepare this model, the following materials and tools are required:
- The basis. How can there be a vikoristan plastic bowl of any size or packaging made of plastic of different shapes, for example, a body in the shape of a pyramid.
- A garland with as many light bulbs as the size and shape of the base.
- White farba. Bazhano, so that the farba is at the baloney. Allow it to be evenly distributed over the entire surface with an even ball.
- Soldering iron with a standard tip (or an electric drill or drill bit with a diameter).
- Budivelny Nizh.
Before cutting the slots, markings are necessary. The stinks can be placed symmetrically with 1 piece in the opening (or it looks like a little thing with a few pieces in the middle). At the bottom you need to make a slot through which the wire from the socket and the ceramic box will be passed.
Since the material from which the base is made allows you to open it with the help of a soldering iron, which will not harm you, rather than use it. If the integrity of the structure is damaged when using a new hot soldering iron, it is necessary to stop the drill and drill bit. After marking, open with the appropriate tool that is suitable for the selected base.
As a result of the cutting of the openings, sharp edges have been created or some of the plastic has been lost in the middle or in the middle, and the excess must be carefully cut off using a utility knife. It is necessary to wrap up carefully and in such a manner as not to harm the foundations.
After the cutting of the grooves is completed, you can start preparing the grooves. The base needs to be prepared several times in this manner to create an even white color over the entire surface.
After the farb has dried, you can place the light bulbs in the opening.
For the sake of victoriousness, the robots should destroy the beast. After all the light bulbs are placed, and the wires with the socket and control box are placed in the slot, cover the base with a lid. It is possible to move the lamp into the room. The lamp is ready before use.
Nichnik is not just a piece of lighting, but an important decorative element. During the day it can be virtually invisible, but in the dark, when all other lighting devices go out, the night itself comes to the fore. And since it’s not just a light bulb under a lampshade, but because the wine is longer, the night room takes on a special, pure atmosphere. Having spent a little zusil, you can make an effective and stylish bedspread with your own hands. Its form and particularity are limited by the imagination of the creator.
Everything you need
To light at night - the axis is obvious on the power supply. But he’s far from united! A good nightclub consists of a whole range of low-cost functions:
- creates a welcoming atmosphere before bedtime;
- save electricity - a light bulb uses much less electricity than a chandelier;
- decorates the interior of the room;
- eliminates the need to stay in the dark and wake up household members if necessary in the middle of the night;
- Allows you to install a light bulb in any color and create a lightening pattern.
In addition, a night in a child’s bedroom is a reliable way to combat the fear of the dark. Just as the lampshade is decorated with little ones and little ones, then the light from such a nightlight is beneficially poured into the waking child. Any psychologist can confirm that the visual effects that the baby watches for are an important and beautiful element.
Ideas
There are no further ideas for independent beginners. The stench varies according to the level of complexity of preparation, but most of them are ready to be attacked by people.
wall
You can check the name of the person in whose room the bed will be placed
The options for making a wall-mounted bedspread are anonymous. It can take any form, be folded out of any materials. This is one of the simplest and at the same time options that look effective. For this creation you will need three boards, a sheet of acrylic and one light stitch in any color:
- Take two planks of the same size. The fellowship may be small - so it will be easier to deal with them. Sand the material with an emery paper or in some other way to give it a presentable appearance.
- Use acrylic rectangle of the same size as the plank.
- Take one of the boards and paint or write on it.
- Vizhte vizerunok or write it so that the stench becomes dripping. Since there is no CNC workbench at hand, it can be done with a basic drill or jigsaw. Through this open we pass lightly into the night.
- Make 4 holes for the bolts in each of the boards and in the acrylic sheet. For an empty shelf, also create an opening for the cord with a light-colored stitch.
- Draw a groove a little wider on the acrylic sheet per light stitch. Smuga is guilty of being in the lower part of the preparation and going out. Place the stitch in the groove.
- Take a day for additional chats.
The light fixture can be screwed to the wall with these very bolts, using some kind of assembly, or it can be glued or carefully hung on flowers.
Z orgskla
Plexiglass is prepared from acrylic resin and is widely known under the names plexiglass, acryplast, acrylite.
Organic composition and acrylic are practically the same. Therefore, the key principle of preparing a nichnik from orgskla is the same as in the previous version. The only difference is that it can’t be hung on the wall, but, for example, placed on a table or hung on a bed in the room.
One of the simplest options for creating such a book:
- Make 3 straight-cut blanks from plexiglass. The size may be sufficient, but the leather preparation will need to be a little bit behind the front.
- Draw on the paper the kind of paper that suits you. Place a paper under the workpiece and trace the outline with a scalpel or other tool. Best of all, when it comes to orgskli, the spit will be dry. Remove them after completing the work.
- Make a banana-shaped figure from a solid wooden plank - it will serve as a stand. Make another figure of the same shape.
- In one of the figures, make slits under the acrylic workpiece (you can use a special drill), and in the other, make a hole under the light-colored stitch.
- Place a stitch near the buried stitch and glue the wooden figures together. Then insert the plexiglass blank into the slot. The effective nichnik is ready!
In order for the night to shine well, placing one line under the light-colored one can “cover” all three slits.
Paperovy
Do-it-yourself nichnik with paper - one of the least expensive ways to prepare it
Papier is a very soft and flexible material. You can earn money from it in advance. The axis is one of the numerous butts of the kagants from the paper:
- Take a thick colored paper and paint it on something, either an image or a sketch.
- Use an awl to stitch around the image behind the outline. You can also make slits with wood.
- Turn the paper tube into the tube so that the outline of the image ends up in the middle. Glue the cylinder together.
- Place a small lamp or candle on the table, covered with an inverted bottle. Place the light core under the paper cylinder.
Christmas garland
It is clear that there are no options for such new products, because You can choose a garland of any color or shape
A Christmas tree from a garland is one of the simplest ideas. It’s not uncommon for such young girls to cry out in school practice lessons. To prepare a lamp, you need to make a step:
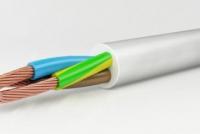
- Take a glass container. It could be a jar, a vase or a dance of any shape.
- Place a garland in the middle of the container. It is better to use light-colored one, as the fragments do not heat up and are therefore safe for storage.
- Pass the cord from the garland through the opening of the container and place the cord with the opening facing down. To make it easier while standing, you can cut a small notch for the cord into the edge of the opening.
Vikorist the container with a strong matte glass. The wires of the garland will not be visible except in the brightness of different colored light bulbs.
With the effect of the dawn sky
You can try to make the sky realistic, repeating the contours of real landmarks, or you can depict schematic landmarks that are not at all similar to the real ones
This is one of the most popular ideas all the time. The romantic effect of lightening does not deprive anyone of interest, and the space for experimentation when creating is simply magnificent! In order to create such a brightening device, you need:
- The original bottle of the jar (or it is not essential, if you want a beautiful lampshade) with a lid;
- thick foil (it’s ideal for kitchen use);
- small-sized lighthouse (located near the bank);
- marker chi felt-tip pen;
- awl and knives;
- the surface is hard - a plank, just like that.
How to earn such a salary:
- Use a marker to paint sparkles onto the foil.
- Place the foil on a hard surface and pierce the eyes with an awl. You can remove the holes and carefully trim them with scissors, pressing them into a five-cut shape.
- Cut the sheet of foil so that its height is equal to the height of the jar. Then burn it into a tube and place it in the middle of the jar, smoothing out the sides. It is necessary to use a glass container, thickly lined with foil in the middle.
- Place the liquid into the jar and turn the structure upside down.
To give your home a “heavenly” color, you can buy a decorative jar from a home goods store, and for brightening - a garland or a light bulb with a dark blue glass.
With the effect of inconsistency
Preparing materials is a headache for the creator of such a project
To prepare an enemy enemy you will need:
- acrylic mirror (either double-sided or double-sided – it doesn’t matter);
- napivprozor sklo;
- aluminum smudge;
- light line;
- be some kind of wooden block.
The process of preparing a kagan is simple:
- Make grooves in the block into which you can insert a mirror and side. Cuts of the required width can be easily made with a jigsaw or a basic drill, selecting a drill according to the size.
- Fold the aluminum smear into a rectangular shape and secure it with additional bolts on the block between the cuts, as shown in the photograph.
- Wrap the aluminum with a light-colored stitch. You can attach them with glue or a dart.
- Place the mirror in the groove. Nichnik is ready! Move it forward on the table, crooked.
New Year's Eve will become an original decorative element for any location
To create a bright month for your bedroom, you will need the following materials:
- a round bag was wrapped;
- a roll of paper towels;
- glue (preferably PVA);
- sponge with large pores;
- farba (bazhano acrylic).
Select the farb according to the color of the month (pale yellow or ivory) to achieve maximum effect. You can also mix white farb with ocher - you will get the desired color.
It’s easy to try to finish such a dish, if you want it at the right time:
- Trace the top of the wrapped bag with a marker. It is important to leave a circle with a diameter of about 6-7 cm. This area further away does not need to be touched, it will be removed.
- Place the round wrapped bag in a container of glue. If I don’t glue much, the sack can be coated with penzlik.
- Cover the bag with paper towels. Caulk until the glue sets. Then apply another ball with a pencil and repeat the procedure. Make sure to use at least 3 balls of towels so that the ball is tough and thick.
- After hanging out for a long time, fry the bag with acrylic paste.
- Take a large-pored sponge, soak it in the same mixture and carefully “scrub” the culm from the dry sides. For realism, you can “paint” the image of the Holy Month. This very stage is important for the creation of the monthly surface with craters and seas.
- Check until the kulya visohne. Then trace the opening along the contour made by the marker and pick up the damaged bag with tweezers.
- Place a light bulb in a socket, a white garland, or use it as a lampshade for a floor lamp.
Khmara
Nichnik in the form of gloom - one of the simplest and least expensive options for self-made nichnik
To create a nightstand that looks like a thunderous gloom, you need a round or oval lampshade, cotton wool, a light-emitting diode lamp (or a bunch of different-colored light bulbs) and glue. It is also necessary to prepare a strong thread to hang the thread to the frame. The lampshade can be replaced with a frame made of wood, giving it a round or oval shape. Such a frame will need to be covered with a thin cloth so that it can be seen through.
The process of preparing the nichnik lies in the immediate:
- Open the lampshade and insert the light bulb. Pass a new thread through the thread. If the light bulb you are using uses electricity, the lamp can be suspended on a cable.
- Cover the lampshade with cotton wool. You don't need much glue at all - just a small drop of cotton wool per skin. Try to put on a form of cotton wool, vikorist, both small and large pieces of cotton wool.
- The opening in the lampshade can also be sealed with cotton wool so that it is not visible.
- Hang the lamp up to the ceiling. Today it will look like the early summer gloom, and at night there will be a “storm raging.”
Troyanda
To prepare such a dish, you can choose any color paper to connect with the internet
It’s difficult to make a beautiful trojan, but the result truly is the effort and time spent. For the preparation of this book you will need cardboard, corrugated paper, acrylic fiber (red, burgundy or yellow - depending on the chosen color), olive glue, and so on.
And the axis is the manufacturing process itself:
- Draw a template from the cardboard that looks like a Trojan pellet. It is important to make it look realistic, make it similar to the real one - this way the lamp will look more beautiful.
- Place the pellets from corrugated paper according to the shape of the template.
- Use a knife to round off the ends of the pellets so that it looks approximately the same as in the photograph. Applying scissors to the edges of the pellets, iron the papier, and through a number of such ironing it will become round.
- Glue the pellets in the shape of a horn bud, place a light-emitting diode in the middle under the color of the paper. You can, however, experiment with different shades.
- You can also make a stem, as in the photo, and glue it to the skin leaf using a green LED. Ale and troyanda without a stem will look better like a table nichnik.
Such a bed can be either small, so that it can be placed on the table, or it can be placed under a table top.
Wooden scraps are even more popular; it is much easier to work with wood, scraps and metal. From this you can create the most deadly forms. And the wood covered with varnish looks wonderful and from a distance it looks even better than any interior.
Materials that may be needed for the preparation of a wooden base:
- wooden planks, bars or deck (depending on the selected model of the lamp);
- farba chi lac;
- a light bulb or one light strip (it is important to color the strip itself, so that it does not get hot and is therefore safe for the tree);
- glue, flowers or bolts (depending on the chosen method of fastening);
- emery paper.
Tools required for preparing kagant:
- a small file or jigsaw;
- drill;
- pen for applying glue;
- twist;
- bench for cutting wood (it is necessary to finish folding models of lamps).
Pokrokov's instructions
The process of creating all wooden trees is similar. Let's look at it on one strong butt:
- Take a straight log of about 0.5 m and about 15 cm in diameter. The exact dimensions do not play a role - a headache, so that it does not become too great.
- Saw the deck into discs, using 2 of them to create a bunch of others - the stinks will spread to the top and below.
- Drill at the very center of the skin with washers. On two of these washers, open the doors, but they are deaf, and on the doors, they are sharp. If you have a drilling workbench, you can make wide openings, or even slightly widen them with a chisel or jigsaw.
- Clean the opening with an emery paper to remove the rocks. Then coat them in the middle with glue: this will allow the new bed to retain its shape and not dry out.
- Coat the wooden washers with varnish and let dry thoroughly.
- Thread the washers one by one onto the rail or metal strip along the width of the opening. The haircut can be wrapped in front with a light-emitting diode, or it can be installed around the light-emitting diode after the structure has been assembled.
- Divide the light so that the skin gap between the washers glows evenly.
Light
If you are looking for a bedspread for a child's room, you can choose your favorite character from a cartoon or book
Light-colored nightcloth is the best option for handmade items. Even the pages and bulbs never heat up during continuous operation, and are therefore safe for wood, paper and other materials.
Necessary materials and tools
When preparing light noodles, you most often need:
- one lighting element (one line and one light bulb);
- base for the bedside table (lampshade, frame made of wood or other accessories, wooden stand, etc.);
- glue;
- knives, awls and other tools.
Pokrokov's instructions
The model of a light-emitting diode can be absolutely anything, depending on the author’s imagination. Let's take a look at the process of preparing one of the simple lamps that you can get from very little time:
- Take a piece of plywood and paint an image of a gut on it. It’s enough to just draw and trace the template. You can paint any other creature or burn it out - just lie in front of your reality.
- Carefully cut the image with a jigsaw.
- If the current appearance of the plywood does not bother you, cover it with varnish or cover it with trellises such as those used in a room. Then the guts are forced to be angry behind the wall, which will give the impression of effectiveness.
- Glue one light line to the back side of the figure. Place them close to the center - this way the light will be soft and even.
- The novice is not obliged to lie down hard against the wall. Hang this trace on whatever mount you have. To do this, glue a small wooden block to the back side of the plywood figure, and fix this block on the fastening.
From handy kostivs
In order to make money with your own hands, all you have to do is delve into your treasure chest
To make a nice lamp, it’s not at all obligatory to go to the store for materials or look for wooden blocks at the dacha. There are many ways to prepare kagants from any available materials.
What can you do in the future?
For the building you need:
- whatever materials you found in your home (in our case - a dance with wine);
- old new garland;
- drill;
- clay (as it is not enough - sand or earth from a flowerpot);
- different colored threads;
- glue.
Pokrokov's instructions
It’s really easy to earn money like this:
- Remove the labels from the dance. To remove it easily and without excess, place the dough in a container with warm water on a piece of bread. After whose paper you will stand up yourself.
- Drill a hole at the bottom of the dance, at the edge 1-2 cm in diameter. In order to prevent the surface from overheating and bursting, stick a little loose clay, sand or earth onto the required plot of dough. Drill the giblets, sometimes pouring water into the opening.
- When the opening is ready, remove the dough and seal until the surface is dry.
- Sew a new garland in the middle of the container, and pass the cord for connecting to the outlet through the holes. Here you have to tinker with the dance’s narrow neck, so you can stock up on terpins.
- If you want to decorate the dance, wrap it with threads of different colors soaked in glue. Thickness and thickness are of no importance - you can create a small layer, or you can cover the entire dance. Golovne - close the door, so that there is enough light. Nichnik is ready!
The creation of a handmade craftsman is a cumbersome and awkward process. It is not at all difficult to work with wood or use any special materials to create a beautiful and stylish tree. Ideas of design are interconnected by the author’s imagination.
The key meta-creation of the author with powerless hands is by no means an economy. Lighting equipment is not so expensive anymore, and any person can afford to buy a model for the gusto. The main purpose of handmade art lies in the fact that you feel like a real creator and make real guesses about the process of creativity. When looking at the day of “power harvest,” people will definitely feel more positive emotions than when they go out to the store.
How to make a new lamp from a garland? 20 photo ideas. Do-it-yourself Christmas tree from a garland
DIY garland lamp: preparation
- garland for 15-20 light bulbs;
Turn around to the spot
- Budivelny Nizh.
moyagostinaya.ru
DIY garland flower video Video
1 like this
Unusual Lamp with Banks and Garlands! Subscribe https://www.youtube.com/channel/UCd8Azl-iVV84GiN_np1cDwQ.
10 months ago
From whose video you can learn how to make a homestead with your own hands using the simplest and most accessible speeches!
1 like this
How to make an incredibly cool little bed with your own hands using garlands and light bulbs. Other materials on our website...
3 fates of that
3D LED KNIKNIK 220 Volts from a plastic dance with your own hands. Samorobki Secret Maistra. Original design...
4 fates of that
Let's decorate the child with a nichnik. Robimo made a night with changing shadows from cardboard with his own hands.
3 fates of that
I love the intense manipulation of the garlands! This time I will show you 2 ideas for decorating a room, let's call it...
1 like this
In this video I will show you how to make money with your own hands. Another plus is that it uses batteries and...
11 months ago
Subscribe to the channel: http://bit.ly/2wjLewP Organizing a work desk with your own hands - 9 ideas: https://youtu.be/ghxWglSDiBU?list=PLJTrP...
9 months ago
What a beautiful thing to do with your own hands is unique, how to decorate any interior! I present to your respect...
11 months ago
Quick and easy, you can easily make a baby bed for children using additional cardboard, Farbee glue and light-colored...
3 fates of that
In this video I will show you how to make a Christmas tree from garlands and polystyrene with your own hands at home)))
1 like this
A self-made LED tree with your own hands. How to make yourself. Very simple How to make a light-emitting lamp at home...
4 fates of that
For a couple of minutes you can make garni lamps from curse dances and garlands. My page http://vk.com/v...
2 reasons for that
In this video I will show you how to grow a light tree at home with your own hands for minimal...
12 months ago
How to earn money. The night is shining. Charming lamp. How to make money with your own hands. Master class...
3 fates of that
How to earn money with your own hands using a paper? Today we will show you how to make a lamp yourself from a stranger...
2 reasons for that
A tiny strip made from an old garland with your own hands.
3 fates of that
a cool lamp from the interior of the room and a new garland. gift for daughter until 8th birthday. really tell...
2 reasons for that
This video with Brother shows how to make a cool battery-powered lamp from wood with your own hands.
4 fates of that
To make such a lamp, you will need a garland, an empty can of coffee (we turned the mountain over...
videobomba.net
DIY new lamp - 20 photo ideas 2018

What, around the Yalinka, creates the atmosphere of the winter saints? Well, new lamps! The stench itself, filled with warm vodkas, brings a note of joy and a wonderful feeling. The stores now have a great selection of unusual models, as well as the most exclusive ones that you have made with your own hands. We have prepared a bunch of ideas for you.
Threads and bobbins
The idea of preparing a light kilimka for those who are more sophisticated is extraordinary. The primary stopper is without a crochet, in the middle there is a plastic piece with LEDs. You definitely can’t buy something like this anywhere!

Wrap a skein or thread around a bunch of dried bags. The threads need to be soaked in PVA glue first. If you catch a virus, pick up the blows. Through the opening between the threads, insert lamps that operate on batteries or as an electrical outlet. New mood of security!
These new lamps look like creases and are made of cotton and thread (in the middle there are battery-powered garlands). Perfect for decorating a child's room.

The fabricated gauze is transformed and the garland is transformed... into a unique and unique embellishment.
New Vogniks from paper
Do you have an original LED garland? Decorate it and turn it into a quiet lamp for the New Saints. Need:
- paper for scrapbooking;
- plastic cups;
- glue;
- for a little while.
You can transform the original garland with the help of Paper's light origami. Such a lamp is given to our Russians when it is quiet, warm and light.

For a childish New Year's Eve, choose a lamp in the shape of a bright tsukkerka.

With a crepe paper you can create such a fiery masterpiece.

Some lifeless serverlets can turn into a wonderful new flower.

 Saint's lamps in the interior
To formulate the history of the fate that is passing, in photographs illuminated by the depths of the yuletide fires.

The wine dances, on top of the LEDs, look really charming! 
The compact, simple-looking yalinka with garland is a perfect solution for small apartments.

This is an original vase, filled with bags and LEDs, perhaps the heart of a new table.

Create, guess what, light the fires! Adje New River – the hour for miracles!


new-year-party.ru
Christmas tree from old garlands
 Today, there is no need for original master classes in the selection of lamps for lighting children's rooms and bedrooms. Several models of self-designed nichnichki can be collected from available materials in no more than a year.
 Let's get started.
Materials:1. Old garlands2. Board 10 by 10 cm.3. Sklyana jar 0.4 l.4. Zhizhlivnya block 12, 1.5 A

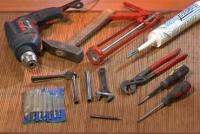
Tools:1. Drill2. Drill 4 mm.3. Twist 4. Glue gun5. Soldering iron (solder, flux...)
For the beginning of the garlands, there are three light bulbs of different colors, in my choice of red, yellow, and green.
 Let's take a board and clean it from all sides with an emery paper.
  For the basil, you can coat the board with varnish to make it easier to finish.
  Next, we add the lid from the jar to the board and screw it onto two self-tapping screws, as in the photo. Then we drill a through hole with a 4 mm drill. in the middle of the lid.
  For durability, I made the legs from hot glue.
  We take the light bulbs and glue them to the cover in the shape of a tricubitine, as shown in the photo. The wire can be easily shortened. At a distance, we skim the crust with additional alcohol.
  At the back of the opening there is a life cable running through our block. And let's sing all the drotas.
 The axis is the connection circuit itself, no resistors are needed.
  Screw the jar into the lid and remove it as a bedside table for your children.
  Become an author of the site, publish important articles, descriptions of self-interest and pay for the text. The report is here.
 usamodelkina.ru
How to make a lamp from a garland with your own hands?
The garland, which is most often used to decorate the new Yalinka, can be used as a storage component for the preparation of a lighting device. It’s easy to make a lamp from a garland with your own hands.

To make a lamp you will need a garland, a plastic lampshade and a stand.
With this lightening, the location will be soft. Such a lamp can be viewed as a chandelier. The designs of such self-contained lamps can be varied depending on the imagination and output materials.
Lamp with disks and garlands: preparation
The following materials are required:
- CDs or DVDs, which may offend both parties without any harm;
- garland for 15-20 light bulbs;
- glue and a gun for applying it.
The beginning of the formation of such a lightening device begins with the preparation of a geometric figure, for example, a cube or a volumetric pentacle, which will be the basis. For this purpose, apply glue to the disk and apply another layer. The disks are sequentially glued until the required figure is lost. But in order to make it easier to place in the middle of the cube, one of its sides is not sealed.
To secure the discs you will need a glue gun or something.
After all the disks are glued, place a garland in the middle. They should be put out in such a manner that the fork and the box that controls it are in the final position where they are assembled. Place the light bulb in the opening. The number of placements in the middle of the windows can be from 3 to 5 per position depending on the size of the light bulb. The elements that shine must completely fill the opening, thereby creating the necessary effect. I decided to place the garlands that did not fit in the openings evenly in the middle of the cube. Next, remove a few bulbs to get them across the remaining side, which is done after gluing the remaining disk.
For ease of installation in the middle of the openings, they can be secured together with tape or insulating stitch. In addition, the group that has been created can be additionally secured with additional glue or sealant while they are being placed in the disks of the lamp.
After all the openings are filled with light bulbs, then glue the remaining part of the lamp cube. The remaining disk is filled with excess light bulbs.
As a stand, you can install another disc. Glue the cube onto it using additional glue, tear it off, and place it on the edge. Such placement allows the lighting fixture to stand firmly at a distance. When this is done, fold it over so that the socket and control box are placed at the bottom and are not glued together.
Once the structure is installed on the stand and the adhesive remains firmly set, the lamp is ready for use.
Lamp made from plastic packaging and garlands
Scheme for decorating a garland near a lamp.
In order to prepare this model, the following materials and tools are required:
- The basis. How can there be a vikoristan plastic bowl of any size or packaging made of plastic of different shapes, for example, a body in the shape of a pyramid.
- A garland with as many light bulbs as the size and shape of the base.
- White farba. Bazhano, so that the farba is at the baloney. Allow it to be evenly distributed over the entire surface with an even ball.
- Soldering iron with a standard tip (or an electric drill or drill bit with a diameter).
- Budivelny Nizh.
Before cutting the slots, markings are necessary. The stinks can be placed symmetrically with 1 piece in the opening (or it looks like a little thing with a few pieces in the middle). At the bottom you need to make a slot through which the wire from the socket and the ceramic box will be passed.
Since the material from which the base is made allows you to open it with the help of a soldering iron, which will not harm you, rather than use it. If the integrity of the structure is damaged when using a new hot soldering iron, it is necessary to stop the drill and drill bit. After marking, open with the appropriate tool that is suitable for the selected base.
As a result of the cutting of the openings, sharp edges have been created or some of the plastic has been lost in the middle or in the middle, and the excess must be carefully cut off using a utility knife. It is necessary to wrap up carefully and in such a manner as not to harm the foundations.
After the cutting of the grooves is completed, you can start preparing the grooves. The base needs to be prepared several times in this manner to create an even white color over the entire surface.
After the farb has dried, you can place the light bulbs in the opening.
For the sake of victoriousness, the robots should destroy the beast. After all the light bulbs are placed, and the wires with the socket and control box are placed in the slot, cover the base with a lid. It is possible to move the lamp into the room. The lamp is ready before use.
dekormyhome.ru
Self-made cherry "kvitucha cherry" with garland


You can prepare beautiful cherries that glow using inexpensive materials at hand. It only takes a few hours to get the ingredients ready.

Lesson 1: Materials
- White LEDs under a new garland
- Cigarette paper in various colors (suitable for shades of white and tan color). You can purchase them as gift packages if you have them in stock
- A bottle from a piece of flowers from a florist shop
- Sand or gravel (small stones are also possible)
- Wires and bent cable ties
- Olivet glue, PVA and tape
- Floral stitching in dark color
- Pliers
- Knives or other similar cutting tools
It is important to know that we will need to open the bottom of the vase to connect the wires.


Krok 2: LED
We cut off the pieces of paper that are no longer needed. We attach the pieces of LEDs using bent cable ties.
The battery life (a bunch of batteries) is located below. Make sure to distribute the LED light over all the eyes.


Croc 3: Paper Paper
Our winner got 2 balls of white and 2 rye cigarette papers. You can produce more than 4 levels, vikory and different colors.
We cut squares with 4 balls with sides of 7.6 cm. The leather from them is needed for the luminous LED.


Croc 4: Cherry blossoms
Rotate the leather square completely. We bend the half into a cone, as shown for the baby. We check the edges.
Using scissors, we cut around the top of the cone, forming a cake. Apply olive glue at the center to connect all 4 balls. Using scissors, we make a small hole in the center.

Krok 5: Gilki
If you use a vikorist, and not a piece of gilt, it is better to sand it with an emery paper and glue the required small gilts, so that very few of them will appear together.
We place our formed flowers through the center onto the nails with LEDs. We fix them with tape. Then we add glue. Once dry, give the flowers a realistic look by fluffing up the petals a little.
Croc 6: Stitch
We wrap the entire nail with a floral stitch, including sections with wires right up to the lifeline.
Croc 7: Completed
Place the finished nail together with the batteries near the vase and start pouring gravel in the middle. Seal up all the vitality, and then reconnect so that you have free access to the pump.
As soon as the battery charge runs out, everything will be drained and you will have to try 7 again.
Lyut 2, 2016Gennady
rukami.boltai.com
How to make money with your own hands at home?
The daily lamps have hand-held and ergonomic lighting fixtures. They are a good addition to the interior of any room and can be a useful element of decor. In the children's room, the baby will help the little ones feel careless, and you can also present a lamp, made with your own hands, as a souvenir from a handmade one.

Advantages of a Nichnik
The advantages of a self-propelled lamp can be taken into account:
- creating a special welcoming atmosphere before bed;
- the ability to orient yourself in the dark, without awakening your family members with the main light;
- change in a child's fear of the dark;
- saving electricity;
- adding decorative elements to the formal interior;
- additional visual effects in child development.
Nichnik dawns the sky"
One of the most current and most romantic models of the night sky is that in another world there is an endless accumulation of stars in the night sky. Such a light fixture can be made independently from available materials. It does not need to be connected to the limit, so you only need a primary care worker with little batteries.
To create such a dish, you need a glass jar with a lid of some size, some foil, knives, an awl, a small lighter and some kind of surface that is not afraid of damage, for example, dancing.
- Draw a map of the dawn sky on foil. You can grow celestial objects schematically or follow the actual growth of the stars. Everything lies in front of your bazhans and that step is zusil. If you are looking for a similar bedside table for your child, you can surround yourself with images of the suzirs of the Great and Little Vedicina.
- Place the sheet on a flat surface and make holes with an awl. There will be stars that will shine.
- Cut the foil so that its height matches the height of the jar. Burn the sheet in a pipe and place it in a container.
- Place the liquid at the bottom of the jar and soak it. The walls and beds immediately fall into the garish candles of the night.

Another option to create a child’s nest, which is the night sky. This can be made from an ordinary tin can. You can clean the traces, remove the label, prepare any desired color and make a bunch of threads using an additional sewing machine. You need to place a lamp, a garland or a lit candle in the middle of the jar. The edges of the jar should be covered with a plastic lid so that no one from the family gets hurt.
Merezhivny Nichnik
This version of the lamp can be an ideal romantic gift or decoration for the bedroom. To make a bedspread with your own hands, as an element of decor and light, you need to add some living fabric. Here you can choose a variety of colors and colors, depending on your likeness. You will also need a dry and clean jar, knives with thread, and a light pack with batteries.
- Wrap the container in hemp so that it does not protrude beyond the edges or overlap the edge. Pick up your parts.
- Sew the edges of the hem to create a sleeve that fits the diameter of the jar. You can sew it on a sewing machine or by hand.
- Place the sleeve over the bow, place the lid in the middle and screw on the lid.

Lamp from a can
At your disposal, you can create a great self-made lamp that will decorate not only a child’s bedroom, but also the entire room. To create such a miracle, you will need an original plaque or plastic tea jar. Also required paper for scrapbooking, stationery cardboard, paper cutter, acrylic paper, glue, sandpaper, masking tape. And while we are working in this situation, not just a lamp, but a lamp, we need to prepare a socket for a light bulb, a light bulb, a cord for the hem and a wire.
- Take a sheet of scrap paper that can be used to completely burn the jar. Please note that the bottom part of the tea packaging will be the top of the lamp.
- Remove the lid from the jar, press it to the top of the paper, circle it with an oval and turn it.
- Connect the drawing template with a burnt can using masking tape. Draw a circle around the sheep.
- Follow your mark at the end. Clean the edges with sandpaper.
- Re-trace the oval template onto the cardboard. Paint in the middle of the cream and draw out some of it.
- Glue the cardboard to the inside of the jar.
- You can decorate the jar with high quality, vikorist paper, cardboard, acrylic thread, hem, etc.
- At the back of the lamp there is a circle for the cord. You will need to make a hole for the cartridge.
- Take the light bulb socket from the lancet and the electrical plug.
- Place the socket near the jar and screw in the light bulb.
- Take the lamp and turn it over to the robot, plugging in the socket.

Nichnik for a child
When creating a lamp for a child's room at home, it is most important to show your imagination as much as possible. In addition, you can connect the baby until the end of the day and eat with the brown one.
Prepare a glass sphere or a spherical lampshade for the lamp. You will also need a lot of tulle or tulle, glue and a lot of light, and even a garland for the yalinka.
- Create a large number of small circles from the fabric.
- Take a dry and clean lampshade, collect circles of rosette tulle or tulle. Fix the fabric cup on the lampshade with some glue, dripping some into the very middle of the cup. In this manner, create a bag for the fluffy one.
- Place a light and a garland in the middle of the lampshade. Show the result to the baby and watch out for his happy reaction.

Night with LEDs
To create a unique and beautiful light-colored bedspread that can be placed in a child’s room, you need to prepare a pair of clear plastic tubes of different diameters. You also need a light-colored LED with bright brightness and color. Also prepare cement, wire, a larger plug, superglue, pliers and a board for LEDs.
- Pinch the ends of the LEDs with pliers.
- Connect all the light bulbs with a shim in a parallel circuit, adjusting the polarity.
- Please finish the payment before payment.
- Turn over the working part of the lamp, if the LEDs get very hot, add the resistor to the lance.
- Glue the tubes together. Decorative bags are empty when empty.
- Pull the plug with LEDs onto the tube. If the plug has a larger diameter, the lower tube needs to be reinforced with a leather belt.
- The steam from the LEDs is ready, you can turn it on.

Safety of night lighting
As we know from the above-mentioned applications, there are no designer models of self-made lamps. To discover different methods of working with decorative materials to create different light effects.
Tim, no less, behind the beauty of the night, it is not easy to forget about the security of oneself and one’s homeland. With this method, we must be especially careful to complete the life cycle of the light source.
Many home managers appreciate that compact beds have minimal tension and little stress, which in itself can protect against problems. This is not entirely true. A voltage of 12 volts for a halogen light bulb or 3 volts for a LED light bulb does not pose a threat to the human body. However, if there is a short short circuit, an electric arc is created at the contact point. At this point, a wire will pass through the wires, which can heat the insulation right up to the point of termination. The vitalization block can be used in the reanimation mode, but the shield will not respond. It is necessary for him to prevent the execution of such rituals by the devotee. Since the electrical wiring at the output of the housing unit is stolen, attention must be paid to the electrical safety of the board itself. They are placed in a reliable casing, which is especially important for lamps in children's rooms, where children can try to change the lamp.
How does a halogen lamp differ from a frying lamp?
: lampshades, lamps and garlands - this is a selection of simple and sophisticated master classes and the creation of beautiful words for the decor of your living space.
This article will tell you about the nature of handicrafts for the home with your own hands. And we will also inform you that master-cobs of all trades can allow themselves to experiment in the creation of beautiful and practical speeches for their family nest.
 DIY crafts for the home – garnishes for lampshades for hanging lamps. They are prepared easily and simply with cotton threads soaked in barless glue or gelatin.
 As part of this article, we have selected for you the most affordable, intelligent and simple ones from the Viconn Master Class, from making lampshades with your own hands to various lighting fixtures.
 DIY craft for home - lampshade made from starched serverets.
  A lampshade made from a server with your own hands looks almost inconspicuous in the interior and creates a charming group of light and shadows.
  Another option for a self-made lampshade made from serverets.
  The most effective solution is a DIY lampshade made from thread.
  Cheap and simple, DIY lampshades made from threads look even beautiful – either alone or in a link from three pieces.
  A very effective option for making a lampshade with your own hands from knitted yarn for a standing lamp.
 Here are some handicrafts for the home with your own hands: spools of yarn or skeins can be used not only as lampshades for great lamps.
  You can also “grab from them” small garlands. This idea is very brilliant and original. It will be perfect for both Christmas and everyday interiors.
 Hand-made toys are not only exclusive but also original ones for the booth, which exist in a single copy and that is the pride of the owners of the booth.
 DIY lamp with glass dances and garlands.
 Moreover, do-it-yourself handicrafts for the home help to save the family budget for the purchase of more expensive analogues. Even in order to make a lampshade with your own hands, you need the cheapest and most accessible materials. It’s possible that you already have the stink of the “government” and you won’t be able to buy anything, but you’ll only lose something that has been idle all this time.
Do-it-yourself home care: master class
How to make a lampshade using thread or yarn

Everything is very simple and clearly shown in the photo. For the lampshade you need:
- threads or yarn,
- PVA glue (bar-free craft glue) or water-soaked gelatin
- form.
The perfect shape for an inflatable bag (if you want a round lampshade). If you need a lampshade of a different shape, you will have to be smart and know the appropriate item.
Then simply soak the threads or yarn with glue/gelatin and carefully and evenly wrap them around the form. Let the whole structure dry thoroughly, let the wind out of the bags, and remove it. Insert the shade into your new lampshade and you can renew your interior!
How to make handicrafts for the home with your own hands: carefully using a lampshade made from serverets based on this very principle.
Decorative lampshade made of tassels or motuzkas: photo MK
Globe lamp: the idea of an original display for the home

How you can make it: simply cover a basic paper lampshade with bright stripes from a geographical map.

Until the end of the speech, handicrafts for the booth with your own hands will not end with such a vitivitsa. Instead of a geographical map, you can use a contrasting color border, decoupage garnishes or vintage pictures, sparkles and much more!
Do-it-yourself handicraft: lamp from dance

Here everything is clear and simple. If you want to replace the previous options, here you will need a drill or a drill and a little more skill.
Timing is no less, all these ideas of handicrafts for the home with your own hands are simple and useful for beginners and beginners of home masters. Be brave, and everything will work out for you.
“You may also benefit from our hostile collection of highly manipulative ideas.”
And also earlier we were told about those that are possible.
More creativity and more original ideas!