Doors, what is it? We select decors for door openings. Installation of an accessory on the door What is the accessory for interior doors
Interior doors reinforce one room from another and part of the interior, which is responsible for the different external appearance. In addition, how beautifully the door opening is designed, there is a feeling about the room, which is the first to be noticed by the person who enters. The thickness of the wall is significantly larger than the width of the frame; after installing the doors, a part of the opening is lost, which requires fixing. For this purpose special decorative elements are created - additions.
What is good for interior doors?
Most often, the thickness of the wall is larger, and the width of the door frame is lower. Until recently, when replacing a box, it was necessary to carry out extensive work in order to remove the unclosed part of the opening. The first part of the mowing was plastered, after which it was primed, coated or covered with trellises. Such robots extract singing skills and take a lot of hours. At the same time, in order to close the slopes of inter-room doors, they are most often resorted to.
This is a decorative strip with a thickness of up to 10 mm and a length of about 2 m, which on one side has the same finishing as the door installation. The width of the choice is chosen based on the size of the door frame. Installation of this element takes quite a bit of an hour, it can be done by any home craftsman. After installing the additional components, the door opening acquires a beautiful finished look and fits harmoniously into the interior of the room.
You can also give the door opening a beautiful and finished look.
Door access must comply with several parameters:
- be made from the same material as the doors;
- run out the door for the color;
- I'll need the width.
In addition, additional strips play an aesthetic role, attracting defects in the cuts, and also help to enhance the door frame.
Consider the additional materials prepared from available materials:
- natural board;
- laminated chipboard;
- plywood
A wide choice of colors and shades allows you to select the additions that go with the door frame so that the entire structure looks like one whole.
See the types of additional elements
Although there is great variability in the type of construction, before purchasing you need to become familiar with their types and features:
- Zvichayn. These are just slats made of MDF, chipboard or laminate. As the eco-veneer is most often covered, at the end you should trim the decorative edge if you want to trim and unfinished planks. As there is no additional edge molding, it can be glued on its own with additional sanding. It is better to do this, because the edge will help to absorb surface defects and protect the material from moisture, so that it does not swell. The standard length of the additional strip is 200-220 cm, and the width is 100, 150 or 200 mm. Fakhivtsi recommend buying verobi hemmings of at least 10 mm.. The main advantage of primary gains is their low level of gain.
The primary advantage is a decorative strip of specified dimensions.
- Telescopic. Such elements are similar in the method of fastening to lining, so that there are grooves for fastening one after another and with platbands. They can come in a variety of colors, are processed by processing methods, and are made from the same materials that are originally sourced.
With the help of a telescopic extension, you can close mows of any width
- Combined. Eat your own goodness and surplus. The combination is completed with a pocket, which is installed in special grooves in the door frame. There is little solution to the fact that it is impossible to cover wide spaces with them. Then, if after installing the doors there was a loss of 2-5 cm of unfinished space, then a combined addition is the best option.
Combined elements will bring you more and more
The height of the frame corresponds to the size of the doors and should be 200-220 cm. The thickness of the plank should be such that it fits snugly into the groove of the door frame. Set the groove size to 10 mm, then make the additional elements yourself. Since the thickness of the walls can vary, additional extensions from 30 to 200 mm or more are produced.
The desired strip can have a width of 30 to 200 mm or more
Just as in apartments the doors are opened and the walls are set to standard values, then in private booths this is no longer the case. Ready additions are often not suitable here, since the doors and frames are prepared for fabrication, they must be completed with the same decorative strips. Since there is no such possibility, you can simply connect a number of additional elements one after another. To determine the required width of the plank, it can be sawed with a regular knife. When stacking a number of pieces from the front side, you need to make a groove, into which you can then insert the piece.
Yak correctly viconati rozrakhunok
In order to obtain the required dimensions, you first need to properly package them. It’s not easy to earn money, so you can do everything on your own:

The butt is folded out: the folding width of the wall is 250 mm. You added a box with a width of 70 mm, so you need something with a width of 180 mm. Since the closest standard size is 200 mm, it is necessary to add the same amount. The width of the joint is cut with a hacksaw.
Before installing the inlaid or telescopic accessory, select the width of the slats to obtain the required size.
Installation of extensions for interior doors
Before printing the installation of the additions, you need to complete the preparation work. From the opening one can see all the obstruction and excess stumps, so that the stench does not interfere with the installation.
For work you will need:

Before you begin installing the additions, you need to secure the door block properly.
Installation of basic additions
The procedure for installing simple additions:
- Open the material. Using a jigsaw or a hand saw, cut slats of the required length and width.
Dobry can be cut either with a regular knife or with a power tool
- Clean the groove in the box to remove dirt, otherwise you will not be able to install the accessory correctly.
- Insert the top bar first, carefully align it and fill the gap with mounting foam.
The top bar is mounted first
- The beam strips are fixed in a similar way.
The beam strips are installed after installing the top element
Often, the first additions are fixed using additional screws. To open it in the canvas, then screw it to the wall. It is easier to finish this robot by opening the frames with wooden blocks. After installing the screws, select plugs to match the additions and cover the screw heads with them.
Installation of telescopic elements
The process of installing telescopic extensions is no different from the previous version. If you need to cover a wide partition and the width of one piece is not enough, you need to join a bunch of planks. The next step is to connect the planks together, selecting the required width, and then install them. If you work first, it is better to fasten one bar first, and after catching the stump, another one. If you want to work a little more, the drying of the pin when attaching the skin element takes an hour, but the result will be more accurate and clear.
The groove in the telescopic extension allows you to adjust its width
Installation procedure:

Video: connecting telescopic extensions
Installation of combined accessories
With the help of combined additions, it is easiest to sew up the mows. For this fastening it is not necessary to remove the mounting pin.
The work is arranged in offensive order:

Since you don’t have enough knowledge of such work, then to trim one door opening with combined accessories you will need no more than 30 khvilins, and you can give masters for 15 khvilins. If you want the process of installing combined accessories to be simple, you need to do everything carefully and clearly. If the extensions are installed incorrectly, the interior doors will have an unattractive appearance.
Incorrectly installed doors can cause problems with the appearance of the doors, so the robot needs to be installed carefully and accurately
Non-standard situations
Situations often become more intense when the door opening has a significant impact on the horizontal and vertical.
- Widening the door slot to the outer edge. It is not possible to bend it as much as possible, because it will tend to get laminated, otherwise it will catch the bite. In this case, you can use a frame made of wooden blocks, plywood and plasterboard. In this manner, an additional plain wall is created, which is then covered with an additional wall.
- Move the box vertically and horizontally. In this type, you can eliminate additional elements of different sizes, but you won’t be able to get rid of the perfect result. It is better to dismantle the door frame and install it correctly.
- The walls are moving. If the fault is no more than 5 mm, it can be corrected with the help of plaster applied under the casing. In other cases, wedges must be used.
How to close the gaps after installing the add-ons
After the additional elements have been installed, the gaps that are left are placed behind an additional mounting pin. You need to remember that when caught, the foam expands and can bend the door frame and doors. If this does not happen, you must adhere to the following recommendations:

Video: installation of add-ons
Installation of interior doors is a simple operation that can be installed without any additional work. The door frame is used as a frame for such structures and is attached directly to the wall. The dimensions of this door often do not exceed the similar parameters of the door leaf. Altogether the wall in most of the episodes is richly widespread throughout the entire system. The additions to the interroom doors will help correct this difference.

The additions are made of dry slats, which are used to install a handrail from the door frame. Most often they can be found on entrance and interior doors. The remaining option is relevant, since the design decorates the surface, including the veneering of sandy bevels.


The door door is technically the primary bar or the board of the singing ceremony and dovzhina. However, there is no universal standard that regulates any technical characteristics. The structures are installed flush against the frame, which makes it possible to prevent the appearance of gaps and other uneven slots. Today, the additions are most often called factory components, which are distinguished by elegant designs and distinct additions. The following product is made up of several main parts:
- Two vertical boards. Their height corresponds to the height of the door opening. The stench spreads all the way down the sides of the frame. Fixation can be achieved using additional glue, screws or other special methods.
- Horizontal jump. Structurally, it connects two vertical supports into one complete system.

The width of all three elements is most often equal. Since the opening parameters are not standard, the skin edge of the accessory panel is adjusted individually to the required dimensions.
The additional slats carry a number of important advantages:
- Easy to install. Installation of additional components will not require special fastening.
- Durability. The virus adheres tightly to the surface of the mow, preventing it from being destroyed by sudden physical surges.
- Variety of styles. The addition can be made practically depending on the color or structure. They are suitable for both wooden and plastic interior systems.


Do you need a door opener?
The additions are simple designs that are easy to create on your own.
These ideas are very practical and there are a number of basic instructions:
- The main purpose of the addition is an additional door frame for decorating the opening. In this case, the installation of such structures does not require special skills and knowledge. Most often, accessories are installed by fakhivtsy, like installing doors. To create a unique system, the additions can be supplemented with various decorative inserts or grooves (wood).
- Additions include additional improvement of mowings. This allows you to spare time and the forces of the counterfeiters. It should be noted that the quality of processing does not suffer. In some cases, the surface is trimmed using additional additional strips to make it more beautiful.

- Dodatkove insulation. It’s too much cold wind to pass through the room through the gaps between the frame and the wall. However, a similar phenomenon is only relevant for entrance structures, as well as interroom systems to reduce this shortage.
- Elimination of distortions and tightening of the canvas. These modifications can make it possible to visually align all parts of the door frame. This requires an additional selection of different types of beads that can be attached right up to the door frame.

The addition of interior doors is a completely independent design, so it is not obligatory to install a complex with a door frame. One of the direct steps is to ensure a smooth transition between several adjacent rooms. In this case, the opening of the doors becomes unbearable.
Vidi ta formi
Doors are simple structures that are difficult to divide into types. This is the main classification, which is based on the design features of the planks. From these values you can see a number of different species of additional germs:
- Standard. The call is to gain even with extreme levels of small labor. In this case, the stench does not affect additional structural elements that compose the system. Interiors are often made from glued slabs from wood waste. To give them an original design, their ends are trimmed with special edges. This also allows you to increase the resistance of the material to moisture.
- Telescopic. Viruses of this type are more universal. A special feature of the telescopic choice is the presence of special grooves at the ends of the bar. The stench of the stench can already be guessed by the systems with which plastic and wooden lining is equipped. With the help of these grooves, the extensions can be expanded to almost any width. Therefore, similar designs are much easier to adapt to different widths of the door opening.

Connecting behind an additional groove also allows you to turn off the appearance of gaps, as well as straightening the original planks until they appear. If the frame of the interior doors is made of wood, then a similar groove can be cut additionally. In this manner, remove the bright side, which is practically invisible on the side.
- Combined. An addition of this type consists of a connection between the casing and the planks. These designs are universal and allow you to accurately cover the door opening. Such devices are supplemented with special grooves to simplify the installation procedure.
While there is no difference in the form of additional payments, they are not so varied. The most popular and cheapest modifications are usually flat straight boards made of metal or plastic. There are also models that complement the decorative designs. Today we are taking advantage of the particular popularity of the collection in the form of a colony. They are prepared exclusively from wood and similar materials. Behind the valve stems, the vibrator can be supplemented with different decorative overlays and inserts. The availability of such products is already rich in classical modifications.

What sizes are there?
If you need to add a layer to the door frame, you will have to adjust it to fit its dimensions. This is necessary to create a harmonious and practical system so that it can last a long time without replacement. The current market presents a variety of standard sizes of accessory strips, which allows them to be adapted to suit any opening dimensions:
- Dovzhina This depends on the significance of a specific element. For example, cross-bars can be placed up to 60 to 200 cm apart depending on the type of door on which they are installed. As long as there are vertical slats, their height varies in the range from 190 to 220 cm in position depending on the modification. If you need to install extensions on non-standard doors, then this value can be increased to 250-260 cm.
- Width. This characteristic also varies over a wide range. Today's market is represented by both wide and narrow modifications. The width of the extensions often does not exceed 20 cm. In this case, the plant produces a bunch of standard sizes, which are cut into a small crumb. Thus, standard designs have a width of 10, 12, 15 and 20 cm. The parameters of telescopic extensions can vary slightly - 90, 12 and 150 cm.
- Tovshchina. This parameter is one of the most important ones, because it ensures the decorative appearance of the finished system. The widest size of additions above the market is 10 mm. Such products are gaining great popularity due to those that fit a wide variety of door frames. But there won’t be an end to the variety of planks. The thickness of these vibrator can vary from 6 to 30 mm depending on the material and type of vibrator. In this case, focus on the parameters of the door frame.

Materials
The special features of interior doors are those that they are made from materials that offer practicality and unique decorative properties. Therefore, at the hour of preparation of additional payments, insure the particularities themselves. It is important here that the components approach the main structures.
The following materials are suitable for the production of interior doors:
- PVC. The plastic panels are thin plates that resemble lining. They are distinguished by their low value and simple design. Therefore, in the middle of living budins, vikors are very rare. Sometimes they add plastic boxes to the balcony or near the bathtub. The advantage of this product is that vologists are not afraid of it.
- Tree. Additional planks from the solid wood - the highest quality and brightest ones. The material is highly durable and durable, and the unique texture allows them to be combined with any interior style. Wooden structures are made from the impersonality of villages. The most widely respected are the harvests from pine, the fragments of which are well harvested and are practically available directly. When choosing these components, it is important to use the same material from which the door frame is made. Therefore, the best option would be to choose from the same breed as the doors themselves. Let us create a smooth transition for the little one that will miraculously fit into the interior.

- Chipboard and fibreboard. These words are also very relevant for winning taxes. The material has a low price and a decidedly bad value. Otherwise, the stove can absorb moisture, which will lead to swelling.
- MDF. The additions from it are distinguished by unique decorative parameters and obviously low quality. To give the material a unique design, it can be covered with different dry melts (lamination and other options). These products also do not allow the virus to penetrate inside, which will continue to serve the virus.


If the internal door structures contain metal doors, their frame can be supplemented with accessories for the same reason. Otherwise, the food is caught very rarely. Moreover, the installation of these structures requires the formation of a special pin groove, which is not always technically possible.


How to select an additional element?
After installing the door leaf, it is often necessary to ask about trimming the cuts. Today, this problem often revolves around additional efforts. Before you run to the store for these germs, find out what you need for the stink. It is recommended that similar designs should be built up if the thickness of the wall is at least 13-15 cm. In this case, the box will only be 5-7 cm, and the wall will need to be covered with an additional board.
Buying an additional bar, follow the steps with simple recommendations:
- We first need to figure out the dimensions of the board or timber for installation. For this purpose, change the dimensions of the wall and box in order to determine the height and width of the box. Please note that everything needs to be done to ensure that the strip fits into the groove of the door frame.


It is necessary to cancel the extinction in several places throughout the entire period of a particular party. This is important, since it often opens with an uneven geometric figure, which does not allow you to choose only one value when choosing. Once you have determined the dimensions of the extras, you will need to add a few more centimeters to the reserve.
- The next step is to select a strip for a specific type of door leaf. Here it is often necessary to check the material used to make the door and its type. So, for example, the same materials are not suitable for cabinet doors as for classic single-chair modifications. The style of decoration of the purchases is selected individually based on the specific requirements of the buyer and his financial capabilities.
- Virobnik. This characteristic is also one of the most important, as it adds bitterness to the material. Today, a lot of companies pay extra, but not all of their products can serve you for a long time and reliably. Among this diversity you can see brands such as Mario Rioli, Matadoor and many others. In this case, be sure to insure the purchasers' products and skin conditions in order to obtain clear products.


What can I replace it with?
An additional strip for interior doors can be made independently. Here it is important to choose a material that will match the color of the main style of the door leaf and frame.
You can replace factory accessories with a number of materials:
- Plywood. For this purpose both normal and voluminous type of speech are suitable. The versatility of the product allows you to select not only the durability, but also the decorative features of the material. After preparing the panels from plywood, cover them with dry varnishes or varnishes to prevent disintegration.
- Wooden board. Most often, this type of product is good. To remove the clear plank, carefully sand the board and varnish it. According to the router, a number of decorative elements can be cut on its surface.
- Plastic lining. The optimal option for preparing supplements. Viruses are of low quality and work well to allow you to cut the bars of the required dimensions.
- Laminate This material is produced in the form of planks, which can be easily attached to the wall. But they are rarely vikorist, the fragments of the stench appear to be of high quality. You can polish the additions from the excess laminate after laying it on the substrate.

Additions, or additional boards, are installed in door frames, since the width of the door frame (jamb, “jamb”) is less than the thickness of the wall in which the door is installed. The additions play not only an aesthetic role, covering up uneven haircuts that make it easy to look ugly. (if you need other methods of mowing - read about them here). The stench, along with the platbands, also stains the doors and distorts them. Do-it-yourself installation of doors is possible both when installing new doors and on existing doors. We will look at the broadest variations.
Additional boards can be made independently from straight boards, cut or tongue-and-groove, for thick walls. For very thick or watery walls or linings, water-resistant BS plywood (aircraft plywood), covered with decorative self-adhesive glue: BS plywood does not fray or crack when thin and trim the edges and not warp in the face.

Door frames with extensions. The mustard color indicates the lining.
However, it is often cheaper and easier to buy ready-made MDF boards with decorative coatings. Standard dimensions of factory-made additions range from 80 to 550 mm. For fallouts, when it is necessary to work on thick walls, MDF panels with a tongue-and-groove lock are produced.
Following the standard technology, the accessories are installed at a special position on the inside of the door frame - a quarter. However, when installing the extensions on a door that is already standing, it is permissible to twist the extensions (adjacent to the door frame) and the pad (fitted under it).
Accessories are recommended to be used only in dry areas at a moderate temperature and in cold weather, if the doors are made or may lose value (for example, if the doors are antique item or museum exhibit).
Like the doors are slanted
If the door frame distortions and the bending of the top plank from the horizontal become more than 5% in the future, and the door frame is fitted to the braided frame, installing extensions without reworking the doors is not recommended. The door frame itself does not warp; It’s important to note that there are structural defects, without correcting any additions, they will not be visible, and will warp and splinter.
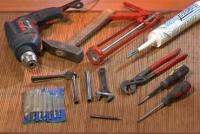
The tool is ready
To install door panels you will need several additional tools: a hand-held wood milling machine, a hand-held (parquet) saw and a clamp with a soft casing on the frame. The most important thing to do is to use a clamp to press the saw against the stool with the disc up high and manually remove the mini-circular. You can tighten the clamp softly by successively tightening it and heating it over a gas flame at a distance of 0.4 - 0.5 m, a tube that is heat-shrinkable into 3-4 balls.
In addition, you will need 3-4 stools of the same height and 4-5 wooden slats of approximately 30x30 or 40x40 mm, so as not to be hit, with a dozen wedges from these slats and a strip of smug (you can use them) for an initial package other plywood or plasterboard.
The process of installing door panels
Type of base area
For the door opening prepared before installing the door frame, it is necessary to knock out the base surface and mark the base with a trace. Precisely follow the method of the Pythagorean tricut (straight tricut from the directions 3:4:5; magic tricut). Let’s explain to the little one, so let’s do it:

- Half the width of the door opening at the bottom is equal to the three basic dovzhins – 3l. For example, the width of the opening is 60 divs, the other half is 30 divs, and the base dovzhina (l) is 10 divs.
- I will open the door with a 5l long cord for two badges. From point B to point O (the middle of the opening) there is 4l. With this type of fit, the BB line will be exactly perpendicular to the opening plane, and from it all dimensions can be drawn horizontally; The temple will provide the necessary vertical accuracy.
Note: If you are able to use the laser projector on base surfaces, this procedure is not necessary. Unless you can achieve the required accuracy with the help of a metalworker or metalworker, you won’t be able to achieve the required accuracy: the loss will be greater due to the size of the gap between the door frame and the door frame.
What to do if you are standing with a wound
When reversing the verticality of the walls, it may appear that there is something wrong, positive or negative. If the size of the hole does not exceed 5 mm beyond the height of the doors, it can be completely covered with plaster on the surface. If you don’t need anything more, when sawing the additional boards to size, you will have to cut them into a wedge.
Blowing with foam
After installing additional panels, the cracks are blown with mounting foam before plastering. When caught, the pin expands and creates a significant pressure. In order for the finished door door to fail, you need to adhere to the following rules:
- Do not remove the wedges that are aligned until the pin is completely caught.
- Also, do not remove the spreader bars; If you didn’t need the stench before, put it on the grate so it’s not too tight. The spreader bars are meant to encourage gains rather than destroy them.
- Blow the foam with a smooth flow around the perimeter for 3-4 steps; skin of the step - after being completely caught in the front.
- From the outer edge of the stump to the edge of the mow, the singing space may be lost. As soon as you see that the offensive ball will come out, grind it out. “Re-plaster” then better, not “blow” at once.

Right out of the box
The technologically simplest solution is to install the door frames with your own hands when installing new doors from the door frame. The operation is carried out in the following order:
- We place the door door on the stools with the inner side (thrust to the hinges) facing up.
- We straighten the kuti to the point of straightness, reversing the diagonals: the stench remains equal to the last day. For this purpose, a wooden strip is nailed to the bottom with the same length as the top strip of the doors.
- If there is a door without a quarter before finishing, we select a quarter with a milling machine. The depth of the quarter is due to the thickness of the extension board, and its width is equal to the depth.
Butt: additional board – thickness 16 mm (standard thickness MDF). It is necessary to select a quarter of 16x16 mm.
- Along the perimeter of the door frame, we attach plywood or plasterboard to the outer side so that the stench extends to the width of the extension board. Extensive framing is not required; two trims are enough for the top bar and 3-4 for the sides. The plywood is nailed down; The plasterboard will have to be secured with screws.
- We cut the additional size. The top bar must lie between the sides, so they are cut to the size of the top quarter, and the sides are cut to the size of the sides of the box.
- A thin layer of glue or some kind of wood mounting adhesive is applied to the edges between the four parts.
- We insert the additional boards into place and make sure to spit out the glue.
- Now we remove the bottom bar, which was removed from the fallen plywood and put the door frame on the spot.
- We level the box behind the base surface.
- We adjust the width of the box using wooden spreaders; The verticality of the sidewalls is verified by the schematic.
- By pushing the wedges under the sidewalls, the horizontal level of the top door trim is reached.
- We blow out the cracks with foam and plaster the surface of the wall.
- We nail the baseboards, cut them to size and glue them with rare flowers of leaves - the doors with accessories are ready.
Ready doors and straight cuts
In this case, in order to make installation of the accessories easier, it is necessary to prepare in advance a dozen or two thin, 3-4 mm thick, blades made of non-standard plywood. After all:
- We beat the plaster from the corners and check it, even if there is a quarter on the door frame. If this is the case, then you will be deprived of additional income for work.
- We cut the size, but not as described above: the top board is now the size of the box at the top; barrels – size of barrel quarters.
- Apply rare flowers to the inner edge of the barrel additions and insert into place. If you can reach up to the quarter, it is best to apply glue to it.
- We add height using wedges from below, as described.
- It is inserted through the spacer strips, the edges of the door opening are cut from behind, and the edges are supported from the side with a thin wedge so that they do not fall out. The verticality of the additions is verified by the schema; in short - just two people hanging behind them.
- Apply glue not to the tops of the barrel boards, to the inner edge of the top board (or to the quarter), and lay the top additional board.
- After setting the glue, set the foam and shape it as described.

There is no quarter even with poor walls
If the door frame is without a fourth, then there are two options:
- Gateway quarter. Using a milling machine, we remove a quarter of the boards with a width of 10-15 mm and a depth of half the thickness of the board. If the walls are “not too” thin, this option is simple because a quarter of the addition can be cut with an oblique along the width, and such an addition will be trimmed no worse than a “normal” one.
- If the walls are solid, you can knock out a groove at the frame under the door frame and put pads on the frame. This option is so handy for those who have a rough job with a great investment of effort to come out better than ever.
And in this case, and in another case, the additions are installed with the help of additional thin blades, as has already been described.
Mow with a wound
If the door opening has a hole in it (which is widening), then, regardless of whether there are new doors or existing ones, it is necessary to place doors at the doors so that they can stand. On the right, when straight extensions are installed, there will be an even wider gap. After blowing foam behind the casing, there will be no space for the plaster to lie on the foam. Early or late, cracks and/or failures appear there.
Therefore, before installing the extensions at the slot with thin bevels, the inner edge of the extensions must be placed on a wedge, as indicated on the small piece with a red stake. After trimming, the size itself will take the shape of a trapezoid. In other cases, there are no particularities in the establishment of additional payments.
Interroom doors
As a rule, the doors are installed on the side, adjacent to the door hinges. However, when installing extensions to interior doors, there may be a problem if you happen to install hinges on the side. If this is the case, then we need to check first so as not to interfere with the selection of doors.
Since when the doors are open, there is no gap between the edge and the edge of the door frame, equal to the totality of adding a margin of 2-3 mm, there are no problems: we can install it using any of the described methods. If the edge of the doors touches the edge of the frame, it is necessary to place pads on the sides, first knocking the plaster from the edges. There is no trace of this: just a 1.5 mm “pressure” of the chairs before the installation takes 10 degrees of opening, not to mention those that will soon be pressed together.
Read about the latest cycle of installing interior doors here.
Steel doors
In addition to the steel door, you can only install pads. Here is the aspect: after completing the additions, on their internal decorative side, at a distance of 10-12 mm from the edge, it is necessary to use a disk saw to select a groove with a clay of a third of thickness of your choice and the width of a bundle, from any the door frame is welded plus 1 mm. Behind this groove itself, if you leave the edge of the steel door frame, the frame and trim will be removed.
Even more information about the nuances of installing entrance doors can be found in the post.
Nabirnі dobori
When covering walls with MDF panels, laminate, etc. The door frame can be assembled from sheets of cladding material, later or transverse. However, technologically, such an operation is carried forward to the technology of wall cladding, and not to the installation of additions.
Video: new cycle of installing interior doors
Decorating the door opening beautifully and giving it a finished look will help you get to the door. Such options allow you to beautifully design the opening and select the required option carefully. It is advisable to get acquainted with the various types and types of rice so that you can choose the best option for your home.
Read from statistics
Accessories for interior doors - what they are and what they look like in the photo
First select a specific virus, you can see what you got and look at the photo. These are specialized strips that can be configured in different configurations. Designers who design door structures also allow you to select additional elements for a beautiful design of the doors. We suggest you take a look at the photos of the finished solutions:


Purpose and functions of door frame extensions
Most often, the width of the door frame corresponds to the thickness of the wall. To get rid of the unclosed part of the opening, mow it first, and then get stuck. Vikonati found it difficult to do such robots with his own hands. However, such tasks can be handled well by choosing a door frame that is installed not only in the middle of the booth, but also in the middle. Yogo installation for bagging can be done via self-tightening.

Accessories for the door frame have different functions. I will help them:
- unevenness is masked, the laying of the slopes is adjusted, since the width of the box is less than the thickness of the walls;
- There are distortions that can occur if the installation is not installed correctly;
- the canvas is changing.


Materials used to prepare panels for interior doors
To prepare additional strips for doors, various materials are used:
- . Expensive option. The players are ready to show themselves with a presentable external appearance and a trivial term of service;
- . The base is covered with a special glue, paper or eco-veneer to create the necessary texture. The molded ball has not only a decorative, but also a drying function, more than a service to the virus;
- . Vikorists rarely get enough. The elements are ready to be additionally glued, coated or coated to give the surface the desired appearance;
- . The most advanced option. Representations in a wide range of colors.

Respect! Virobniks will demonstrate the variety of different colors and colors. This allows you to select elements that look like one whole from the installed door structure.

Types of door extensions
First of all, buy additional items and cash on the table, then get to know other types of rice. This allows you to select the required configuration and size.

Zvichainy dobir
To make slats, you can use different materials. The planks can be unbroken or covered with eco-veneer. An edge float is glued to the ends of the frame to protect it from the outer float and give it a more attractive appearance.
Respect! Simple additional elements are of low quality.
The dimensions of the planks are standardized. Dovzhina is 2-2.2 m with a width of 100, 150, 200 mm. The product may be different, but the farmers do not recommend buying slats that are less than 10 m long.
Respect! Virobniks allow you to choose different widths. Select a trace of the type that is closest to the size required.
Telescopic models
The configuration of such devices conveys the presence of a groove, which ensures a stronger connection of the telescopic elements with one another and with the platbands. The models are presented in a wide range of colors and are made from a variety of materials. You can then select the required option for a specific opening.
Combined viruses
Similar functions will enable you to obtain the functions of an additional element. Trace the shape of the roll, which is installed in a special groove cut near the door frame. However, due to the design features of the combined doors, they are not suitable for decorating wide openings. Before this help, only the fact that the width of the unclosed space is only 2 - 3 cm is given. In such a combination situation, the element becomes the best solution, which allows you to beautifully decorate the partition.

The procedure for determining the required amounts of donations
To ensure that there are no difficulties when installing the extensions, it is necessary to determine their dimensions in advance. You can do this like this:
- This is determined by the configuration and overall dimensions of the door frame. Due to the obviousness of the groove, its depth and width are visible;
- You will probably stand up from the box to the edge of the wall. Vimiri is active in several places: the beast, below and in the middle. The width will correspond to the maximum value.


Comment
Kerivnik of the brigade of the repair and construction company "Dim Premium"
Set meals“Since dismantling the old system has not yet been completed, after choosing the appropriate model, it is necessary to measure the width of the door panel, and then, from the selected value, select the thickness of the frame.
"If it is desired to give priority to the telescopic element, such a number of slats are purchased so that their total width matches the required size.

Which doors are best to buy for interior doors: features of choice
If you decide to buy doors, you will immediately notice their appearance and dimensions. These elements are made from the same material as other parts of the door system. The color most often chosen is the same as that of the original box. However, you can first select a contrasting level for the background.

Features of the installation of door panels in the type of storage
The procedure for installing door panels depends on their design features and dimensions. Skin lesions have their own characteristics and nuances. It is advisable to learn about this, how to set it up correctly, so that you can complete the whole process with your own hands.

Installation of an emergency accessory board on an interior door: the order of installation work
If you have decided to cancel the installation of a self-propelled door, we will discuss how and in what order you need to install extensions on the interior doors. Robots follow the instructions: To fix, follow the instructions. Openings are drilled in the canvas, with which elements are screwed to the wall. Mounting openings are decorated with plugs of the same color as the main material.
Watch the video to better understand how to install additional interior doors with your own hands:
Installation of telescopic extensions on interior doors: installation options
The installation of telescopic elements can be arranged in different ways:
- The strips are connected to cut the required width. Then they are installed at the door opening;
- The first bar is installed. After catching a tree stump, it comes.
Respect! Another option allows for quicker installation of the system, which will take more than an hour.

Installation of telescopic extensions follows the following sequence:
- the groove is cleaned to remove any debris that has accumulated;
- The size is cut and the first strip is installed. Insert the element into the groove, then fix it behind another mounting pin;
- The advancing element is being prepared and installed after the stump has completely dried out.
We recommend watching the video, which shows how to install telescopic doors on interior doors:
How to attach combinations with door trim on interior doors
Combined weeds help to beautifully arrange the mowings. Fixation of elements is completed without any distortion.
Let's take a closer look at how to secure the doors on the interior doors:
- the material is opened;
- the grooves are cleaned from dust and dirt;
- get installed. Place the elements in the groove on the box first, installing the upper element, and then the sides. The cut should be carefully prepared, the top part should be trimmed, and then the sides. The rest are teased from below.
We recommend watching this video about how to install fittings and trim on interior doors:
Additional prices for interior doors depending on type and sizeThe price for additions depends entirely on their design and size:
| Model | Characteristics | Average vartіst (camp for spring 2018), rub. |
| For interior doors Verda Vega | Zvichainy. 2050×150×10 mm. | 510 |
| Door veneers | Zvichainy. Width: 150 mm. Natural veneer. | 420 |
| Porta 62, Cappuccino Veralinga | Zvichainy. 2070×200×8 mm. | 600 |
| "T" MDF CLASSIC-32 (33) CAPPUCCINO SOFTWOOD | Telescopic. 2070×200×8 mm. Eco-veneer. | 380 |
It may be that the thickness of the interior walls is greater than the width of the door frame. And here you have to draw up a tax. The optimal design option is an extension for interior doors: with these, you can close the hinges carefully. Once installed, you can secure the leaves.
Additions for interior doors will not be needed forever. It is even more common to use double-sided doors, on the sides of the doors. Only in the event that there is a need to enlarge the box, make it wider. As for the installation plan, nothing changes, only the work with bevels will increase.
You can buy ready-made doors with platbands, so that the smell is not included in the complete set of doors. Or you can make them with your own hands: select panels of the desired color and texture and make boards from them.
The materials used for the preparation are MDF, chipboard, wood, veneer, laminate with additional coating (for example, MDF + veneer) or without (dazzling photo).
Dimensions of additions
The standard dimensions of extensions for interior doors are:
- Dovzhina 2.1 m;
- Thickness can be from 0.5 to 2 cm;
- The width of the extensions for doors from 7 to 40 cm (theoretically, most often up to 15, wider - subject to washing).
Since the box has a special groove for installing an accessory, when choosing a board you need to focus on the width of the groove (if something appears, you won’t fit into the groove).
This design is inexpensive and easier to install. It often happens that there is no groove and it is impossible to create one. It is important that in this case it is better to have a 1 cm thick brother, in this case there will be less cost.
But, in principle, the size of the board can be whatever it is, it’s the width that matters. It is necessary to select a board with such a structure that the entire structure (box + accessories) is at least as wide as the bottom wall of the opening.
Price
Ready additions for interior doors are most often made from MDF (as in the photo). Finish: veneer, polyurethane varnish, enamel. Veneered boards are veneered against different types of wood: oak, white clear, pea, almond, red wood, stained oak, etc.
The price for additional interior doors varies depending on the width: for example, an 8-centimeter board costs on average 400 rubles per piece (2.1 height, 1 cm width), a 15-centimeter board costs 700.
The same price category has enamelled MDF (mocha enamel, vanilla, white gloss, stained oak, ivory brush, etc.). Much more expensive than lacquered MDF: here 8 cm costs close to thousands, 15 - up to two thousand (decorated with gold, cracolite, mother-of-pearl, etc.).
Mounted on the door
The best option is to install the doors immediately from the door frame. Then the box is first connected to the frame, then the entire structure is installed in the opening. However, with this option it is easier to align with the vertical.
The complete set of interior doors often includes door leaves and frames as well as trims. In this case, all parts of the structure have proper grooves.
Video “Installation of interior doors”:
Since there is a groove in the box for an additional board, it needs to be made. After this, measure the width of the wall of the opening with the alignment of the groove and adjust it accordingly. Its height must be higher than the height of the box. This is how the other and the third (horizontal) boards are prepared (the half of the horizontal width of the opening).
Once the required width is ready, it is simply inserted into the groove. The area must be coated with glue first. Vertical extensions are installed on the spine, then horizontal ones.
Video installation with minimal tools - folding method!
Due to the lack of installation of the groove, the number of interroom doors is reduced. When you get it, the doggy comes right up to the box and sits on the glue or small flowers. You can attach the boards to the grating using three or four bars, evenly distributed along the bottom of the wall, using the same glue (or “rare flowers”). The sheathing is secured to the opening with screws.
If the walls are too crooked and it is impossible to straighten them, you will need to trim the extensions at the top.
Some installers recommend securing the doors for interior doors with screws. In order to achieve an aesthetically pleasing finish, you need plastic decorative plugs. However, the grown-up mows do not receive much attention, fixation with the help of glue is sufficient. If the wall of the table is crooked, so it is impossible to plant glue boards, you need to apply a vinegar first, then. finish the wall with plaster.
After installing a set of interior doors, you need to fill the gaps with foam, check for hardening, trim the edges and install the leaves.
Sometimes the curvature of the walls is such that it is not necessary to press the leaves to fit the interior doors. If it is otherwise impossible to correct, the gap between the platband and the wall can be filled with acrylic sealant.
If the gap is too large, the sealant will have to be placed on the floor. Before starting this procedure, you need to seal the leaf itself and everything that can become tangled (trellises, etc.) with masking tape.