The technique of braiding cats with an outline. How to make a parkan from an outline with your own hands? Photo and video instructions. How to hesitate
Instructions
Prepare material for weaving. When preparing the outline, you can work the whole river, during the winter it is important to drink through the kuchuguri, and in the spring - through the back and forth. Therefore, the outline is being prepared for the coming of spring. The material, cut at different times, is removed behind the shades.
Cut the stems with a knife or sickle. Tie the bunches, hang them under the canopy near the roof. After 2 years the material is ready for use.
Sort the essays by day-to-day, to-do's and to-do's. Take the stems suitable for wattling. Clean all the leaves, filling in the leaves well and discarding the damaged ones. Split the stems into strips of varying widths and lengths.
Draw a dry outline to bring out its softness. Before starting the cob, immerse the material in cold water for 1-1.5 years. During the weaving process, periodically trace the outline using a foam sponge or washcloth.
Before weaving, you can emboss or paint the outline. Earn money. Heat 10% water peroxide to 60°C, add 2% sodium silicate to 60°C, place in new stems and leaves and boil for 2 years. The material is in silver color. Then rinse under running hot water.
For the preparation, I will use barnberries to make the mixture. Prepare a mixture of 5 g of barnberry per 1 liter of water. Then add 1 g of kitchen salt and 2 g of octic acid. Boil behind the vibrations of the cheret at this level for about 30 khvilins. Then rinse under running water.
To weave a tatsya or a bread plate, prepare 30 sheets. Burn the leaves that you will weave later, so that the stench does not dry out. Select the template you want to weave with. Tse mozhe buti zvichaina kastrolya.
Cut the leaves into equal slices. Their dovzhina is to blame but 5 cm more for the template. Place 4 smears in a row. On the surface, approximately 1/3 of the way to the edge, place the sheet perpendicularly so that 1 and 3 folds are on top of the new one, and 2 and 4 are below it. Then weave the stitching in a similar manner, but in checkerboard order, so that 2 and 4 base stitches lie on top of the sheet, and 1 and 3 underneath it. Weave a square in this manner.
Thin and short parts of the leaf that were lost due to pruning are twisted using a flagellum. At the end of the day, put the saucepan, tie it with a skewer and continue to cover the base along the stake with the prepared flagella in a checkerboard order. Rotash their yakomaga closer one to one. When the end of the cord ends, put the foot on and continue the cord.
Once the bottom of the tray is ready, push the mixture of the base up. Weave them with flagella in a checkerboard pattern to the required height.
Clean up the template and fill in any leftover ends. Using an awl, push the edges of the tray and insert the tip into the opening to wash. Season all other ends in the same way. In a similar manner, you can weave a mat, a cat or a bag.
When in Russia, wattle, cattail, reed and other similar wood materials were a thriving industry. The maistry-matters in the matting huts worked on mats, baskets, chandeliers, seats for the servants, and much, much more.
In our time, such an activity has become not a profession, but rather a swilling activity, the result of which is cute slippers, coasters for dishes, cases for pots of bags, woven with the pattern “boots that are not afraid,” etc.
Stands for hot dishes.
Stands for hot dishes, woven with a pattern and a cattail, show value and longevity. You can safely place hot dishes on them, without fear of damaging the glue or tablecloth: cattail leaves and especially porous steel wool are bad at letting in heat and are wonderful insulators. In addition, dishes can be placed on such a stand without that annoying splattering that you see on metal stands. It is important that you do not remove a hot kettle or saucepan from the stand and put it on the table for any reason and get very sick. The term of service of the outlined and rose-colored stand, obviously, with careful attention to it, is no less than ten to fifteen years.
They are starting to prepare a stand, vikorist and simple weaving "at the closet" (Fig. 6).
Small 6 Wicker stand for dishes: A- attaching the outline for the “moto”; bі V- "motorcycle" molding; G- Stitching the sides with a lacing awl.
Under the straight cut, twelve lines are intertwined one by one. Then take a new line and bend it around one of the outer legs of a simple boot. (Fig. 6, a) and form a “coil” around the remaining one, through which all 24 strong ends (stands) are wrapped around each other, applying pressure so that the result is formed correctly (Fig. 6, b and c). So that the “little one” was caught along the stake, they are forced to pull the boot tighter on the heels. Once you finish the first round of the “motuzochka”, and this is the most important one, it is much easier to weave the other row.
Once you have completed three or more turns with a “motuzka”, you can move on to a simple braid. If the rows of such wattle are to run continuously in a spiral, it is necessary to have the same number of posts. In this case, the stand has 24 racks, dissolved in dried stakes, so simply add one rack or add another one.
How to do this, decide for yourself: if the racks are too thick, then it’s better to remove one rack, and if it’s best to add it. To insert the additional rack, insert a new line through the front rack using a sewing machine with a special opening at the end (we’ll talk about the design of the sewing a little later).
Now all the racks, including the additional ones, which have been transferred, pass through them in a “circular” pattern, circling them successively around the skin of the racks and the molded rows of rows, as far as possible world of stand. To replace the wickerwork with a “motuzka”, do not twist the lines, but rather try to arrange them in tight rows. But for the sake of convenience, the remaining turn will be cut again with a “motuzka”.
Having completed the weaving, proceed to laying the sides. In the simplest way of laying, the end of the skin stand is simply pulled into the braided band using the skin stand. The lace was sewn “at the center” to insert one of the posts (Fig. 6, d), Insert the end of the seat post at the opening and pull it in from the middle. Then we sewed to guide the front post and pull in the end of the front post from the braided line... Use the same method to lay all the other ends of the post.
The posts can be inserted into the wicker and not all the way through, but small loops can be removed along the edges. Moreover, the loops behind the baskets should be either straight-cut or tri-cut. Before speaking, to decorate the stand, it is effective to use one or the other loop. To cut off the loop, smooth the stand with the handle of an awl so that it becomes flat and sharpen the end with scissors. Having inserted an awl through the end of the post, insert the sharp end of the post into the opening and pull it into the weave, leaving behind a small loop, so that you can straighten it so that it is either a tricut (Fig. 7) or a rectangle.

Small 7 Stuffing of the sides of the boot: A- work with a lacing awl; b- Trikutna loop.
Oval stand for "goose maker".
Weave just like in a circle. The difference is even greater in that under a straight tuft you weave not the same number of stems, but a different number of stems. For example, to weave a stand whose width would be twice as small, the number of lines spread vertically would be twice as large, less horizontally. Let's turn around to our awl. First of all, instead of this, it is easy to lace the lacing, using the same method used to lace up football and volleyball balls. Stinks are also sold in sporting goods stores. In other words, it is not so easy to make such awl-lace with your own hands (Fig. 8).

Small 8 Lacing sewing.
Drive a flower into the wooden handle, cut off the droplet and flatten the end. Having heated the flattened end until fully hot, let it cool completely and use a tooth to pierce the crack along the axial line. Then the holes are widened and filed with a file. The awl is ready to be sanded with fine-grained sandpaper. The simple design of the awl is easy to use and can be made from available materials for those who are not new to working with metal. The knitting needle is roasted in the middle, and if the metal is cold, it is completely destroyed. The resulting ends are cooked and hammered into a wooden handle. With the help of such an awl, you not only need to stretch out new stands, but also lay the sides of various weeds tied with herbs.
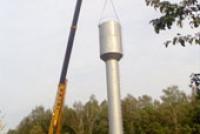
When choosing a material for a parka, summer residents and owners of private cabins try to find a cheap, easy to install, reliable and durable material.
An option that satisfies at least two advantages (cheapness and ease) is parkan with a line.
The material for this is easy to find (for sure, there is a river nearby), and the fence made from it is much cheaper than other materials.
Hydration and shortcomings
Advantages of the sketch:
- Cheapness.
- Environmental friendliness.
- Grizuni does not like the outline.
- Fits well into the natural landscape.
- Speed of mixing.
- The installation is easy, and so is the installation.
Nedoliky:
- Flammability.
- Low value.
Types of parkans


You can create a decorative wicker fence, a small fence with vines, or a full-fledged parkan.
If you want a dirt and small fence, then attach the frame to a wooden frame.
In dacha plots you can get simple parks with a line, supplemented with livestock. Such a fence is bigger than a malovnich.
Budivnitstvo fence
Parkan with your own hands is reduced to a number of stages:

- Cutting and drying according to the outline.
- Preparation of mats.
- There is a fence in the middle.
Preparing the outline begins in the spring - at the spring. Roslin can be mowed or cut with a sickle at the very base.
Immediately clean off all the leaves, remove the fluff and carefully tie them into small bunches.
You can clean the reed with a self-propelled brush. To prepare this, hammer long flowers into the plank in a number of rows at a height of 1.5 cm.
Find a place for drying the preparation of the bundles.
Regain respect: In addition, when you dry the outline, keep the color of the next day's parkan: the growth dried in the shade has a green color, in the sun - yellow.
The size of the mats available for installation is 2 m and 10 cm. The height should be stored in the prepared milk and your bananas.
Knitting techniques
The first method of knitting mats from outline No. 1.
Video on how to make a parkan from the outline yourself:
- Prepare a 1×2 m frame from timber.
- On the two sides of the beam, beat in a row of kernels or long flowers. Stand between the knees from 8 to 12 div.
- A couple of skin ligaments from the opposite sides are connected by a knitting dart. A tail of 4 meters is cut from one side - for tying.
- We turn the frame upside down and place the bundle in an outline across the stretched beam.
- We are bound by the strong ends of the dart outline. The offensive beam is placed with the “jack” of the front one.
Technique No. 2.

- We prepare a workbench for tying mats: from the boards we create an even surface with gaps for cutting. The size of the bench is the same as the size of the mats.
- We lay the outline on the workbench - bundles of about 20 cm of fabric.
- We press the stem with the frame.
- The outline is connected in 4 places with a dart.
- Let's finish the ending.
Technique No. 3.

Scheme of tying the outline with a dart
- We put it in a few rows.
- Place the outline on top, then drag it again
- We fasten the upper and lower parts with staples.
Technique No. 4.

- It is connected with the sheaves of work, which are the ancient comrades of the future parkan.
- On the other side of the sheaf we divide the outline into 2 equal parts, the skin of which is tied to parts of the other sheaves.
- Fastened to a wooden frame.
Regain respect For an even match, the stems must be tied with a “jack” one at a time.
It is difficult to create a parkan with your own hands. How can you ensure durability and protect against fire?
Really simple: There are special infiltrations to reduce flammability. And by securing the layers so that they do not stick to the ground, you will continue to serve the fence.
Apparently, it is possible to love moisture, growing along the banks of rivers and lakes, in swamps, floodplains, on low-lying peat fields, near quarries, dry ditches and ravines. If any rig is suitable for weaving, how should it be prepared?
No matter how much I searched for information about making cattails on the Internet and in literature, I couldn’t get a complete picture. For this very reason, I had an urgent desire to get a master class from a good craftsman.
The axis is now based on those who, having recognized me, Vasil Mikolayovich, write about what different authors write, and I again find the lack of similarity. For example, in the book "Weaving from straws from Grandfather Vasily" ( http://www.e-reading.org.ua/bookreader.php/140113/Sergeev_-_Pletenie_iz_solomki_-_ot_deda_Vasiliya.html) I read: “Before drying the cattail, it is necessary to peel it, and strengthen the leaves from the stem.
And Vasil Mikolayovich heeded to me the protracted: there is no need to peel the cattail, neither before drying, nor when saving, and the root part itself is suitable for wattling.
We will not go into an analysis of the unknowns, but will simply tell you about those whom Vasil Mikolayovich taught me, whom, with great love, I call grandfather with great love. Well, the secrets of the rightful master of cattail weaving, the honored master of folk art of Ukraine Kaznovetsky Vasil Mikolayovich, from the first west.
PREPARATION OF CATTY.
Cattail is broad-leaved and narrow-leaved: the first to olive-green leaves have varnished leaves.  you get a bubbly or grayish color, while the other one has a thicker yellowish color. You can weave from one or the other. The narrow-leafed bark has a short part, but when weaving, it is possible to twist it into a cattail and then mix it up, but there are no more valuable elements.
For the wattle, that part is attached to the bottom of the leaf, which covers the edge of the inner sessile leaf. This part of the leaf along the edges is thin (looking like a baby), everything that is greater than this place, after drying, becomes brittle, and therefore does not vikorize.
Prepare cattail leaves starting from the other half of the sickle and continue until the end of the spring. The yellowtail should lie in the weather, the cattail may begin to dry out, and may even need to be dried before frost.
 You can emboss the horns from the chovna or in the choboty-wanders. Golovne, so that it is near the water. This is where the main secret of the unsuitability for weaving of the cattail that I prepared before was revealed.
I cut it at the same time, where the water only lasts in the spring and dries up until mid-summer. The cattail there grows thickly and is tall, but the wattle is tough and tendinous, so soaking does not help soften it. Now I will cover the unnecessary surroundings in search of the teacups that grow right next to the water, and the more beautiful it is than the underwater part.
Only those plants are prepared that do not produce the so-called “eskimo”, I think that they are not suitable for pumping.
I searched on the Internet for some lines without downloads, men and women. And the axis has been identified.
It appears that cattail is a monoecious plant. The smell consists of female (lower) and human (upper) swings, usually drawn out at the same time, the size of the gap between them is different, and sometimes the smell sticks together,  Therefore, the colors are sometimes viewed as one pump, divided into parts for men and women. http://fitobaco.ru/informatsiya/sotsvetie-rogoza-2.html
In such a manner, do your best, so that the cattail, which has burned out without blooming, is suitable. Probably young.
Reap with the help of a sickle, which instead of the handle has a long petiole, like a spade, which allows you to cut the plant as close to the root as possible and at a suitable depth.
DRIED AND PRESERVED CATAIL.
Dry cattails without splitting them into leaves, standing in sheaves. The food in the sun and in the shade does not rise, since grandfather has everything installed with them, and behind the gate on both sides of the street everything is inserted. In this manner, some sheaves are touched by the sun, and some are near the shade. Geez, it's not important.

 If the cattail is dry, and after 2-3 years, cut off the crop (usually the entire green part) and put it in storage right on the street. I was trying to save money in my apartment (I brought a bunch of herbs to use), but over the past week it has become very dry. It’s also prettier on the street.
Place horizontally on a wooden pallet. Who has a plank under the canopy.
In the photo, the right-hander in front of the sheaf shows how to fight. Two vertical posts - an axis and the whole simple design for winter storage.
PREPARING THE ROSE BEFORE ROBOTICS.
Splitting into leaves behind is not carried out only directly in front of the wattles and to the extent necessary for the work at the moment.
 If the material becomes crunchy in your hands when squeezed with your fingers, then I spray it with water from a spray bottle and leave it for a while.
Do not hesitate to soak in water with tight wines, but there was no need for anything.
The leaf is cut with a knife, usually halfway through. For other viruses, if the leaf is too wide, then it is divided into three parts.
You don’t really need to weave a whole sheet of paper, at least because you want to make it easier or more interesting.
And the axis, when preparing the handles to the ears and flaps, is formed as a whole leaf.
WICKER WITH MATTY.
What impressed me most about this process was that I was trying to make the weaving process as comfortable as possible.
 The wicker began to grow and fall, I have always been making money on the table, and that means standing, and even having gotten sick, I am no longer talking about those that occupy the entire table.
I’m going to do everything sitting down, placing a table with hard seats in front of me. Rigidity is required in order to ensure pressing without straining the shape.
Everything is behind the form, and none of the craftsmanship matters.
The dance itself or the ice cream, if they are wrapped around them, serve as a form.
For a wicker drop, a saucepan is selected according to the size.
For weaving bast shoes, use wooden blocks, cut to suit the different sizes of the feet.
For wickerwork from boards of beaten shapes of different sizes.
The choice of molds for wattle is determined by the need to tighten the wicker, which achieves strength and evenness.
The basic principle is illustrated in the butt of a cat. The bottom is woven on a solid support with a “skewer”, and the skin row is rounded, and their ends are stripped; the smell will be the basis for weaving the side walls of the weave. Then the bottom is fitted to the shape.

We press it with a board of the same size as it is tied or nailed with flowers. Now you can lower all the ends and continue weaving with the shape.

This principle will always be victorious. With wicker bast shoes, the board is nailed to the sole of the block; when the dances are covered, instead of the board, vikorist is used to make caps of the appropriate size that are tied to the dance.

Without form, flat speech weaves, the bottom of any virobu, for example, the fields are white. In this case, the role of shape is played by the table itself or another surface,  where the wickerwork is finished.
To weave the fields of the droplets, you need to rest the board, place it on your knees, and place the top edge on the table. In this manner, the work is performed sitting and with a straight back. How grateful I am for such ergonomic solutions.
As the cattail begins to dry out during the process, it becomes noticeable with a characteristic crunch when the leaf is pressed and then wetted.
For these purposes, I use a vikory sprayer, in which, after sprinkling, add a small amount of quill, so that the cattail has absorbed water and softened. Following the same procedure, the weave begins to weave and the previously unused work is not completed.
 And in my work, my grandfather vikorist’s so-called tightening looks like a bent loop. True, we came up with this idea ourselves and moved on.
I’ve been grinding the axle with such a drawstring with a handle for a long time now, because a man argued with me, and because I’m tormented by the need to sleep or straighten my line.
Ready to drink, I'm going to varnish. It seems that varnished goods want to buy. I especially want to look more like a natural person.
And there’s just one secret I’m sharing without revealing it. Tse farbuvannya cattail. And not to what I don’t want.
 Having stolen them at the bazaars, and now no one sells them and you can simply buy them anywhere.
I think that the powders that my grandfather was talking about are aniline barberry, which is used to prepare fabric. In Ukraine there is no such thing as warring, but I had already found a place where they were going to take me.
So I’ll send it to my grandfather and make him happy.
EPILOGUE.
The axis and all the secrets from Vasily Mikolayovich Kaznovetsky. On the theoretical side, everything has now become clearer; it is impossible to even know where to prepare the “correct” cattail.
In the meantime, I have a piece of dried cattail in me, which my grandfather gave me as a farewell gift. Now this is a less expensive material for me, a leather leaf on the face, leather on a vaga of gold.
During the hour, the master class took a lot of video, so as not to miss or forget anything important. I wanted to insert one video into the post to make you happy. There I will put my tusks by my bast shoe. If the post didn’t work out, then who cares, marvel at the video in the first comment.
Prepared during the flowering period. At this time, the leaves gain sufficient strength, but still retain their flexibility. The trail should be collected no earlier than mid-summer. The outline is cut with a great knife or sickle.
When properly dried under a canopy, the leaves retain their natural olive-green coloration. Do not dry the material in the sun, otherwise the waste will lose its value and develop a golden-fawn color. If you do not plan to immediately take up the wickerwork, keep the leaves tied in bunches. If necessary, the leaves can be prepared and infused with synthetic barnacles. For wickerwork, add a leaf 1 cm wide, if the leaf is too large, cut it in half.
Using the weaving method you can create unique and beautiful things: trays, cats and decorative vases. For weaving, select 15 leaves and make “stands” from them. Take 6 sheets of paper that will match the diameter of the bottom, and another 6 sheets that will be the same in width and bottom. During the process of weaving the bottom, add new leaves.
If the diameter of the bottom reaches the required size, weave the “motuzka” into two sheets and place it on the bottom and continue to weave the walls of the tray. Having reached the required height, complete the weave with a hanging “motuzka”. Behind the help, she straightened the rows of wickerwork.
Curtain in outline
If the wickerwork is difficult for you and you need to remove the result of the curtain, prepare a curtain with a line. For the curtains you need a stem, which is cut in the warehouse using a sharp knife, carefully twisting it.
The skin is pierced with a knitting needle and the hair is woven. You can decorate the curtain using different colors and plastic rings. The length of the curtain must increase the height of the door opening. Having finished folding, cut off the threads and tie them onto a bar with drilled openings.
Papier with outline
This paper is perfect for decorating a notebook. To prepare the outline, cut it into pieces, discarding the segments. Place the stem and meadow in a suitable container. Yak meadow can be used with caustic soda. After the stems have softened, rinse them under running water.
Add the ground flax to the mixture. Therefore, this homeland will become more rare and viscous, handy for writing. Prepare a cloth stretched over a wooden base and pour the masa through a sieve to form a sheet. Using a knife, flatten it and press it using another cloth. After the leaves have dried up, you can pick them up.