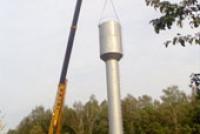
The correct design of the putty. How to make putty. Armchair and size. Video: a boy putstying a flat slab with his own hands
To work on putty, the following materials are needed: One board measuring 800x300mm, thickness 18mm. These are sold in hardware stores and are called “glued furniture boards.” It is traditional to take a coarser and simpler material for putty, but for keeping children busy, especially for further decoration, this option is the most optimal.
Tools for preparing putty:
- A jigsaw with a T101A0 type file (or something else for finishing a figure saw),
- Electric drill with 4mm drill bit.
- Khrestov twist.
- Samonaris (3.5x41mm with large grooves) – 18 pieces.
- Line, olive.
- Medium grit emery paper.
Future materials must be handled sparingly. Tim says more about wood. We are, of course, in turmoil because the area of forests on the planet is rapidly shrinking. Therefore, we make sure that our production inputs are minimal, and we make the layout of the workpiece correctly.
The layout of a board measuring 300x800mm is carefully planned according to the following scheme:

The size of the scraps of the boards, and the finished putty may be different, it is important to note the following important points:
- If you want the bottom of the putty to be more square, then the width of parts A (the front and back walls) is greater than the width of parts B and C (the sides and bottom) by approximately two square meters. That's logical. In our breed, the hips are approximately 2 cm thick - approximately 17 cm for the front and rear, and 13 cm for the side.
- The fragments of work during the hour (both during cutting and during cutting) always appear in the place of destruction, then the end of the workpieces is better marked after the place, focusing on the similar edges of the workpieces A., and the end of the workpiece It’s better to measure a few times later (after installation A + B) specifically at the place, then, during cob cutting, the cuttings of the board are removed, which will be lost after strengthening parts B1 and B2 without change.
- The difference between parts A is supposed to be 90 degrees, and the edges of the contact with the side walls are supposed to be equal (as a matter of fact, the design idea does not convey the special plaster, but you know what happens). To achieve the correct result, you will need to correctly mark the workpiece by inserting, however, on all sides near the center line the same sections (div. diagram below), equal to half the width. Axis like this. If you don’t trust yourself, apply the braid directly, reconfigure, everything is accurate.

Having finished marking, we cut out all the parts with a jigsaw. In principle, you can just use a hacksaw, and then use a power tool. In addition, it is difficult for children to work with manual saws, the saws come out very uneven, and then through the distortions, assembly becomes much more problematic. Use electric tools in a faster and simpler way, but only carefully control them so that everything is safe. Do not deprive your child of the tool every day, and immediately try to escape.
After sawing, the surfaces are carefully sanded with a medium-grit sandpaper so that the sanding becomes smooth and safe. There is no need to polish strongly, otherwise all the unevenness and rocks need to be removed.
Folding putty.
 Let's take parts K1 and K2. These will be halves of the putty. We immediately drill two holes in part K2 and connect them with two self-tapping screws to part K1.
Yes, get ready, let's keep the guards on the side. In the meantime, let's take everything differently.
Finally, walking through the shpak to get home is called “lyotok”. It has a round shape, and for a medium-sized spatula it is about 45mm in diameter. For our modification of the putty, the shape of the casting will be the same as a smaller one. The center of the tray is placed in its order on the central vertical axis of the workpiece A1, extending approximately 2/3 in height (in this case - 20 cm). Olivets paints the outline of the upcoming opening.
Drill the hole at the center of the tray. So, let the jigsaw blade pass by him. Please, so as not to change the drill for more work, I, using my hands as they walk, drill, carefully expand the hole to the required dimensions. From the central opening we begin to saw, step by step in an arc reaching the required trajectory.
Extending 15mm from the lower edge of the tray, there is a drilled hole for attaching the pole. The sheet can be prepared from a small piece of paper, using a knife and sandpaper to press it into a cylindrical shape. Otherwise, I buy wooden rods with a diameter of 10-12 mm in the store, and from them I cut wedge pieces of about 60-70 mm. The screw is attached to part A1 with one screw.
In order for the birds to be comfortable, the inner surface of the front wall of the putty is made of wool, so that it is not easy for them to scratch with their claws on the smooth surface. With the help of a drill, knife and other available items, we must prepare the necessary machine.
 To connect parts to the putty body, drill 5 holes on the front and rear walls (div. photo). Open the opening at the edge of the board, which is the same half of the thickness (9mm), so that when installing the self-tapping screws go straight into the middle of the part that will be attached.
We connect part A1 with sides, aligned along the bottom edge. And then we do the same from the back wall. Now you need to follow up with the filling process. It is adjusted so that it is tight, so that there are no gaps. The young birds do not need any stretching.
Part C is oriented in the direction of the fibers, similar to the sides U. Since the width of the piece is the same (13 cm), then it is impossible to select more than one size. For this purpose, use the line to select the required parameter (div. photo) and add it to the preparation of the day. We edit the request, and now we can select the correct part C.
Since everything is cut correctly, the bottom sits firmly in its place. You can beat it a little with a hammer. And then, through the openings on the front and rear walls, the two are fixed with screws. To install the door, we drill 4 openings in such a way that along the back side the opening at the edge of the door is 9-10 mm, and the distance between the back and front door on the skin edge is 14.8 mm. It will be aligned along the back wall, and the visor will slightly hang over the tray.


Where the carpentry work ends, the artistic design begins.

For decorating vikoryst acrylic fabrics. First we prime the body with putty with white tarpaulin, and then with black or brown. Before speaking, let’s make it easier to prepare in the hired camp. White farb is better than matte, on it it’s better than colored color. On a white aphid we apply the contours of a baby aphid, and on the right are the techniques. The contours of additional thin foam (I prefer synthetics No. 2) are outlined with black acrylic. When the farbi is left to dry a little, we cover the entire surface with acrylic varnish to protect it from the unnecessary spillage of too much middle ground. Practice shows that with such technology, barbed putty preserves its original appearance for at least a couple of seasons, without being afraid of summer sinter, rain or winter frosts.
Decorative elements (fence, pipe) are cut from cord boards that were lost after cutting, or from other available materials. For other elements, plastic or thin wooden slats are more suitable. We prepare the blanks using acrylic farbs. They are fixed between each other and before the putty with glue such as “moment”, “moment-assembly”, super glue. Please note that a hot-melt glue gun is not suitable for this application, since in the baking process the putty is heated in the sun and the elements glued in this way are destroyed. The pipe is fastened to the bottom with a screw in the middle of the budinochka. Why drill a vertical hole in the hole?


There are different ways to hang putty. Tie a long stick firmly to the back wall, and tie it to a tree or nail it to any shed. It is recommended that the vertical station is recommended, without a najil, not more than 3-4 meters, orintuvati at the expanse of Bazhano so, the Sonyachni prone did not poison on the spaceshny, and the cake of the creatures Bulo is problematic to the liot. After the skin season, the putty needs to be removed and cleaned, for which the birds say a big thank you. To clean it, just unscrew it and rub the old pad out of the putty.
Birds are indispensable helpers in the fight against annoying mosquitoes. If you want to “agree” with the birds about providing all possible assistance, they need to get to their plot. And for whom we are aware of the everyday life of putty. Before speaking, it’s important to use these bird little things for good measure and to train your child to learn about the extra world. Well, since the development of motor skills in the baby’s hands is allowed - take him as an assistant. In this article you will find various ideas for making bird boxes from wood.
What you can earn: putty, titmouse and other beads
The government knows a lot about the measles of birds, but some figures still contradict us: in a season, a small-sized spack reduces up to a thousand beetle larvae. This allows you to preserve root vegetables intact.
If your main goal is to get birds to the plot, then it depends on the planned result of the bird responsible for a particular species. If only the putty will be just like a year old, you must ensure that more than one putty populates the hanging apartments. Now it’s time to become familiar with the types of these inhabitants, and at the same time with some of the engineering features of their everyday life.
Dimensions for chairs of wooden booths for different birds
In addition, for which birds you will house, its shape, size and other nuances will depend.
- Nest. A booth with a vertical wall at the back, a long shell that fits to this wall at a temperature of 30-40 degrees, and knitted sides, as well as cut-through trays. Such structures are built no higher than 1–1.5 m above the ground and are suitable for grub.
- Wagtail. This little box is placed horizontally at a height of 3-5 m above the ground, so the birds do not fit in a classic putty, the dimensions of the bottom of which vary between 14-16 cm, and the walls - from 20 to 30 cm.
- Titmouse. This is a place for little birds to live. Height 30 cm, dimensions 10 x 10 cm, tray 3-4 cm.
- Duplyanka. This is a version of a “tourist” booth for different birds at 2 m above the ground, which can be made from a field with two plugs at the top, at the bottom and an inlet in the middle. The diameter of the outer deck is 15 cm
- Napivduplyanka. Will be for flycatchers. The ring is similar to a modified copy of the putty - 12 x 12 cm and 15 cm curl. This booth must have a wide, rectangular top and a long tail that hangs over it.
- Shpakivnya. The bottom is 14 x 14 cm square and the sides are shaped like a rectangular trapezoid. Moreover, the rear board is tied behind the front board, so that it is hidden on them under the skin. Maybe mother and two children.
Photo gallery: types of wooden booths for different birds
Putty of two ears  Shpakivnya odnoshyly
  Titmouse
  A little house for the little birds
  Nest for owls
  Nest for other birds
  Duplyanka
Materials and tools
To prepare classic putty you need:
- boards, pine trees, or polynoms of uniform width;
- self-tapping screws, flowers of different sizes;
- acrylic weather-resistant fabrics - as you barvlyuvate virib;
- putty for finishing wood - fill gaps if necessary.
Before you need the tools:
- hand hacksaw or jigsaw;
- drilling with a milling cutter for shaping the sheet;
- screwdriver;
- twist;
- hammer;
- olive, ruler, protractor, compass.
Safety equipment
When working on putty construction, you will find yourself dealing with prickly objects. It’s also impossible to get by without adding safety rules.
Let's reconsider the basics:
- When taking on the task of providing residential food for birds, it is necessary to be moderate, respectful and not rely on outside help.
- Make sure to follow the manual table so that you can place all the tools and materials on the new one.
- If you plan to trim the wood before marking, then use eyepieces so that the thyrsus does not get into your eyes, and gloves so that you do not have to twist the rolling pins.
- After folding, make sure that the bird's box does not lose its jagged edges, otherwise guests may suffer injuries. With this method, you need to bend or file away the ends of the flowers or screws that protrude.
Putty with a detailed description of preparation
Let's take a look at the options for bird houses, from traditional to original.
The first attempts to create birdhouses have been built by the last thousand years of Indians. Step by step, the price of innovation moved to Europe, and spread to Russia through the efforts of Peter I, who valued all kinds of stupid speeches.
Classic putty with two sides
Materials and tools:
- 2 straight-cut pieces for the sides, 15 cm wide and 22 cm high;
- 3 parts 19x37 cm for the front and back walls;
- 2 parts 15x15 cm as a cover and one part of the dahu;
- stick for shestka;
- part for dahu 15x17 cm;
- tsvyakhi, hammer;
- glue for fastening the stitch;
- drill with a nozzle for cutting round openings 5 cm in diameter;
- line, olive.
Instructions:
- We lay out all the details on the back and check them.
- Don't forget to make an inlet hole in the middle of the front wall with a diameter of 5 cm at a distance of 19.5 cm from the bottom.
- On the front and rear parts there should be a slope of 15 cm at a distance of 90 degrees.
- We connect the façade and the walls.
If necessary, we bend the protruding parts of the flowers so that the flowers are firmly pressed against the walls and to seal the sticks we apply hot wax or a special putty for wood.
- Firmly attach the parts to the back wall and front, firmly sticking them together one by one (spread the seam with putty). Just so that you can lift and clean the putty. For this purpose it is better to use screws that can be screwed out and then screwed in again.
- Let’s check again that there are no holes in the middle of the putty to wash, or self-tapping screws. The bottom is solid.
- We glue the stitch.
Respect! This model can be made with a light bottom. For this reason, it is secured not with screws, but with long wooden pins. Before speaking, the parts can be attached to wood glue.
Putty for straight-cut parts
The variation of the classic putty is simplified, since the student can independently assemble it, conveying that all the details of the box are formed in the shape of straight cutters.
Instructions:
- Let's see the details. Please note that all vertical parts are the same, and the bottom is the same width as one vertical part + two boards, and the same width as the front. It has the shape of a square with sides equal to the bottom.
- The façade detail has a molding with a diameter of 5 cm and a small opening for the stem.
- The vertical parts are connected with bolts or screws.
- The bottom is coming. We glue the stick.
- We nail the putty onto a long thin board, for which we will fasten it to the tree.
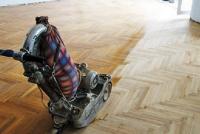
Video: a boy putstying a flat slab with his own hands
The original version without a diagram is a bird's box from a deck
Materials and tools:
- deck of standard size;
- chainsaw;
- drill bit for selecting wood.
Instructions:

Video: puttying from a log - a folk method
Lightweight little booth made from wood and tube
Materials and tools:
- tube;
- a small board with a width no less than the diameter of the tube, and no less than two diameters in length;
- jigsaw;
- olive, compass;
- drill and screws or hammer and flowers, long and short.
Instructions:
- We cut approximately ¼ of the tube.
- The internal diameter of the opening varies.
- Robimo 2 circles of the same diameter from the board.
- The first stake is secured to the tree with screws or flowers.
- Another has a round opening.
- We drill a hole for the pole in a new hole below, and insert the pole.
- We are rotating the façade of the tube. Using small flowers, we beat it into stakes, “drowning” the bits into the clay, so that the booth can be hung.
- We tighten the workpiece on a tree with another stake and then nail it with nails.
If you don’t want to damage the tree, you can try not to rip the back wall from the boards, but simply remove the bottom of the tube and then, inserting a belt stitch or thread into the hole for the handle, secure it on the stovbur.
Photo gallery: bird boxes made from other materials
 Putty from plastic dots can be filled with acrylic pastes so that the little house is not visible, and there is also no guarantee that birds will settle there
  Putty can be made from random items, for example, from a propane tank
  Choboti-putty can be decorated with paint
  This model may only be a year old, the birds will not feel quiet in the clear-sighted wake-up window
  The few cardboard “apartments” are extremely impractical, and also have little moisture, which creates problems in rainy or windy weather.
Tricks for protecting putty from destruction
The biggest enemy of bird buds is the gut. If the concern in your business is current, then you can create the following:
- Don’t shy away from the brush, otherwise the dark-haired ones can paw at someone else and ruin the nest;
- there is a slight visor that protrudes strongly beyond the front walls, so that the cat cannot stick its paw in the middle while sitting on the floor;
- The vein cannot be placed on horizontal legs.
During the off-season, it is necessary to periodically inspect the putty: such units can be inhabited by almost every person.
Two ways to secure a finished birdhouse
If there is a problem with the placement of the putty, there are two options for attaching it to the tree:
- nail it with pins;
- tie it with a dart.
Another method is to remove the wine fragments from the tree from damage. For additional protection from tree bark, you can place some kind of spring material between the drill or the flexible and winding material. This kind of gasket will take all the force of tension on the rod.
If you are fastening the putty with a dart, it is better to insert small pads, for example, with a car tire, between the dart and the trunk, so as not to damage the tree
Remember also that the new place of residence for the birds needs to be spread out under a small blanket, so that the day will be a few steps forward: this will make it easier for the birds to fly in.
Making putty with your own hands is not so difficult anymore. There are only a few years left, and the reward for the birds and dominion will be great. During the season, such things will become a great resource for birds, as they will help them fight against pests in plots and fields. Moreover, the design of putty is a miraculous way to achieve it yourself and get your child to worry about extra light.
Highly philological insight, 11 years of experience in English and Russian language, love for children and an objective look at reality are the key lines of my 31-year life. Strong jaundice: consistency, the need to learn new things and self-improvement.
Shpakivny is the wine of civilization. Until recently, birds, even without people, knew their own nests in which they could lay eggs, hang them and hatch chicks. But the situation has changed: there are practically no more hollow trees, especially in the area. It became difficult for the birds to find a place to nest, and people figured out how to help them. These are the most analogues of natural nests - these are putty nests, titmice and little boxes for other birds, which you can make with your own hands.
How to make putty with your own hands at home
The most popular closed nests for birds are putty. This little house is needed by the spatkas not for living, but for removing the parts. Therefore, there are a number of specific benefits.
Vimogi until the correct virobu for birds
- Safe for birds;
- Eggs and chicks are hand-crafted for laying;
- Keep it warm, with hot ventilation;
- With a tray of suitable size.
Materials for preparation
Why bother with little boxes for the birds at home? Nature chose the most beautiful material - wood is the most important material for birds. Practical little boxes should not be made from chipboard, fiberboard, plasterboard, soft cardboard and other unconventional materials. The wooden structures of the building stand idle for a long time, even as papier, clapboard and cardboard quickly fight for the unfavorable weather minds.
The trees are more beautiful than the leafy trees. Conifers are not the most beautiful material. The stinks smell of tar and leave the bird's stomach sticky and unsafe for the birds. The resin can glue the feathers of birds, and it threatens illness and death of birds. And you can hang the putty on any tree in your garden or yard. Here the birds do not care about their lives, firebrands, so that the warmth is lost and stolen. 
For decorative putty, which is installed in shelters from the wind and boards in places, vicor boxes, sheets, cardboard and other materials.
Structures, shapes and schemes for installation
All putties can be intelligently divided into two groups:
- Boudinochki of different shapes;
- Duplyankas.
Traditional putty is a straight-cut box with a flat, single- or double-sided opening and a round flap opening. Depending on the size of the lot, it’s time to lie down and settle down with the little one.
Rosemary
- Height: 30-40 cm;
- Dovzhina bottom width: 14–16 cm;
- Casting diameter: 5 cm.
If you change the size and create a fly with a size of 3-3.5 cm in diameter, you will get a titmouse. Birds settle here, as today they find mosquitoes and various larvae in many more times, the lower part of their waters.
Yak zmaistruvati behind the chairs
It is necessary to stay awake, otherwise you will simply fall apart in the first gusts of wind. It is important to adjust the dimensions. It will be cramped for the little birds, but the big ones will be cold. Often, before the sprout, chop up a perch - a perch. Birds vikorist them very rarely.
It is especially important to achieve the correct size of the chute (inlet opening). There it is designed so that birds can pass there freely, but the huts - guts and crows - cannot be consumed.
You can adjust the putty near the appearance of the nest. For this purpose, a piece of stovbur from a leafy tree is used and the core is removed. Close the nest at the top and bottom and remove the tray at the barrel station. Such a little bodice is a natural hollow for birds.
Yak vygotoviti from the tree
To cover the nests, boards from velvet trees, birch trees and aspen trees are used. The inner part of the budinochka is rather rusty. Smooth boards need to be finished with a chisel - apply horizontal notches. The chicks can crawl behind the steps and easily get out of the box.
Cream of boards needed:
- Tsvyakhi;
- Wood glue;
- Line and olive;
- Woodworking knife, jigsaw;
- Chisel chisel drill;
- Hammer.
- Water emulsion mixture and decorative elements.
Sometimes they cook budins. Do not decorate them with sparkling fruits, otherwise you may kill the birds.
Putty from plywood and lining on gilts
This is the simplest design of a bird's box. The tools are not damaged because they are used in a robot over wooden putty. Depending on which one you choose for the putty (single or double slope), you will need 6 or 7 parts. Oh well, there will be a little booth made of plywood.
Preparation steps:
- Armchair. It is necessary to determine the dimensions, make small pieces, specify the placement of the walls, tops, bottom and fastenings, and proceed to the construction of the chair.
- Opening and sawing. A layout is required from the beginning. Transfer all the parts onto plywood in such a way that the bottom overlaps the walls, and the upper part protrudes at the front of the visor. Cut plywood adjusted to the width of the jigsaw and the gap.
- Folding parts. All eyes need to be polished. You can connect the parts using additional glue and screws. It is necessary to glue the side walls and the front facade. After the glue has completely dried, tighten the structure with bolts or screws. The back wall is nailed with the rest.
- Bottom ta Dah. Screw the bottom along the entire perimeter with screws. May it be better to earn money in the future. This makes it easier to see the putty. If you need to do a general cleaning of the putty in the old nests, then fasten them on two self-tapping screws. It is your fault to increase the visor by 3-4 cm, closing the visor in front of the cast.
- The putty is ready. You can prepare and decorate it to your liking.

Yak poduduvati cardboard
Cardboard is not a popular material, but putty from it also has a right to life. Cardboard is better than my brother's tenacious one. Welcome palette cardboard. It has a good shape and is easy to prepare and process. Choose non-toxic ingredients so that birds will have the most beautiful offspring in your day!
Cardboard putties will not last long, but if you do everything correctly, you will survive the stinking season.
To prepare such a bird, you need to go through the following stages:
- Development of sketches. It is necessary to draw and clarify the dimensions.
- Armchair and rozkry. The armchair is gradually broken down from the assembled structure. All dimensions are transferred to cardboard and cut using a stationery knife or jigsaw.
- Connection of parts. Folding can be done using wood glue. This order does not change from the previous model.
- Finishing work. Vologgers are afraid of the finest cardboard. Therefore, such putties need to be treated with special methods. These may be dry varnishes and farbi.
3 boxes (3 cardboard and paper)
Cardboard boxes made to make life easier for bird lovers. The putty comes out smoothly and does not require special tools. 
Preparation steps:
- Determine where the filler will be in the putty and make a marking.
- Open the opening at the intended location. Obvіtіz vіzі vіdі zakhistu vіdologi.
- Attach it. All parts can be connected with glue or tape.
- Coat the putty with varnish or coat it. Garniy painting fills your design. You can guess the details of the decor.
Budinochki for dances
Our craft produces such a variety of containers for drinks that it is important to be careful so as not to misuse them otherwise. Plastic flaps are a good material not only for children's viruses, but also for such bark-like things as putty.
Preparation steps:
- Preparation. Use plastic bowls with a volume of at least 1.5 liters. The smells are clean, without any foreign smell.
- Learn how to dance. This means it’s time to re-shape the tray. Open the door with scissors or a knife.
- Cover the edge of the gostria with tape and plastic.
- Insulate and decorate the little box with burlap, winding it with a skein, or tying it with loose yarn.
- For the basil, you can make a budinochok with acrylic farba. This is to give rigidity to the design and give it a finished look.
Unusual and original putties made from available materials
You can't get enough of the kind of putty these days. Designers are creating entire collections of these unusual little boxes from available materials. Even amateurs do not stand up to them. In the gardens you can find bird houses of the most ingenious shapes and designs. For whom are traditional and modern technologies used? 
The most popular types of original putties are:
- Weaving little boxes from wicker. Such putties are suitable for birds. The smells are made from environmentally friendly materials. Fans of weaving with paper tubes can also quickly use their skills to make a bird's box.
- Budynochki from traffic jams. For whom are wine rinds made? The material is durable and can withstand falls well. The only downside is the complexity of the assembly. That's why we need to combine it with wood and plywood.
- Putty barrel. The little barilas, based on their shape, resemble nesting boxes and are perfect for feeding a bird’s belly.
- Budynochki with chereviki. You will need a large boot that can be hung on a tree at the required height.
- Putty with gilts. For such a budinochka, the pins are connected with screws or intertwined with a skein.
- Garbuzovy booth for birds. For this purpose, you need a special dish watermelon lagenaria. It’s easy to open the hole for the tray.
Decorative and beautiful for the garden
Birds don't need painting. The stinks can get by with the simplest putty. For people, putty is a space for creativity. Axis and are great ideas for decoration.
How to decorate putty? For painting, use acrylic fabrics. The front putty needs to be treated with a primer. 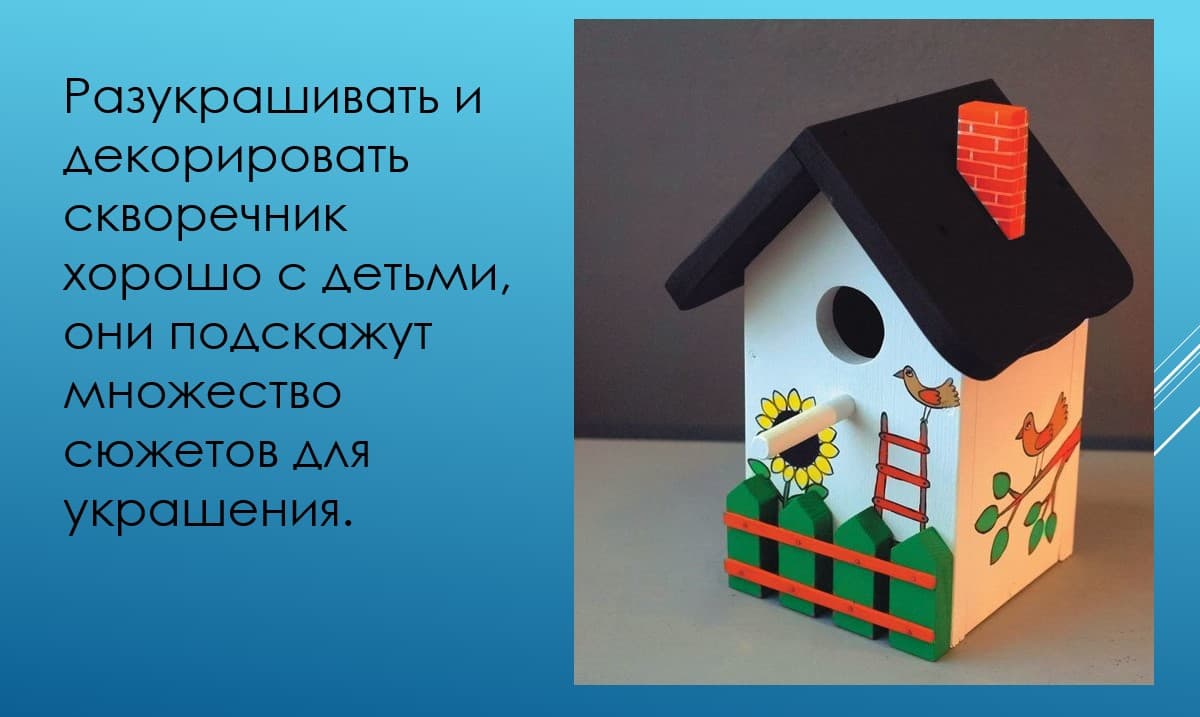
You can create a whole series of “Before the Fate” and imitate the changes in nature on the walls of a bird’s house. For those who cannot paint, appliques and decoupage will do. Just don’t forget this beauty is varnished.
New putties
Such everyday life decorates the gardens of the holy saint. The birds are not nesting at this hour. Ale putty can be considered as an anniversary. And this hanging structure will be transformed into the right nest. You can decorate new putty with pine needles, berries and other materials, even natural ones!
How to hang a little alarm box?
You need to attach a bar to the back of the box, and then hang it on the tree. It is important to hang it vertically or evenly or with a furrow in front. If you are using vicor, then the thickness must be no less than 2 mm, preferably stainless steel. Putty can be hung at any time, or even better after the birds have turned - in the spring.
Video
In the video there are different versions of booths for birds:
Pouch
Putters installed in the garden attract various birds. Don’t be embarrassed, because the stench will not settle in your little room. Depending on what hour is required. Use a simple base for putty and use all your imagination when creating the decor. Your efforts are appreciated not only by your winged friends, but also by your neighbors, and especially by the garden that produces a good harvest.
Before starting to operate the booths, it is necessary, first of all, to think about the functionality of the design, and then about the decor. The birds don’t care how you decorate its life, its important size will open the tray and the internal volume of the putty.
The size and size of the species must be selected according to the different characteristics of the birds.

Let's take a look at the standard sizes of putty and butt for different types of birds.

Parameters of the core for putties
Width x depth of bottom (dahu) - 90 – 110 x 90 – 110

- height 300 – 400 mm.
- The diameter of the opening in the putty for putties is 45 – 55 mm
- The opening of the tray is round in shape, the inner edges are carefully chipped, and burrs are visible.

Budinochka parameters for tits
Width x Glibina - 100 - 120 x 100 - 120

Minimum – maximum values mm.
- Height 240 – 310 mm.
- Casting diameter 30 – 40 mm.
- The shape of the casting is round.

Size of wagtail vein
Width x Glibina - 300 - 350x 400 - 450

Minimum – maximum values mm.
- Height 110 – 150 mm.
- Casting width 35 – 40 mm.
- The shape of the casting is straight-cut.
- Porig (special platform) with a width of 80 to 120 mm.

Therefore, the putty design can be modified from standard models. So, you can prepare bird houses for a few rooms, so that several bird families can move into them.

It can be made up of two tiers. It is necessary to reinforce it reliably and correctly. You can’t throw it back, it’s better to make a small kick in front, so it will be easier for the birds to get out of the hollow.

Methods of preparation
Let's take a look at some of the most extensive ways to make a bird's box with your own hands.

Prepared putty from wood
To make putty from wood, perhaps, the classic, traditional way. The algorithm for action is as follows:
- Choose a material, made from leafy wood.
- Create a chair, then transfer the diagram to the blanks for the booth.
- Prepare the necessary tools and materials: self-tapping screws, flowers; waterproof farbi; hammer, screwdriver or screwdriver, hacksaw, carpenter's glue, ruler, pencils, olive.
- Paint the blanks after applying the chairs. Cover the middle of the board with a fleece surface.
- Drill a hole at the front wall. Attach the strip, behind which the putty is attached, to the back wall.
- Now we need to assemble the structure. Fasten the facade and side walls with wood glue, and the docks are hanging, fix the parts using screws or screws.
- Apply it carefully so that there are no gaps. Then just connect the bottom with the side and front walls. The back wall is glued and fixed into the rest of the frame. Secure the pole.
- Prepare whatever comes out so that it catches the wood and the wind. It’s better to do it carefully so that it’s easier to get into the putty. Use screws to attach the smaller part to the larger one in size.
- The box can be prepared and then securely attached to the chosen location.

Preparation of putty from a plastic pad
There is also a very simple way to make putty from a plastic pad. For which you need a plastic bowl, manually fill the two-liter capacity; waterproof acrylic fabrics, brown, green and beige colors; penzlik; stationery Nizh; knives; glue for plastic speeches; drill and drill bits 1/4 and 1/16; pliers; drit; scotch. Well, the algorithm of action is in the following:
- The first thing you need to do is to open the round opening at the double dance floor. Why do you need a stationery kit? You need to work on a stand 3 cm every day.
- Next we install the seat. To do this, we drill the hole, a little bit lower than the already finished opening and insert a long dowel there.
- Then we prepare the little dance with inexpensive farbs, which are resistant to moisture. Colors should be chosen from dark tones (greens, blues, browns). The feathered friends respect each other better, so that it is dark outside. To add brightness to the putty, it can be decorated with bright bright stitches.
- The next step is to make a loop so that you can attach the booth to a clean tree. For this purpose, in the middle of the dance, drill two small holes, through which the pull is stretched and the ends are tightly twisted.
- Place natural material for bedding at the bottom of the dance. You can use sand or needles, as well as hay or fabric clasps.
- It is prepared using the appearance of tiles. They can be produced either from plastic blanks or from unnecessary disks. For this purpose it is necessary to cut out the required shape of the workpiece and glue it manually, filling it with farbs.
- Hang the dance on a solid tree drill so that the birds will not be disturbed.

This is a very good way to get rid of a bird's day. You can earn a living in just a few years, children will really love their share in preparing such a simple life for their feathered friends.

In this case, puttying from a plastic pad effectively protects the birds from the wind, the board, and external temperature changes.

Exclusive models of putty
Of course, a bird's house is a wonderful decoration for a garden or allotment. Do-it-yourself ideas for puttingty can be very attractive and funny to your wife. When choosing an aesthetic design, do not forget to take care of the birds' needs. So, as if the little budino looked even nicer at the straw droplets. Thanks to the fact that it is made from natural straw, the birds will be very quiet and comfortable there.

You can make the original putty with your own hands from the stone. This is how rich birds live, so they can reliably protect our friends from the current influx of too much chaos.

There is obviously a great variety of different types of wood putty. These can be folding, tall, cunning designs. Here the imagination of creative people has no boundaries. When choosing a palette of colors and accessories, there is also no limit. However, such a wooden booth can be dismantled with metal sheets. Tse give you the additional zakhist. If it is a basket, then with the help of cinder blocks you can create a concrete composition.

The putty from an old aluminum kettle or samovar looks unique and exclusive. Such a little bird's house can become a nub in any interior of your garden or allotment.

All modern designs can be decorated with unusual little details, paintings, stitches. The decoration in the appearance of windows, doors, chimneys, parkans and other parts that make up a regular booth is very good. To decorate the putty, you can use whatever materials you have at hand and, of course, your imagination. Don’t forget the rule that all decorative elements should be safe and safe for birds.
Armchair and diagrams for putty


Puttying from plywood is a miraculous ability to learn about birds and practice at the carpenter's office at once. You can create a little birdhouse with a hand to decorate the balcony of a large-topped little window or garden plot. Putties can be made from various materials, but most often they are made from wood or plywood. The work process is cumbersome, you just need to follow the rules and recommendations.
Zagalnye Vidomosti
A putty box is a small box for birds, which especially helps them in the spring. If there are other brown sides of putty made from plywood or other materials:
- Obviously, if he wants one piece of wood at his dacha, the ruler has the ability not only to look after the lives of the little birds, but also to enjoy their sweet singing;
- birds that hang around in the garden can steal trees from various pests;
- When preparing putty, it is not only a birdhouse, but also a decorative element for a country plot. Of course, this requires more creativity when it comes to decorating a wooden structure.
The procedure for preparing the “bird house,” especially since the project was designed with an awkward design, is simple. To achieve success, you need diligence, diligence and a little time. You will then need to follow the instructions.
There are many different designs of birdhouses, which vary in size, shape and ease of preparation. Ale Varto has the widest variety of species that can most often grow on trees.
Table. Main types of putty.
| Name of putty, photo | Description |
|---|---|
| The classic design of the putty is intended for the residence of small birds. We are talking about tits, hummers and small-sized chickadees. Chickadees flock to trees at great heights. |
| A small little birdhouse, used for songbirds, for example, redbirds, robins and wagtails. The design has a large opening that exceeds the size of the titmouse opening. |
| The small closed design with an opening is intended for small birds. The flycatcher is naturally compromised by other types of putty due to its dimensions. | |
| An artificial nest for birds, made from beaten boards or from small pieces of wood. Virus of meanings for such birds as sieve and jackdaw. | |
| Another variety of putty that is formed into a diamond shape. As a rule, such little boxes are not nailed to the tree, but rather hung with small coils up to the neck. The “diamond” box is prepared for immediate use. | |
| A simple straight-cut design, made of wood or plywood. Guess the box is upside down. Sheds are designated for wagtails. |


Increase your respect! Before starting the work process, it is necessary to consider a number of design options and select the most suitable one from them. Only then can you finalize your work plan and prepare the necessary materials.
Features of the robot
To prepare putty, various materials can be used, starting with wood and ending with large plastic pieces. Making it from plywood is much easier. It is necessary to first draw a diagram of the current structure in order to determine the dimensions of the ceiling and walls. You will need to have the chair putty ready.
At the preparatory stage, it is necessary to think about what types of birds the structure will be insured. Even birds come in different sizes, which is why the bird house is used for spackling, which requires small work, as well as the structure itself. Great birds, for example, wagtails, require a great little bird.
The finished putty is due not only to downtime in the prepared, but also manually for birds, because its design is responsible for transmitting significant pressure and a reliable bottom. You can’t forget about the tray - a special opening for birds, through which they get out of the little house and get out of it. There is a lot of information required so that when it is removed, you can clean up the putty. Knowing that, you can add food for the birds or replace the water.

Tools and materials
If the prepared putty is followed strictly according to the finished pattern, then the birds in the birdhouse can not only eat, but also lay eggs. In order for the robot to proceed as quickly and efficiently as possible, you must first prepare all the materials and tools:
- the putty scheme with dimensions is ready;
- a simple olive or a marker for making marks on the material;
- tape measure, ruler or other innovative device;
- a hacksaw (or an electric jigsaw, which really makes the work process easier);
- small flowers;
- glue for robots made from wood fibers;
- electric drill;
- hammer;
- a set of special parts for decorating the finished putty;
- work gloves and robe.
Don’t forget to also prepare the main material for puttying – plywood. As soon as everything you need is at hand, you can start the robot.
Prepared putty
As stated earlier, the work process cannot be called flexible, especially when working on a finished chair. It is necessary to follow the instructions given below.

Krok 1. Measure the dimensions of the two side walls of the putty and the substrate, and then, using a vicor and jigsaw, trim the parts together.
Croc 2. Apply a small amount of glue to the surface and press the sheets of plywood to dry. Secure the connection with small nails or screws.

Croc 3 Use a good amount of putty so that the back wall adheres tightly to all parts of the structure.

Prices for popular jigsaw models
Jigsaw
Krok 4. Attach the lines until the structure is complete. As before, use glue and flowers.
Krok 5. Drill a large hole at the front station of the putty so that various birds can penetrate inside. The diameter of the inlet opening is 30 mm, although you can slightly change the dimensions per tank.
Krok 6. Place the front wall of the bird box with the prepared opening on the place, nailing it with flowers on both sides.
Krok 7. Drill two small holes in the bottom of the front panel and insert two rim bolts there. The distance between them is 20 mm.

Krok 8 Wrap the working surface of the pliers with tape, and then bend a thin copper wire under a straight cut. For this purpose it is necessary to vikorize bream. Select the diameter so that its diameter is smaller than the internal diameter of the eye bolt ring.

Krok 9 Place the bent part on the spot in the opening of the rimbolts, so that the bent part is bent. At the bottom plate, drill a hole to suit the size of the hole.
Prices for the model range of drills
Krok 10. Drill one hole at each end of the back wall to attach the finished structure to the tree.
Krok 11. Now you can nail the finished putty to the tree or glue it on, creating a new little birdhouse.

Krok 12. Mix it with plywood in any color that suits you. For this reason, it is necessary to use water-based products, even if the stench protects the wood and is environmentally friendly.
Krok 13. The plywood putty is completely ready and can be installed on the tree.

Krok 14 To prevent damage to the wood when fixing the putty, use a whitening spool by stretching it through the openings in the rear panel. Now the vibration can be hung on a tree drill and tightened. Birds can now check in to the new booth.

Pieces of plywood
Regardless of the simplicity of preparation and low quality, plywood cannot be called an ideal material for the preparation of putty or resin. It is knitted with formaldehyde resins, which are used in the production of plywood sheets. These are toxic words that negatively affect the health of birds. Obviously, a lip leak does not happen all at once, but only in subsequent episodes.
Note! Fiberboard and plywood sheets are bad because they have low thermal conductivity. This means that the house, made from plywood, retains heat very poorly. That’s why it’s a lot of tricks when creating such putties to additionally insulate the birdhouses for the birds.

Why is it not possible to putty the putty?
Not all materials can be vicorized for collecting putty. Let's take a look at the main materials that we need to know first.
Juice packaging
Regardless of the fact that titmice and hummocks are even small birds, there will be little space for them to create a nest in a tight package of juice. Therefore, if the putty is made from a two-liter box, then the birds will be able to fit there, but the birds will not be removed. If you still want to make some poultry baskets from packaging in juice, prepare a new one with an open design.

Since there is still an egg in the middle of the package, the eggs will overheat through the foil due to the accumulative heat. This will cause the death of the chicks. Therefore, if you have the necessary bags or boxes on hand, it is not recommended to make a birdhouse out of them. With such a twist, you can be sure to preserve the health of the birds.
Plastic
It is not recommended to use vikorist and transparent plastic for creating putty, the fragments in such a bird’s day will not be able to be felt in complete care. On sleepy days it is light to enter the little house, so the chicks will become an easy catch for the huts. When exposed to high temperatures, plastic can be seen to produce harmful signals that are detrimental to the health of the chicks.

Decorating a plywood booth
As soon as the bird's little bird wakes up, it still needs to be decorated. It’s a clumsy and complicated process, and even with embellishment you can unleash your imagination. Therefore, such a process creates confusion, smut, tension. There are a number of options for the design of putty, veneered with plywood. Below are some of the best ones.
The everyday life of putty is a noble twist
- Paint the body of the putty not in one, but in a bunch of colors, creating this beautiful structure. For example, both the bottom and the bottom of the putty can be painted in a black color, and other parts - in a light color. Here you need to use your imagination. Because it is so powerful, the image can be decorated with little ones.
- Decorate your putty in a unique way. There are a lot of clever people who add rural notes to the design of a bird's box, gluing it to the hay. The more can be glued with small flagella from motuzki. It will be even more effective.
- Use a jigsaw to cut out the various grooves from the plywood, which can then be glued to the side parts of the putty. The master chooses the style and size of the leather embellishments himself.
- Prepare a cute parkan, frosty vikory sticks and small needles. When preparing parkan, make sure to make a birdhouse for the birds before preparing. You can also add small decorative windows at once, so that the putty looks like a regular booth.

The correct combination of imagination and craftsmanship allows you to turn the original putty into a living room for birds to live in, with which you can decorate your dacha plot. You can also find a lot of original ideas on the Internet! It is necessary to see a little more of the right time and get down to work. You can get your children involved in this process to turn their work into a fun activity.
Video - How to make putty