Instructions for self-folding wooden table, chairs and recommendations. Stool chair with backrest and dimensions - how to make it with your own hands Stool chair with your own hands and folding diagrams
Purchased furniture for a child’s room, especially those made from natural materials, can be expensive. The store and online will always have the same option that suits you. You can make a child's chair and table from wood yourself. The work will not be difficult to prepare all the necessary parts and tools, to ensure accuracy and efficiency. Nagorada za pratsiu is a unique product that is as handy for a child as possible and practical for everyday life at home.
You can make a child's chair and table from wood yourself.
Making a frame with your own hands will be much cheaper, and the details of the design will be consistent with the intended parameters and the required level of skill for the baby.

Nagorada za pratsiu is a unique product that is as handy for a child as possible and practical for everyday life at home.
All natural wood parts can be purchased from specialized departments of home improvement stores. You will need to select boards and bars of the required sizes.

Making a stiletto with your own hands is much cheaper.
A child’s chair, hand-made, is good furniture for a child. During the process, you create the dimensions of the seat and back that are as comfortable as possible for the baby as it grows, and you verify the value of the design in the minds of your home.

All natural wood parts can be purchased from specialized departments of home improvement stores.
You can decorate your own wooden table creations to your own taste, rather than being satisfied with ready-made solutions for purchased furniture.

You will need to select boards and bars of the required sizes.
Necessary materials and tools
Various materials are required for emptying the vessel. Several parts are prepared from them. In the first place, there are wooden blocks and boards from which the frame, seat and back are assembled. Instead of natural solid wood, you can use chipboard or plywood, or other materials that are not durable. To fasten it, take enough self-adhesive screws. You will need a medium-hard emery paper.

A child’s chair, hand-made, is good furniture for a child.
Dimensions of Bruskov (dowzhyna):
- supporting legs – up to 20 cm;
- suitable seat frame strips – up to 20 cm;
- backrest strips – up to 20 div.

Do-it-yourself wooden frame creations can be decorated to your liking.
During the preparation process for the legs, solid bars with a 5x5 cm webbing are used. For the planks, take parts with a diameter half the size of the supporting ones.

For planks, take parts with a diameter half as small as the supporting ones.
The parameters of the seat board (height and width) are also not necessary to exceed 20 cm. The dorsal part can be of little value, but should not be more than 30 cm.
- stink less mіtsni;
- The ecology of such viruses has not been confirmed at all.

The parameters of the seat board (height and width) are also not necessary to exceed 20 cm.
To make a stiletto with your own hands, you will need the following tools:
- twist;
- screwdriver;
- jigsaw;
- wood hacksaw.

The dorsal part may be small, but not more than 30 cm.
This side table “covets” the original decor. In addition to the version with divisions, you can quickly apply it with porcelain or other materials to apply the paint or appliqué. To accurately apply the image, you will need a stencil.

This side table “covets” the original decor.
Means by design and construction
For tree virobu, you can choose any option. The child's chair is designed with straight supports and advanced forms of the dorsal structure:
- sutіlna square or rectangular;
- wide truncated cone;
- direct scraping (with a jumper bar).

To accurately apply the image, you will need a stencil.
Making a viroba with your own hands will require careful preparation. First of all, it is necessary to draw up a sketch of the project. Draw a schematic diagram of connecting all the details along with the layout of the cuts and recuts. By inheriting the little ones, you will create a model with exact parameters. The little chair, when all the thoughtful dimensions have been completed, will be “everyday” small, not to create insignificance.

For tree virobu, you can choose any option.
Song models are designed so that the child sits at the sleeping table together with other members of the family. For this type of installation, choose high legs that are mounted not exactly vertically in relation to the seat and underlay, but wider. The lower part of such an empty structure will look like a truncated cone, connected for stability with wooden blocks around the perimeter. The upper part will be approximately 30-35 cm lower than the table.

The child's chair is designed with straight supports and advanced forms of the dorsal structure.
If you have new songs, you can select the collapsible vibration. Such items can be easily taken away when necessary to a storage area.

For the desired design solution, the details are arranged accordingly.
Preparation process: step by step instructions
After preparing the chair with precise parameters, we begin to assemble a simple baby chair.
- Exactly follow the pattern of the bottom, cut the cord with a hacksaw.
- Saw the size of the jumper-bars to secure the frame in the seat area.
- Connect them from the supporting structure. To make it stronger, add furniture glue.
- Attach the sized backrest and seat to the rear using self-tapping screws.
- All parts of wood must be cleaned with an emery paper to avoid any roughness or scuffing.

The little chair, when all the thoughtful dimensions have been completed, will be “everyday” small, not to create insignificance.
If the parts are disproportionate, move them according to the layout diagram using an additional hacksaw. To create a chair with your own hands, be it manually, ask the baby to sit on it, sleep, how comfortable it is.
As long as all the dimensions are taken correctly, the child will fit in the new furniture. To make sure the parts are smooth, sand the surface again.

Song models are designed so that the child sits at the sleeping table together with other members of the family.
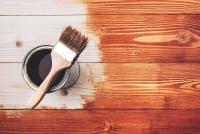
To varnish the product, use only safe warehouses - a special coating for children’s furniture, which is environmentally friendly and has a certified certificate.

The upper part will be approximately 30-35 cm lower than the table.
After applying varnish to the outside, let the surface dry thoroughly for a day or two. Then you can proceed to decorative finishing, as intended. As soon as the carving is applied, the lacquer should be sanded after finishing the artistic finishing and sanding of the parts.
Decoration of the table
To cut, use a jigsaw quickly. You can embellish the look of the flower by placing it in the center of the back or any geometric figure. First of all, at the stage of the upcoming decor, make a marking with a sheep so that the division is even. Parts that can be cut are the legs and back. The cut of the seat can be rounded using a jigsaw and sandpaper.

In the process of preparing the legs, vicorous bars with a 5x5 cm webbing are used.
The top can also be made not straight, but into a truncated cone, rounded, folded. In the remaining option, additional bars and crossbars – one or two – are required. They are secured to the frame of special openings at the points connected to the back frame. This is a laborious process, but you can choose this option instead.

To fasten it, take enough self-adhesive screws.
All steps from processing parts must be completed before the table is assembled - this way the work process will be faster, easier and more accurate.

If you have new songs, you can select the collapsible vibration.
To make a piece of children's furniture with your own hands, looking like it's working, you can apply it to the back and seat of the baby. For which it is necessary to vikoristovat safe farbies. The color scheme is bright and cheerful. On the wooden furniture, simple ornaments, grown-up little flowers, imitation of children's toys, for example, cars, look wonderful.

Instead of natural solid wood, you can use chipboard or plywood, or other materials that are not durable.
Due to the fact that the size of the child is small, the great little one will become a kind of accent that attracts the respect of a child - who should sit on such a rich chair, play or eat.

For decoration, you can use colorful appliqués - there are plenty of brightly colored flakes that can be glued on.
The images will appear as straight as you can see from the paper or a thick plastic stencil.
For decoration, you can use colorful appliqués - there are plenty of brightly colored flakes that can be glued on. Whether the image is monochromatic or colorful - it will be up to your imagination.

In the first place, there are wooden blocks and boards from which the frame, seat and back are assembled.
In the case of the seat or back part of a child's vacancy, it is not recommended to jam large (protruding) parts, both small and large. First of all, it is not inappropriate for a child, in another way, the stench is very noticeable with frequent exposure.

Various materials are required for emptying the vessel.
VIDEO: DIY child's chair
When you go to a furniture store, you will see a wide assortment of different models of wooden furniture. There are a lot of stylish chairs: starting with stools and ending with elegant models. However, such beauty will require a lot of money. So, to decorate the interior of your room, you can make a wooden frame with your own hands. To prepare it, you need a lot of singing materials and instruments.
There are different methods that you can use to earn money. When choosing a method, it is necessary to adhere to style, as well as to its significance. The work must begin with a chair-mounted structure, which may include all sizes of parts, their quantity, and the necessary materials. Success lies in the vicinity of the armchair.
Necessary materials and tools
If you need to prepare a stole of wood with your own hands, you need to quickly cut wood from only leaf species. The main material is wood that is well dried and does not have any knots. To prepare furniture, please choose:
- pine;
It is very important to trim oak or beech, so that furniture made from such wood with your own hands will come out beautiful and reliable. What the mother needs:
- two bars;
- thick upholstered fabric;
- foam rubber, for which the seat is timid;
- boards of different sizes;
- sandpaper;
- furniture glue;
- Self-tapping.

The beams can be purchased at the daily market. Then they need to be processed so that the smells are absolutely smooth. To do this, sand them until the roughness is removed. The timber is first sanded with fine sandpaper (suitable number 100). Add residual shine to the beam using sandpaper No. 220.
Whether you are working to make a stubble from a tree with your own hands, you need to use the following tools:
- sandpaper;
- stapler;
- hacksaw;
- conductors,
- wooden mallet;
- chisel;
- plane.
Turn around to the spot
Technology and features of the robot
How to make a stolet? First you need to prepare two bars. The beams of the rear legs are of the mother's fault, dimensions are 800x40x60. At the front legs, the size of the beams should be increased to 440x40x40 mm.
The beams have grooves cut out for piers and bases (both late and transverse). All grooves are made on the same level. To achieve this, it is necessary to lay them down at once, the ends of the legs will inevitably come together. Then the place where the grooves will be cut is marked. Their dimensions are 20x40x15 mm. The inner part of the groove is responsible for the entrance to the inner side of the leg. Consider using 10 mm.
For fastening the bases of the legs, there are grooves. The skin nose has two. The preparation of the grooves is made at the final ends of the legs. After the folded base is completed, it looks like a straight cutter. A foot will be installed on the skin apex. To prepare the grooves, use a chisel. Then the grooves collapse from the shavings that were consumed during the preparation time.

The hind legs need to be adjusted a little. With this method, along the entire leg, starting from the groove cut on the top, and ending with the bottom groove, the edge is trimmed. As a result, there will be a smooth transition, the size will change and increase to 40 mm.
After preparing the bottom, two layers are formed, and two later bases are prepared. Using this method, several bars with dimensions of 350x40x40 mm are prepared. The skin is ultimately to blame for the badge for the stilettos. Spikes are prepared with a chisel from blanks cut with a knife.
The dimensions of the tenons will correspond to the dimensions of the grooves. The stench is to blame for sitting in the groove. The presence of backlash is suppressed.
Then two bars with dimensions 420x40x40 mm are prepared. It is necessary to prepare a transverse base. For such bars, studs are also cut.
The next step will be to prepare the back. It’s easier to prepare cutouts from boards. Backrest dimensions – 420x80x100 mm. The rear legs have grooves of the required width. They have a backrest inserted.
The seat is secured with screws, and they are mainly screwed in from the bottom. To tighten the screws more tightly and add extra rigidity to the frame, special braces are inserted between the bases.
To give a beautiful look, the legs of the steel must be rounded and then carefully sanded. The same operation must be carried out on the basis. The finished parts must be coated with furniture varnish and then polished.
One of the remaining stages is the preparation of a soft seat. The seat is cut out of a sheet of solid plywood, so you can make foam rubber of a uniform shape. When preparing the table cover, leave about 15 cm at the edge. Then wrap the plywood and foam rubber with furniture fabric.
The material is secured with a stapler on the back side of the base.

Evidence shows that if you are trying to make a piece of wood from a tree with your own hands, you must first remember about sharpening. On the right, the coating with varnish emits a very strong unpleasant smell. The Susids will obviously not be at the capture. That's why all farm robots work best in apartments. For example, there are garages and sheds.
The rest of the time, special varnishes appeared, the basis of which is water. The stench is not noticeable.
Folding of the prepared varnished parts is carried out. The spikes are covered with glue and inserted into the groove. All parts are beaten with a wooden mallet.
When using a metal hammer, its striking part must be covered with soft cloth. Otherwise, the varnish coating can be damaged. The seat and backrest are secured with screws.
Stiletto is an important and indispensable household item of European culture. This is a necessary part of the interior, be it a cubicle, office or other premises.
There are different types and shapes, and the germs can be prepared from different materials. The simplest and most reliable method of its production in the home is from wooden material. The article contains a report describing the process of how to make a piece of wood with your own hands.
All furniture parts are made from a set of wooden blanks. The most common materials for woodworkers are beech, oak and clear. However, come and be like the tree that is under your hand. For making any kind of furniture, it is necessary to choose dry wood.
Please! It is important that the drying material be shaken in special dryers, because In nature, the wood is susceptible to decay from coma, and also the moisture of the street wind does not allow reaching high levels of dryness.
A self-made frame with a back, which you can make with your own hands, is a kitchen item that can be compared to the standard solid wood version.

Preparation before work
In order to prepare a wooden frame with your own hands, you will need the following devices and tools:
- miter saw;
- jointing workbench;
- thicknesser;
- circular saw;
- stitch file;
- pattern for marking legs;
- ruler;
- Kosinets;
- dovbalny verstat;
- spiked verstat;
- manual eccentric sander;
- hacksaw;
- wooden hammer;
- spray bottle for applying varnish
Required materials:
- wood;
- glue;
- putty;
Order of operations
Preparation of blanks


The workpieces should be sanded locally using a hand sander, and smooth surfaces should be finished on a planer and surface planer.
Marking of tenons and openings
Once all the pieces are ready and the sides are ready, it is necessary to make an accurate marking for the tenons and the openings under them. Use your hands to use the ruler, braid and olive.


Preparing spikes and openings


Preparation of the front part

The front side of the virobu is made by hand.
Prepared backrest
The preparation of the backrests begins. The backrest is made from solid, thick timber. At the end of the beam, the lines of blanks for cutting on a stitching saw are marked behind the other pattern. After sawing, sand the workpieces with a hand sander.


- Make the slots for the pin on the back piece on a circular saw.
- Knives should cut the right part.
- Insert the backrest into the grooves of the lower and upper drawers, first coated with wood glue.

Folding of a frame-like frame
After this, collect the parts of the column from each other. To do this, coat all the openings with your own hands and connect the back legs of the back. Then connect the front and rear legs of the frame one by one behind the other side.

Important! For reliable gluing, all collected and empty parts must be clamped with clamps until the glue dries completely.
Prepared seat
After the frame has been emptied with your own hands, the seat is prepared. Try to get out of a whole board, 50 mm thick. The workpiece is cut on a circular saw. After this, the workpiece is cut completely on a large stitch saw. There are 2 pieces for the seat.
The workpiece is thoroughly sanded using a hand grinder and the edges are rounded. Then the edges are rounded with a hand router.
- All cut up.
- Sanding.
- Milling.


If there is a gluing surface, putty all the droplets of self-tapping screws. The surface is sanded with your own hands and coated with varnish. Self-formed stolet made from prepared wood.
Visnovok
Be it from pure wood - the road is satisfied. And since food is scarce, at least 4 pieces are required. Therefore, mastering the preparation of wood from wood with your own hands is quite easy for a gentleman. Folding and expensive woodworking benches, as indicated in the description of this process, are common in household minds. They can be replaced with more simple ones. For example, the replacement of an additional workbench can be frozen.
You can replace a stitch file with a jigsaw. The seat can be made from a shield glued to 20-mm thick slats, with subsequent sanding.
The article has developed a technological process for making wooden beams with your own hands. For individual skin procedures and operations may be changed at the discretion of the Master, subject to technical feasibility.
Video
Making money with your own hands is very simple and won’t take up much of your time. Before you make a style, figure out what kind of style you want. Maybe you want a simple and luxurious stool, or you need an exclusive, chic stool. Or maybe you want to make a baby chair to please your child.
Let's start with the choice of material. If you want your wood to be rich in fruit, then it’s not a good idea to save on wood.
We stock up on the necessary materials and tools. In addition to the main tools, prepare glue and different fabrics and varnishes if you plan to prepare your steel.
So, before we finish emptying our work place, we get to work.
Robimo stool
First prepare the bars in a quantity of 4 pieces. The length of the bars is 440 mm. And the cross section of the bar is 40*40 mm. Be careful to ensure that there are no nicks on the material, otherwise your rolling pin will be safe. Then sand the material with an emery paper.
Now you need to make 8 jumpers. 4 horizontal for seat support measuring 20*50*280 mm. Reshta 4 for fastening the legs. 30*20*280 mm.
Now let's take a look at the seat of our chair. Once the entire material has been removed, we immediately begin to process the sharp edges. If you have a few scraps of wood, you can get them right away.
Now you need to make grooves in order to secure the piercings. The stench appears at a height of 270 mm from the stand.
It is necessary to make pins at the ends of the skin bridge, and on the legs of our stool there are grooves for these pins. The length and depth is 20 mm.
Let's collect all the details. The seat cannot be installed yet, so you will be surprised that there is no bevel or curvature. If everything is fine, then for greater durability, coat the sticks with glue. And then we install the seat. And we tighten everything with the help of screws.
Your stool is ready. Now your imagination and creativity are in full swing. Farbuemo and dainty stool.
Robimo folding chair
You will need such a stole for hiking, picnics and retiring.
Required details:
- Legs – 4 pieces. The size of the leg is 40*20*470 mm.
- Crossbar measuring 40*20*320 mm – 4 pieces. The seat beams are attached to them.
- Prongs - 40 * 20 * 320 mm - 2 pcs.
- Bar for seat – 4 pcs. Size 2 pcs. - 90 * 20 * 350 mm, other sizes 2 pcs. - 60*20*350 mm.
- Bolts 6*40 – 6 pcs.
- Samonarisi.
Robustly rounded edges on all parts. This way the stolet will look beautiful.
We connect the legs with the letter X. There are two parts. It is connected with a bolt closer to the top of the column.
We take the bolts and connect the top end of the legs and crossbars. The passages are strong. I cut the bars. Wide and narrow. The stolet is ready. Farbuemo and dainty.
You can make stitches with your own hands from any material at hand. From old barrels and some kind of thick milk. We remove the knots, sand them, and then varnish them.
A comfortable style - a goyalka, in which you will be hand-holding your favorite book, and will easily earn money from an emergency emptying. To do this, you need to attach armrests to the base, and attach runners that wobble to the bottoms.
For comfort, you can make the style especially soft. It’s not just a seat, but a backrest.
If you plan to make a chair for your child, then sand everything with special respect. Because children have very soft skin, so they can get injured by the smallest or insignificant rolling pin. For children, crumble the soft slivers. Be sure to choose a material that will be easy to clean by hand. When fastening the parts of a child's chair with screws, glue them together and cover them with plugs.
If at your dacha there are logs, cut wood or firewood, wood can be made from them. We polish the blocks. We cover them with varnish and do not allow them to dry. Now we put the pillow and the hand-made tray is ready. The back can also be built up to such a style. Having sawed off a small part of another stump. Such dishes are ideal for a large company during the time of preparing kebabs.
As it turns out, it’s not so difficult to make a small cabin with help from other people. There are enough necessary materials and tools. Use your imagination. Create masterpieces from extraordinary styles. Rosefarm and varnish your masterpieces. Your creations bring you even more joy, even if they are made by your own hands!
Do-it-yourself style - TOP 10 photos


As long as you have a stocked carpentry shop, it is very easy to make a garden insole from wood with your own hands these days. The carpenter comes to work on these tasks. What else can you do if the tools in your arsenal are only a hand saw and a drill?
The article describes in detail and shows how to use these two “helpers” to create a useful, reliable and, at the same time, aesthetically pleasing garden weed. A three-dimensional model and a chair with dimensions will help you better understand the project and correctly prepare the details of the future item. The material also has some recommendations for how to carefully collect and process the slab from wood.


Materials
To prepare a garden drain you will need a shaped pine board with a thickness of 25-30 mm and a width of 140 mm. Also for the preparation of the bridge, the required wooden beam is 5050 mm. These parts can be made from the board, but the value of the design is significantly affected. Garden stiletto is used in cruel minds, which does not have a reserve of confidence.All structural elements are connected with self-tapping screws and carpentry glue. However, as can be seen in photographs, the fasteners themselves are not visible. For their “camouflage”, standard 8-mm furniture cloths are required. The depth of screws is 30 mm.
Now for a number of materials:
- Board – 5 m.
- Beam – 2.5 m.
- Samonaris – 60 pcs.
- Shkanti – 20 pcs.
Tools
The main idea of the material is to use a minimum of tools, like any home master, to prepare a garden mulch. No matter how you twist it, prepare the trail like this:- wood hacksaw;
- drill;
- wood drill bit with a diameter of 2.5 mm;
- wood drill bit with a diameter of 8 mm;
- bit for self-tapping screws (can also be screwed);
- 100 grit emery paper;
- Kosinets carpentry;
- roulette;
- Primary olive.
- jigsaw;
- circular saw;
- electric plane;
- sanding machine (more precisely orbital);
- carpenter's clamps.
Details of a garden stool made of wood
Start by preparing the hind legs as quickly as possible. These are the most intricate details of the table, the fragments and the slanted cut of the board. It is necessary for the back to be small, which will improve the strength and flexibility of the chair.Further from the beam, the later and transverse jumpers are visible. As has already been said above, these parts can be prepared from the same 30 mm plate. Ale is more beautiful, after all, vikoristovuvati timber itself.
The remaining step is to prepare the front legs and slats for finishing the seat and back. At the pointed butt, a 14-centimeter board of the image was released for this purpose. In principle, it is difficult to complete such an operation manually. Because there is no jigsaw or circular saw, you can cut a whole board 14 cm wide. If the thin slats look more attractive on the finished piece. In addition, since the shape of the board you do not need to be straight, later sawing will make it easier to stock the parts to the required size.
After cutting all the elements of the garden table, it is recommended to process them immediately with a plane and an emery paper. To improve the overall appearance, it is important to round all the ribs that will appear. Apparently there is no plane or special grinding machine, we take a drill, a disc attachment and abrasive wheels with a grain size of 100 units. Indications for the butt of the stiletto include the addition of a special set (the plane is not stiffened).

To prolong the service life of the emery paper, it must be periodically cleaned to remove swarf. For this purpose, it is simpler and cheaper to use insulation material that looks like backed polyethylene (one that is covered with foil on one side). If you “go through” such polyethylene with an emery paper, it will become completely clean. This method does not work well against tarry deposits. If the paper becomes clogged with resin, it will no longer be thrown out.
Stages and nuances of folding a wooden stile
The technology for connecting all the parts of the frame will be fixed on its own. It's called the "invisible screw".The sequence of the verse is as follows:
- The details are gradually applied one by one as shown in the chairs and photographs. For ease of use and greater precision, the stinks are fixed with clamps.
- Under the self-tapping screws, drill an opening with a diameter of 2.5 mm and a depth of 30 mm.
- In these places, the openings are widened with an 8-mm drill to a depth of approximately 10 mm.
- Screws are screwed into the opening. To reduce the stench, it is recommended to coat the glass with standard motor oil.
- At the opening that is missing, carpenter's glue is applied and the dowels are clogged.
- After the glue has dried, the protruding parts of the dowels are cut with a hacksaw.


The process begins by attaching the later jumpers and the front leg to the hind leg. There will be two such collections. The process takes special care to ensure that the perpendicularity of the parts is maintained. This is directly checked and verified by a carpenter's braid.
Next you need to connect the sides at key points. For emptying, there is a lower rear jumper, as well as lamellas - the upper one on the back, and the front one on the seat. Attach just one screw to the skin point. If the perpendicularity is damaged, the situation can be easily corrected. Only after this key connection, another screw is added.
There is no need to evenly distribute the lamellas that are missing and secure them in the manner described above. It is better to use two screws at each point. So the design will be as rigid as possible and, obviously, reliable.
After collection, residual polishing of the virobe is carried out. At this stage it is possible to take away any damages committed earlier. Excess dowels will also be sanded down. The decorative-dry coating of the steel is not shown in the photographs; fragments of the required material (tung oil) were not visible at the time of collection. For these purposes, you can use wood stains, glossy or matte varnishes.


Pouches and the safety of the gardener
If you work only with a knife and a drill, then the preparation of parts and their folding will take approximately 8 years. A well-owned carpentry workshop will have enough 3-4 years.For your cooperation. The board and beam for the preparation of one such stilts cost about 5 dollars. Samonarisi and shkanti – 1.5 dollars. Emery paper and dry glue – another 1 dollar. Decorative trim with olive oil - about 2 dollars. At once, the cost of a garden piece made with your own hands becomes less than 10 dollars. Of course, it’s impossible to buy solid furniture for such a pittance in a store.