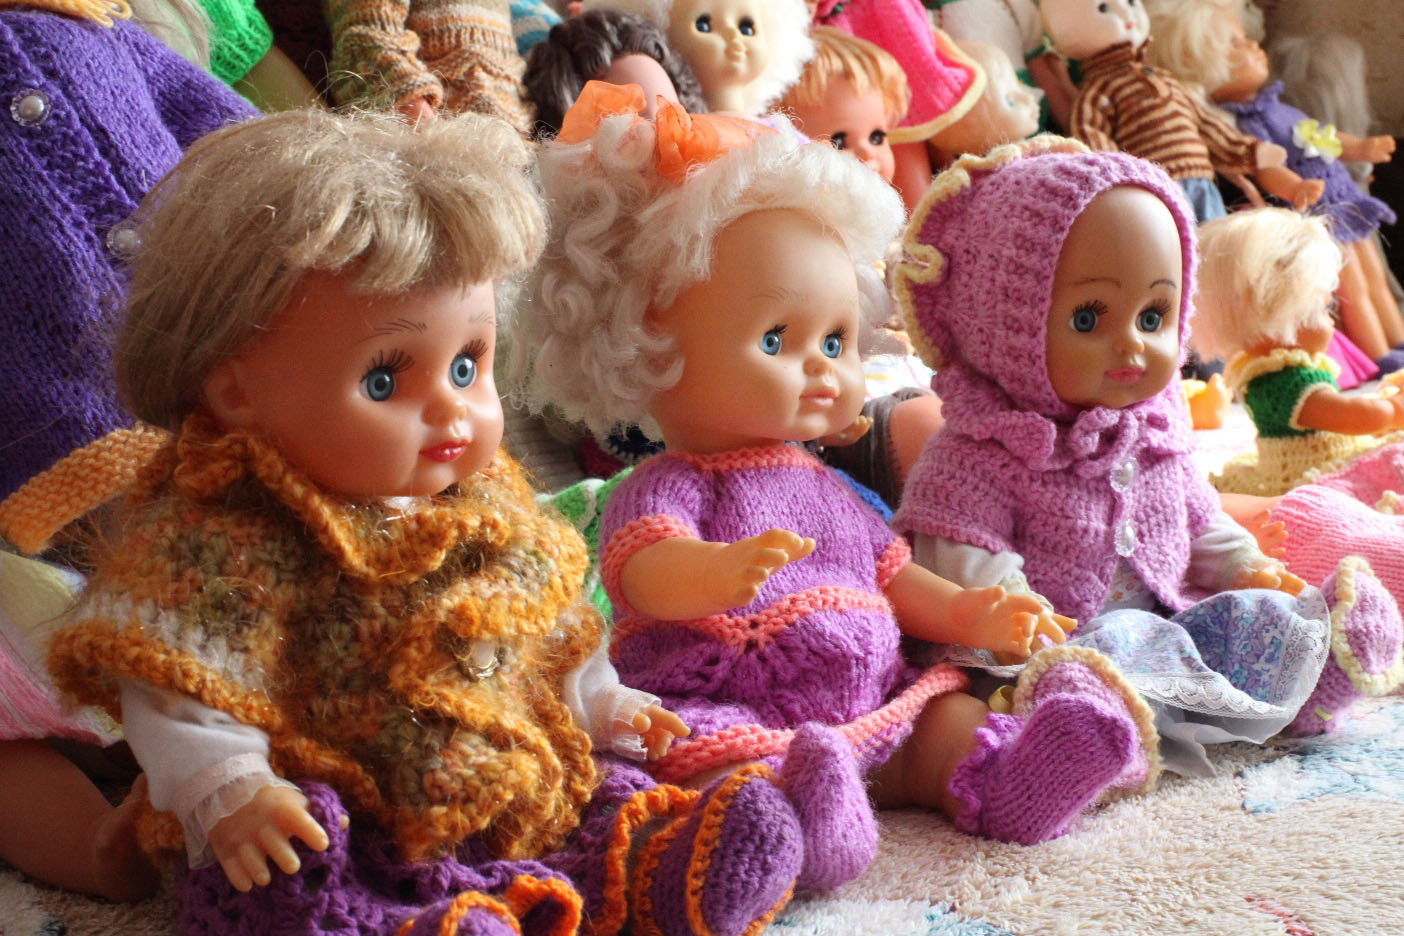
Nostalgia from childhood. Or repairing an old doll. The process of restoration (repair) of the doll (great baby doll)
MK: Restoration of the doll on the name Katya.
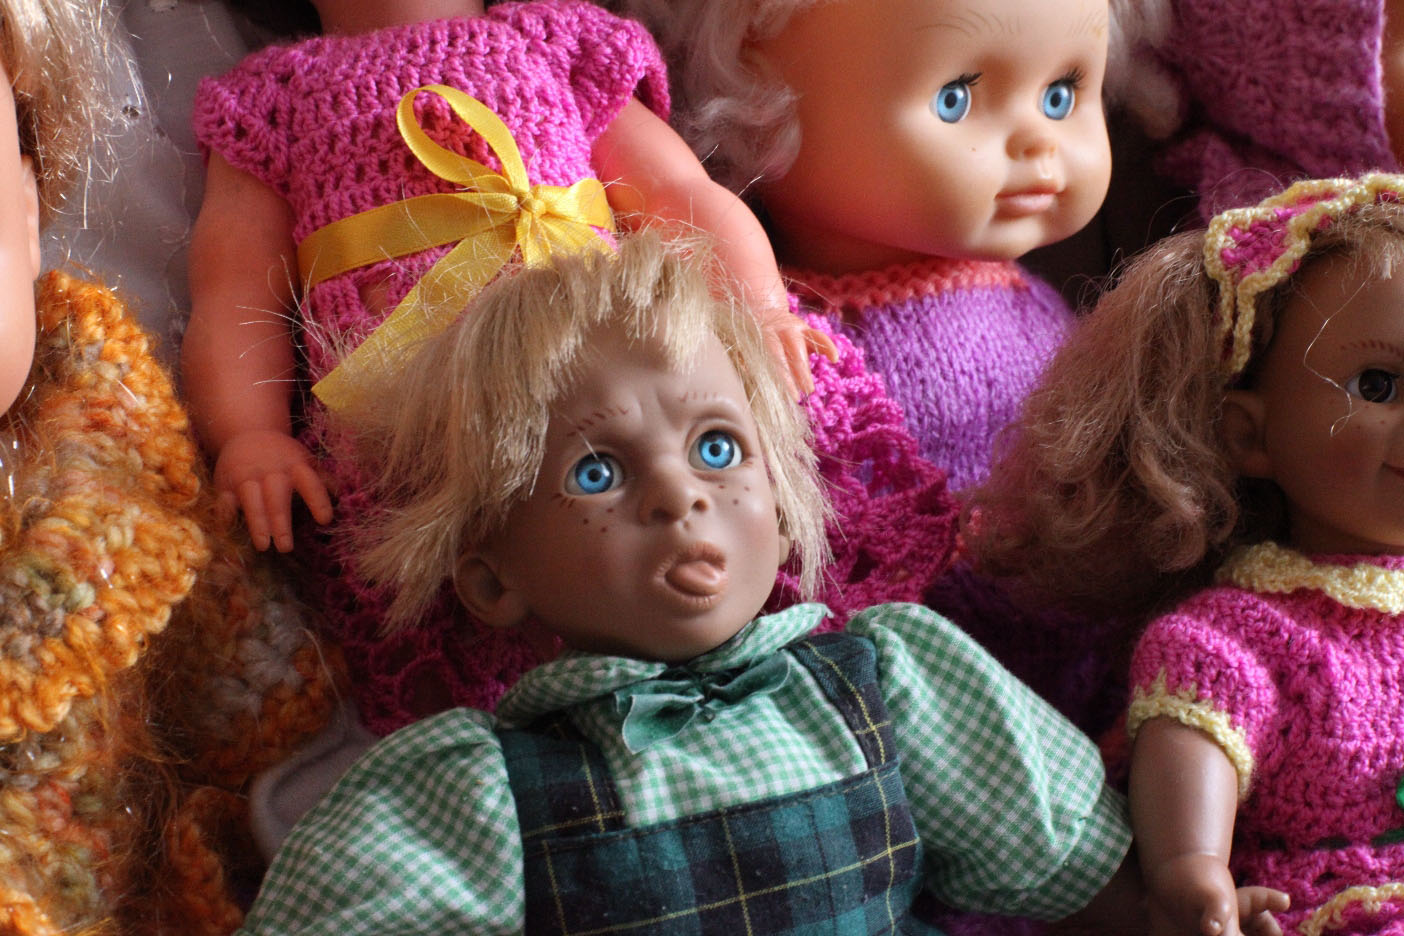
The world is varied and beautiful and it is what it is, and people, due to their individuality, develop their skin in their own way. More precisely, I would say to simply study the differences between them through the prism of your culture, from the perspective of the world. For some, an old doll is a treasure that has lasted for many years, but for other people it is a memory of their fathers, legends about childhood and any extraordinary stories that can be repeated with their children. we, but a little differently... Yakraz such a doll has touched my hands. Lyalka, who was a good friend for the little girl Yulia, became her mother. Both mother and daughter loved doll Katya so much, every day, and now Julia would like to pass her on to her sons, otherwise it would no longer be theirs, but theirs)). Ale Kati already has a lot of rocks. It was created in the 60s of the twentieth century at the Polish Toy Factory. And over the course of her life, she had a chance to learn and experience a lot. The doll was cut from a composite papa-mâché with thyrso and tied with gum. Well... When Julia was a little girl, they gave her a baby doll, as she named Katya. The girl’s doll was worthy of the first glance, but in order to verify that she was in control, Julia tapped two fingers in the eyes of the doll, as a result of which (as it already happened) the stench fell down the middle of her head (maybe the weather was wet and the plaster is fading away the mechanics I was very invested, I might have poked it hard, It’s unknown to us, but the fact is that there’s a stench in the middle). The girl, Julia, was really embarrassed and began to cry, knowing what had happened. So, in order to calm down the daughter, having corrected the position and singing, I use a saw (judging by the traces of the cut on the side of the doll) by opening the head and inserting it like a snake, and the cut part of the side is glued back to the carpenter We glue it. It didn’t turn out very neatly, but everyone loved the baby doll and played with it often (judging by the number of cracks and chips and the fact that the holes of the white hinges are very large). Before that, the girl Yulya never heard how the doll Katya seemed to goow when they throw her on her back - the squeak (a device in the middle of the doll for making different sounds) was broken even before her. As Yulia told me, the doll was restored on the 35th (and judging from the scuffing of the fabric and the plaster - it’s acceptable that a lot of hair was stuck and the ears were smoothed out, perhaps taking the relief behind the ears, and the toes were almost invisible - everything was clear axle even after I took the farb and began to sand the surface of the doll’s body).
Note: 1. The farbe in many places was damaged and fell out quite a lot, the mechanism was much wider for the necessary and therefore the traction was bent under the cut, for the frame of which the doll had a skewedness (otherwise the eyes are also and remembered these gentlemen, like relatives, to that It would be possible to remove them only by correcting the skewness and inserting new ones) 6 The unit is not working 7. The holes at all angles were too large, so that the hinges with the locks fell in the middle 8. The rubber stretched, etc. I also combined parts of the body so that the stench would not be ruined.
Those are the things that I needed to correct. I’m not a restorer and I started with this kind of work first, so I wasn’t quite happy with it))) I thought I’d do it in a week, but the result cost three). This is how the doll looked, if she had touched me:


Let's start shopping for spare parts:

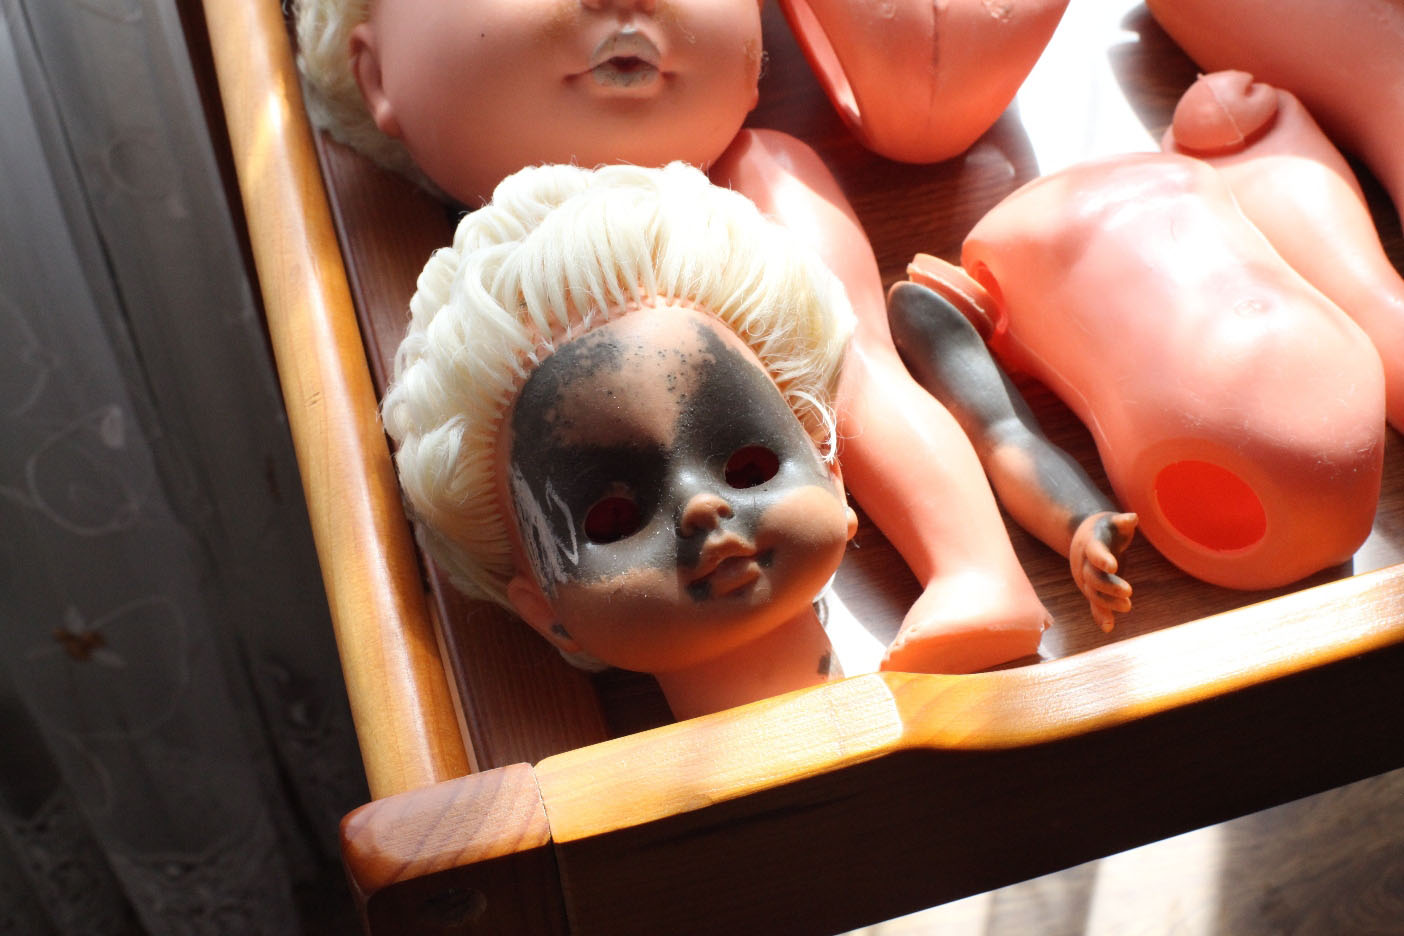
This is what the doll's head looked like in the middle:

And the axis of the body of the doll, open it along the seam:

And the axle and the squeaker itself for spare parts (fabric dusting bag with a cardboard bottom, clay weight with an opening for supplying the squeaker and squeaker, the same cardboard tube and cap):

This is how the squeak looks like - a bent piece of plastic with a slimy tongue attached to it. The wind, passing through this simple device, created a swaying sound and made a sound.

I completely cleaned everything up and collected purchases and devices and requested))), which is why I was so happy ..... :-)

Ochi..to:

Eyes after processing. I just had to take them apart and glue them back together with the help of a daddy-mache, otherwise there was no way to create them on an adequate level and without misalignment.

However, when the restoration of the body of the doll is destroyed, the fragments of the internal parts of the doll are already ready before installation. For the cob, it was necessary to remove the entire farb from the doll, otherwise it would be easy to cover up the cracks, then all the same there would be even more noticeable transitions due to color and surface irregularities, and it would be smoother. The farba was trimmed tightly - they farbed perfectly))) So I took the farba with the help of a hair dryer, an emery paper and a paper knife. Particularly large cracks were widened even further, so that everything could be properly filled with papa-mache - that’s the safest way. small access and small master class in one bottle)
Recipe for papa-mashi:
We take three trays together and tear them into small pieces; Fill with dill and leave under the lid for 3-4.

After that, we squeeze out the water and the butter that came out, beat it in a blender or in a mixer, or stir it with your hands until smooth. masi:

Add borage paste (cook in a steam bath with constant stirring of boreal glue: 100 ml of water, three tablespoons without burning borog; cook and stir until smooth) and three good tablespoons of PVA glue, you can also add carpentry at the time of the day. I didn’t add Thyrsus, but it’s possible.

Once again, mix until smooth, a little bit of sticky mass is left in the molded and evenly moist mixture after drying. The fort is near a soft tree, for example, a linden tree.

I save it in portions in small bags, wrapped in grub in the freezer) You need to knead, defrost and seal the whole cake))) Only papa-mache balls are to blame for not being very tender, otherwise they will dry out for a long time, you can also splash it .

Mayzhe testechka)))

With freshly prepared paste, we scald all large cracks and around the doll and shape the finger and the slots in the hinges. After the mixture has dried, everything is sanded with an emery paper until the surface is as smooth as possible. If necessary, you can also use papa-mâché balls to level the surfaces, or putty a bit behind the additional plaster:


After the whole body of the doll is puttied and well sanded, it is necessary to prepare it for preparation and repair microcracks using an additional primer. I used acrylic primer. It tastes good and is even longer lasting:

Now comes the next stage)) ROZKLAS! And the painting of this doll is similar to what I give to my dolls. Here it was necessary to get to the clear historical features, which I tried to do. True, the dolls were fared at the factory by being stuffed into the farb, and I was faring into a bunch of balls behind the help of a brush and tamponing with a sponge. I went through the first 5 balls with a soft pencil. to fill all the grooves and recesses and give an even tone to the face (the pencil must be steadily soaked in water so that the acrylic paste lays evenly and smoothly and no traces are visible from the brush), and then carefully use a sponge with a long With this porosity I also applied a couple of Farby balls . To protect the eyes that were inserted behind the head, I put small paper envelopes on them, sealed with paper tape. And after the residual fermentation, that lack of knowledge recognized them.

This is what the doll looked like after painting:

And the axle and handles with whole and stained fingers:

Let's proceed to the last stage of work on the doll - lacquer. I chose glossy yacht varnish. It provides maximum durability, wear resistance and water resistance. It’s good to come to us). The lacquer was diluted 50 x 50 times with varnish and divided into 10-12 balls, maybe more)) the first 8 balls were sanded and polished to achieve the most even surface. Then the surface was already well aligned. Lacquered with a little bit of the chewy imitation of an old cradle. Drying:

Lyalechka lost more than a few bucks for the gum. The flat gums stretch further out from the round crosspiece. I picked up a doll for such a rope-gum:

Re-stretching the doll requires two steps: connect the head and legs with one skein, and the other with the hands and a loosely ready-made doll named Katya:

In the next illustration, the doll before and after restoration (above the animal after restoration, and below the one that was worn before):
That’s the story)))) I can’t say that I restored the doll absolutely correctly and well, but I tried to preserve its basic appearance and create it so that it would live longer and with minimal risk of life injuries). I hope it didn’t work out for me)
Before us, a great Sonneberger doll, 60 cm tall, is up for restoration:

The baby doll has multiple injuries all over his torso

Covering cracks on the legs:
The eyes sank into the middle of the head:
After disassembling the doll, the damage to the fastening holes - the bearings - became even more obvious.
Let's get to work.
Let's get to work.
1.Stage: disassemble the doll. The composite body is fastened in the middle with a round thick gum. The parts (legs and arms) are used for fastening to metal. The doll has a basic folding pattern - the leg is secured with an elastic band, extends into the torso - the head - into the torso - leg No. 2, the hands are tied together side by side.
When disassembling the dolls, they appeared earlier (and not obvious) due to extensive restoration. So, when disassembling the head, if the fastening of the head was damaged, it turned out that the eyes that had fallen into the head were already being repaired, glued together, and in a harsh way - with epoxy glue:
Moreover, during the previous repair, the eyes were not completely renewed, all the corners were not glued together, and the frames were not secured. Fill the other eye with epoxy glue for further repairs. I will continue to do so every day. The wax filling of the upper layers is peeling and muddy.
2. Stage: eye repair
The old wax covering was taken from the upper layers;
- remove a trace of epoxy glue from the right eye;
- new ones are glued to the offending eyes;
-on the eye, a new coating was applied to the upper layers (tinted acrylic paint and glossy acrylic varnish);
-the hole of the left eye is filled with clear, hard gel (when folded, it became clear that nothing could be done, the hole on the side of the left eye would be visible);
- the eyes are glued, inserted and secured in the middle of the head behind a hard acrylic paste.
3. Stage: cleansing.
Zastosov is a gentle method of restoration. All surfaces are lightly cleaned with the finest emery paper and sanded with cloth. It was no longer necessary to reapply the makeup - otherwise the doll would have looked over-prepared. From whom you can’t earn more than a little bit, you can’t earn money from refilling
4.Stage: robot with torso, legs and arms.
The restoration of the composite body was formed using a capital method. This will help eliminate stains from putty and prefabricating. After refilling the composite body, remove the soil ball, which in old dolls becomes soft and old like cardboard. Restoration in a major way involves drying dry materials (cellulose and soil balls) with moisture and fresh putty and acrylic fabric, and thus converting the elasticity of dry materials. Now, let's finish the job: - we sand the selected parts, check the soil for “sealiness” and remove the plots that have been sanded, widen the large cracks even further, so that then everything can be puttied well; -apply a few thin balls of paste to a flesh-colored color (the color is selected through samples and adjustments, ideally close to the color of the base coat), a little less light tone is required, and a little light color is not required but - when hanging, the veins darken; -the skin application ball has been dried, sanded and polished:
5. Stage: primer, finishing and sealing with varnish.
The finished parts are wiped with a sponge scraper - particles of putty or any defect in the coating are removed. On the chains there are shredded rags, on which the “body parts” are dried. After repairing and eliminating traces of chips, a primer was applied to the entire surface of the torso to eliminate microcracks. Then, using a wet sponge with very fine porosity, a number of thin balls of tinted acrylic fabric were applied. The skin ball was dried, then a new one was applied (10-15 balls). Drying the farbi on a suspended stand on the racks is like a leather ball. On the top there are two balls of matte acrylic varnish. Drying varnish on a suspended stand - 2 dobis per leather ball.


Although the baby doll had a lot of damage to his hands, his hands were also touched in the robot in order to match the color of the baby doll, as well as to enhance the fluffy, old ball of old paint on his hands.
As a result, the doll looked like this:

The deputy would like to please after such a radical repaint
tuluba, river and river, every hour (perhaps over the course of a month-
two) do not put anything on the doll, do not allow it to be weaved with the fabric,
Let the acrylic varnish (which, unfortunately, takes a long time to dry) is dry
and remaining firmly fixed.
I would like to give a shout out to the wonderful master Natalia Krasnov
Oleksandrivna for such clear work. Our doll is already
She’s not young, she’s over 50! rocks, and about 30 of them she sat with the chef
through the daily life. Natalya, you gave our little girl
friend of life, greatness to you!!! Yakshcho nadali vinikne
the need for dolly restoration is up to you.
Anastasia and Roman
At the last reception station, a young woman asked to put an old composite doll in order. I rarely use composite dolls, but I’ve decided to start admiring the performance of the toy, and then figure out who and what works.
The repairs turned out to be in need of repair, and I took up the renovation.
This is a great little girl from the 50-60s, that same doll.
The doll was brought to me on a dark, dark night... At the rozіbranomu camp.
If the fastenings for the legs were worn out, the eye mechanism “fell” into the head, everything was missing, the hand was lying around, there was a crack in the shoe, and the clothes were no longer there.


I immediately thought that this was not a Radyanskaya doll. A very old composite on the head and a sheepskin coat. The eye mechanism flirts exactly like the KR of the 126th late period.
The eyes are cursed. Arms and legs made of thick plastic. The synthetic peruka is “woven” into a thick gum base cap. At the police station, under guard, number 3066/15 and that’s it. The height is 75 centimeters. Great girl:))
They started to joke about what kind of “animal” this is. The muzzle is a typical old antique lace.
At the forum on Dols-planet, I found out from the girls (YAKUI IM VELIKE) a short description about a doll with such markings. 

Axis here:
"After the end of the 2nd World War, the production of dolls was renewed on the basis of the Armand Marseille doll factory. Vikor factories produced various forms of AM, as well as forms of other brands in the region. Heads and tThe streets were timid with the composition and papa-mâché.
Early dolls are labeled AM, but most of them are labeled “SP” in the stake.
Sonneberger Porzellanfabrik has produced thousands of dolls and baby dolls, but has closed the production of hundreds of dollars on the cob of the 50s. This is tied to a series of plastic dolls, which begins. Next to the forks of the SP models, composite and later plastic Sonni dolls began to be produced.
SP 3066 - big dolls with flirting eyes and open mouths. In early dolls, both the head and the entire body are composite. The older ones have arms and legs made of plastic, arms on a gum “cap-base.”
That's it - the end of the 50s - the beginning of the 60s. Nіmechchina.
Further repairs have been made.
I glued the tube together. I cleaned my head off the glue using motor glue.
The farbi on the head and on the trunk sank.
Behind the help of a sledgehammer, a piece of rocker from the eye, like plaster with glue, appeared. I glued it onto the lids right in the head, it didn’t turn out as fluffy as I wanted, but it wasn’t as handy. Then she put her eyes on the spot, adjusted her eyelids and flirt-rocker. She washed the feathers and combed this “ram”. A very plump feather appeared. Well, panties, a T-shirt, scarves, cloth, sandals, a bow.
Two cloths were sewn. Apparently the doll was wearing a wool cloth with a white stripe and a live shirt-front. There was no plain fabric of this color in the house and it was not the season for summer fabrics in stores. Then I found two vintage ganchers in the box. That's why there are two cloths. Vintage Gudziki, at least today's Bavovnyans.
At the last moment I decided to stick the oxamite paper “behind my teeth”, although I didn’t see any traces of the old one in my head. Perhaps the glue had dried out and the back was simply falling off.
Well, that's all done, now for the photos.


One thing, the child has a “bruise” on the bottom, but I don’t know how to tell, but I’m afraid to try everything later, I don’t want to give up. Maybe you'd like to remove "sincy" from plastic dolls?
Housewife Irina Vakhrusheva loved to play with her doll and her child. Having grown up, she did not suspect that their restoration could become a favorite pastime.
Irina reveals that she came to the restoration of the dolls in a “marvelous” way.
“When I was a child, I loved playing with dolls, but then I had a little girl and had to sort out my dolls. I found out on the Internet that at our flea market you can buy dolls for the Radyansky Union. From that hour she began to collect. I do things that are wrong, and their targets are completely ruined. This is connected with my childhood and brings me great satisfaction,” she says.
Over the past two years, she has restored about 150 dolls.
The main part of this collection are dolls created during the Christian hours, and also new dolls.
The oldest lyatsi – 60 rocks. According to the estimates of the breeders, it was released for sale in the 50-60s of the 20th century and in rare copies today.
There are many ways to find “ugly” dolls, including Irina – online forums and shops, flea markets in Bishkek, or you can spot them on the street. It happens that people themselves bring their old dolls and force them from behind the cordon.

To repair dolls, Vikorist uses “donor plastics” - parts of other dolls. The cheapest ones are Chinese dolls, which go like brucht. Irina has to buy parts of other dolls for restoration, because the toy manufacturer does not produce spare parts for them.


To soften the doll's skin, you need to use an anti-acne agent, and to cleanse the skin from acne, put it on a sleepy place for an hour and let the surface of the toy rise and become clean.
To restore one doll, according to Irina, it takes a lot of time - it takes a lot of time to become a “patient” - it can take 1 day, it can take a week, it can take a whole week.
In addition to restoration, Irina creates an original mixture for her dolls, which is especially suitable for the skin.
“Children are subjected to their own interests, and a person can sometimes be beaten, but in principle he is loyal,” Irina shared with the site.
By the way, it seems that she doesn’t sell restored dolls.

“I collect them. They stink like children already... but I’m pleased with them - the stink of my tabletops has become close, and I don’t want to be separated from them,” says the restorer of dolls.

In the future, Irina plans to open a museum of dolls. She appreciates that the rich man would like to come and marvel - perhaps he would like to enjoy the toy of his childhood.