Decoupage of metal cans for the kitchen. Decoupage of the garden. Photo master class. Decoupage of jars for the kitchen: master class
When a little baby shows up, a bunch of additional items that you didn’t have before appear in the hut with her. This is about metal cans for children's food. People have long appreciated these valuable and durable containers and use them for their needs: for screws, bolts and various repair parts. Why not keep them in the kitchen for an hour? They are also good for preserving gummy products. These jars are covered with hand-made soft plastic lids and therefore will be completely hand-made from the vikoristan. You will need to wash them a little, so that the stench becomes disgusting. You will get better, you will no longer clean up jars of cereals served in the cupboard, but as a matter of fact: put them in the respect and let everyone know how you have created so beautifully. And I’ll teach you how to get busy metal cans for children's food.
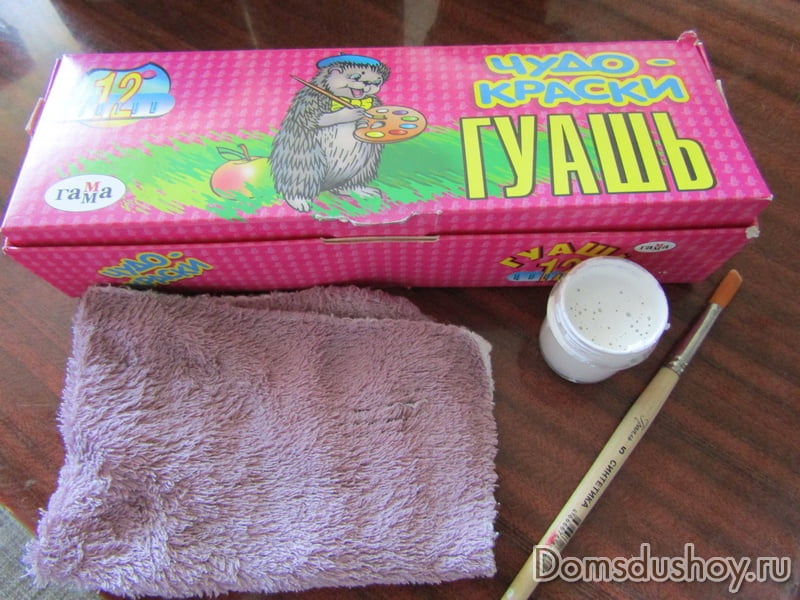
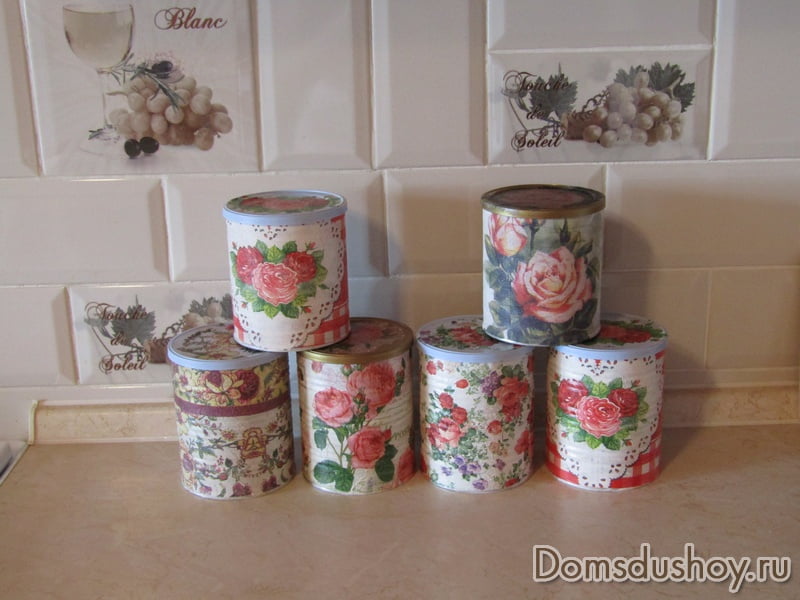
I’ll tell you straight away that I’m not a master of decoupage and I used to work on metal cans in the first place. I don’t intend to read anyone, but I just want to know how I ended up in this mess. I had six cans of children's food, five types of two-dish tri-ball servettes and a jar of everything together.
For robots, I wikilisted:
- old table, which is not bad, drip with glue or tarpaulin
- tin cans 6 pieces
- Trishar servettes with butterfly baby
- PVA glue
- plastic cup for diluting glue
- knives
- white gouache
- penzlik
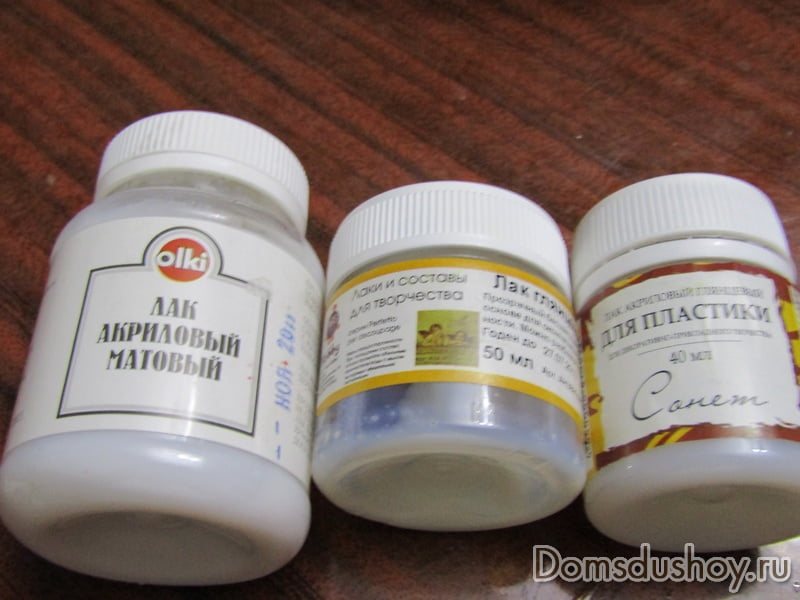
- acrylic varnish (gloss)
- soft gancher with microfiber (for quick removal of congestion)

Before speaking, for decoupage it’s best to choose thick and stiff serverettes. The stinks fall on the surface better and do not break under the foam.

- I prepared the jars: I have mercy on them in the middle and call. I read on the Internet that a hairdryer is the best way to speed up drying. My jars dried naturally. If there is a paper label on the jar, you need to peel it off and remove any excess glue with a cotton pad soaked in the middle to remove varnish or acetone. Since the labels are sticky, they must be completely removed from the surface of the jar. My jars have lettering and symbols directly on the metal, so I didn’t have a chance to catch anything. And from the cries I knew sticky stickers.

- In order for the thin ball of the serving dish not to show through what is daubed on the jar, it is necessary prime. Make a vikorist of acrylic primer and farb. I had neither this nor that. I chose the original white gouache. It doesn’t need to be diluted with water very often.
- Started making jars of gouache. I only took a small penzlik axis to make it thin, I could have taken a normal one, which is used for poaching windows, for example.
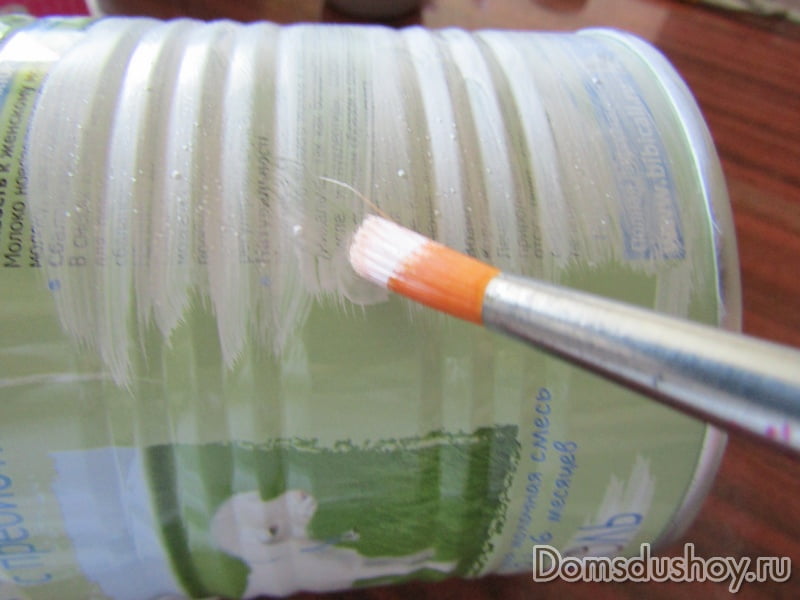
The gouache adheres well to the metal, and it’s practically impossible to see what’s daubed on the cans. I covered the jars into one ball. However, another ball is unlikely to be needed, so there is a fear that the farbs can pass through those that will be the same ball.
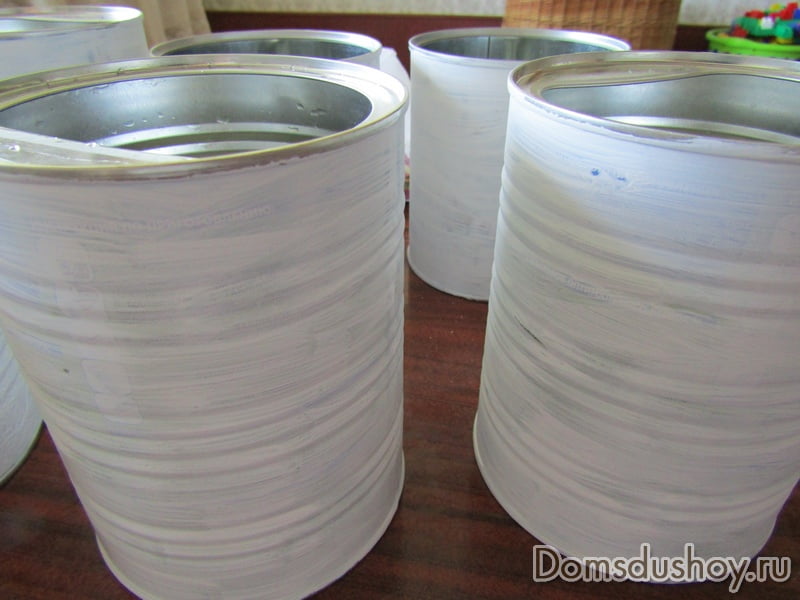
I soaked up all the jars and set them out to dry again.

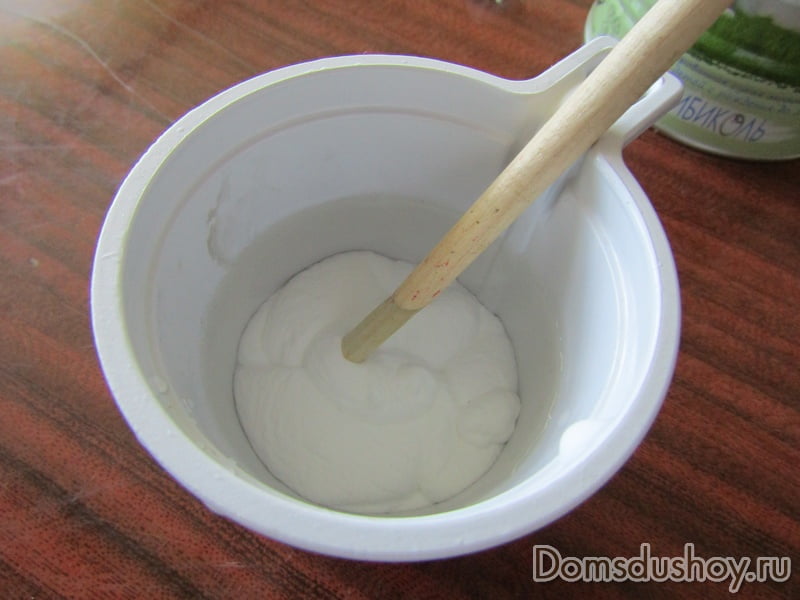
- While the jars were drying, I poured PVA glue with water into a bottle approximately one to one. Mixed it well and sprinkled it with a little bit of dough so that the glue would combine with the water.
- In the meantime got busy with servets. I strengthened the upper barvy ball from the lower ones. I made the servettes 33*33 cm in size.
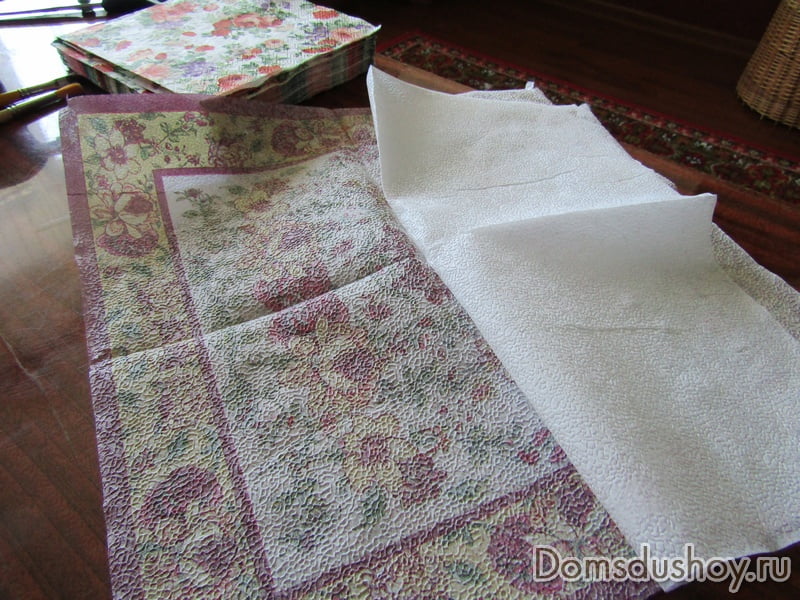
Without using a knife, a scissor cut a bunch of fragments from the server.

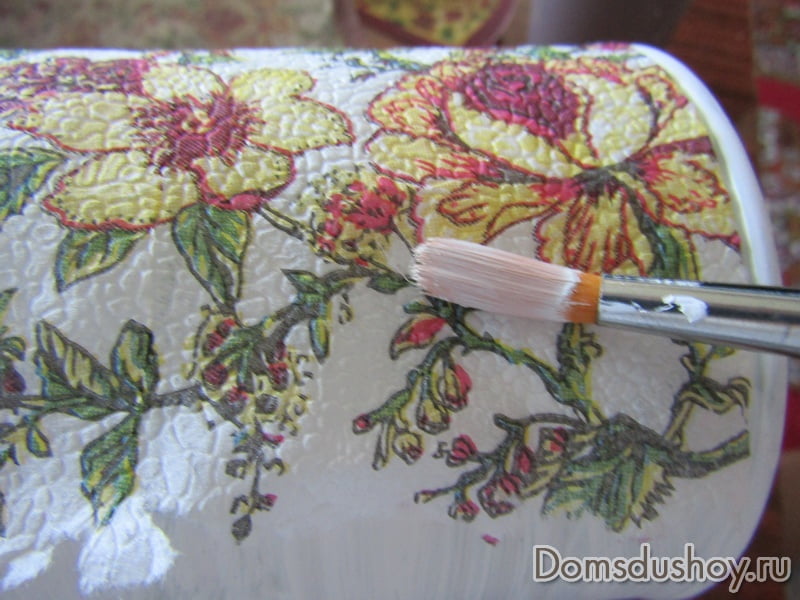
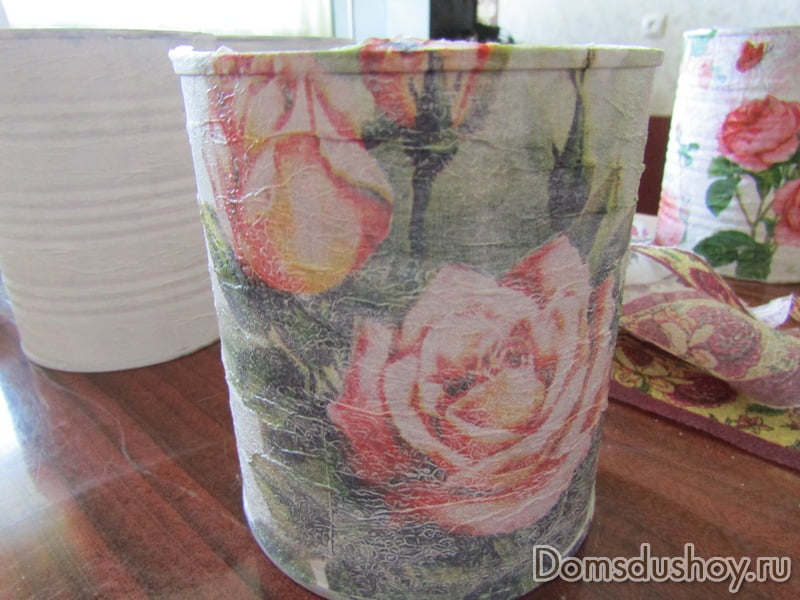
- І axis, you'll find out, the jars have dried up and I proceeded to gluing the top ball of the server to the surface. Penzlik first washed out the gouache, and then dipped it in glue and carefully smeared it on the serverette. Follow the following rules: place the cutlery flat against the jar and begin to spread glue on its edge, gradually crumbling away. You can’t work so quickly, sweepingly, hastily. Otherwise, the server will stretch out, before the wrinkles and until the end of the work, you may lie down unevenly.
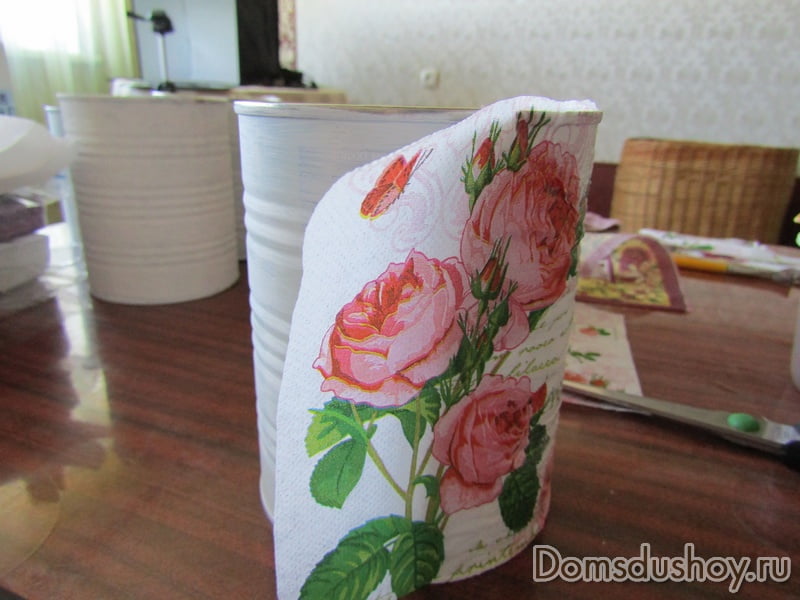
The first jar is ready. She came out of my place with her open doors. I already said that my first job is to decoupage metal cans. I wasn’t embarrassed, even though there were still five cans ahead and I was willing to undergo “rehabilitation.” And if the jar came out with white liquid, then use PVA glue, if it dries, the liquid will go away.

- Started working with another jar. Here I used scissors to cut the serverette to size and began to carefully glue it on.
The axis and the other bank are ready.

- Everything worked, however, on all the jars. Here is a photo of Sirikh cans. Third axis. Of course, wrinkles are inevitable. The stench will be straightened out a little if the jar dries out. You can see the wrinkles even up close.
- A quarter of the can of bacon was sealed and was already drying.

- P'yatu and most of the jars were crushed, however, because there were no six types of serverets.

- Leave the jars to dry got busy with the critters.
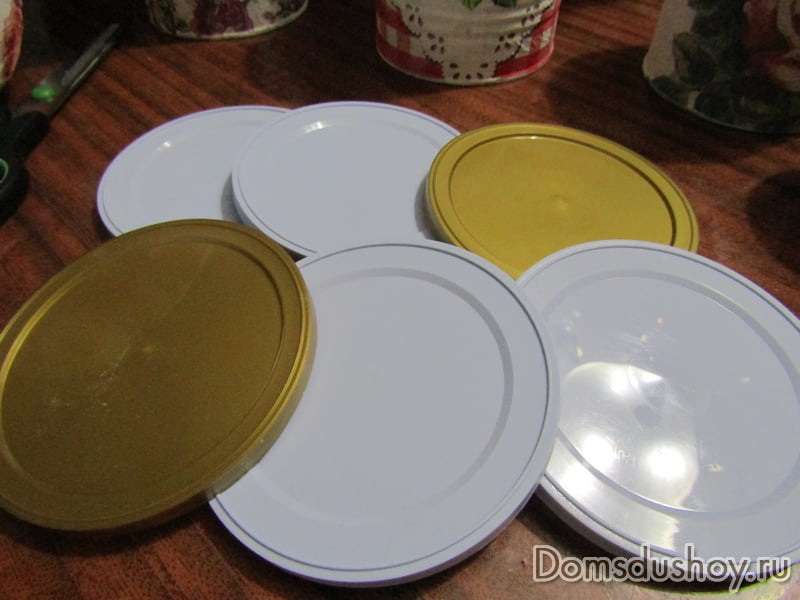
- Let the edge be uneven, virvala z servetok fragments And in the same technique I glued them onto the surface of the covers.
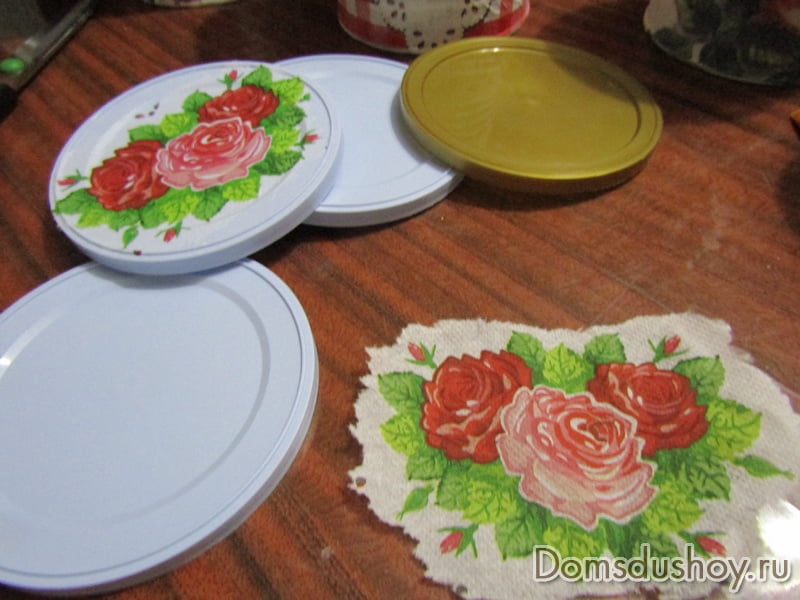
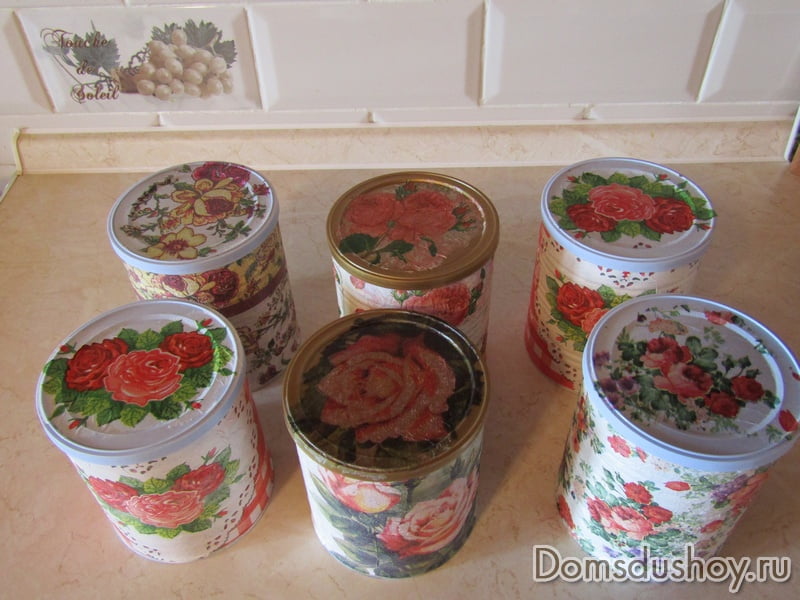
- Just before the skin jar, a little baby appeared.

I earned it all in one evening, sitting in front of the TV. I let the jars dry so that the cracks would dry out.

And the Frenchman took acrylic varnish and covered all the surfaces.
I axis and the jars came out.

Possibly, whoever does not deserve kviti. For decoupage, you can use the newspaper if you want! If it’s eggplant, try it You've got it all right.
Using additional techniques, decoupage can be decorated like metal cans or glass. And a lot more. For example,
The axis like the miners came out of me. I was busy that same evening and early morning when I was filling out these jars.
Good for you, it’s easy to pick up the kind of servings that suit you.

And not enough hours are needed for work. Ale є obov'yazkova umova: bazhanya robiti something for the home with your own hands and in a good mood. I wish you all good luck!

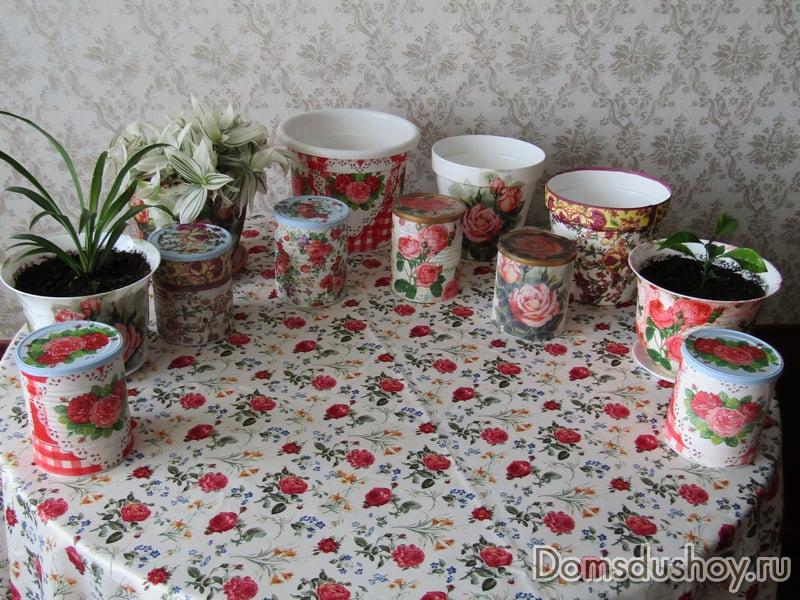
More options for using a jar for children's food:
2016, . All rights reserved.
In everyday life, our skin has different types of cups. Basically, after getting rid of the stench, go to the dump. With them you can create a masterpiece at home that will decorate your home, and also serve as a wonderful gift for children and adults. If you want to give the banks a living for your friend, read how you can earn money. If you decided to decorate a simple glass jar with decoupage, then there are no problems with the materials - they are sold in all office supply stores, and you can find them at home. We will also discuss today how to create decor in the decoupage style for a basic plaque, for the creation of some kind of master class you will find below.

We create decoupage of curse jars using diagrams and descriptions of the work
Every day there are bottles of bottles that can be used to remove harm, and for the stench to stand and just fall like a saw, it’s unpleasant for you. With your own hands you can decorate a jar and decorate it in a variety of ways, for example, as a vase for drinks or a jar for bulk products.

- the empty bottle of the bank is clean;
- glue for decoupage (you can use vikorist and PVA glue);
- Trisphere serverets or thin papier from the required baby;
- farba for primer and farba for baby;
- To create a relief, you can use egg scarf.
Easy to decorate a jar for bulk products
For the cob, prepare a jar, removing all the stickers and skimming the surface with hot water or alcohol. Then apply the primer using balls and let the surface dry.
To create a relief, the egg scarf is detailed on small pieces of paper and carefully glued to the jar. The butt can be seen in this photo.

Apply glue to that part of the surface where the baby will be and carefully glue it. To decorate the gaps, you need to vikorize the farb, the color is likely to make the baby look small. Yak in this photo.

When the decor is ready, cover the jar with sealing varnish and add three balls. Our work is ready, at the end you can decorate it with stitches and other accessories. This is how you decorate yourself. Respect video lesson.
Decorating simple plaques using the latest technology

Using old plaques, you can make cute jars with your own hands for spices, cava, dry foods, etc. Such jars will become a wonderful gift to state gardens for the kitchen interior.
What materials are needed:- empty container for coffee, tea, spices or children's food;
- universal soil;
- acrylic fabric;
- whatever varnish (garneau looks like craquelure varnish);
- trisphere servets or thin papier from malunkom;
- sealing varnish;
- For decoration, you can use stitches, rhinestones, etc.
Pokrokov's instructions with photos for masters-ears
The work begins by defatting the surface of the jar with mild mixture or alcohol, then applying primer and mixture under the base. When dry, apply farbi (what kind of farbi will be left in place depending on what kind of baby is sticking). To give the surface a smooth or matte look after sanding, use emery paper. To give the surface a cracked look, you can apply craquelure varnish, as shown in the photograph.

Varto respect that the thin ball of varnish is the better for cracks to appear. Glue the little ones lightly until the surface is dry. After gluing the baby, use a soft sponge to remove excess glue. Next we apply varnish to fix it. After applying the first ball to the dry surface, you can apply sparkles, decorate rhinestones, everything will remain depending on what design you selected. After completely drying up the first ball, we hit the other and third balls.
Be sure to watch the video below:
Decor of plastic cans with original pictures and prints
Plastic cans and dances have become an invisible part of everyday life. Very often the stench disappears, but from them you can independently, in the home, create beauty. We will tell you how to make decoupage of plastic jars at home.
This photo shows a decoupage of a jar for cavy, right?


- clean plastic jar chi dance;
- knives;
- priming;
- farbi chi laki;
- trishar servet or thin papier with baby;
- accessories for decoration;
- glue for decoupage chi PVA glue;
- varnish that will seal.
To start, you need to remove all the stickers from the jars. Give the dances the required shape (you can create two dances as in the photo).

Next, prepare the surface - apply the primer using even balls. After hanging, you can immediately glue the babies. Using a sponge, carefully remove the glue that comes out from under the baby. Farbs give the little one the necessary composition of colors. After drying completely, apply varnish to fix it and add accessories.
Decoupage of plastic dances differs from other techniques in that the plastic can be given a banana shape, it can be cut, glued one by one without much effort. Yak, for example, is in this photo.

In this way, we learned how to decorate carved jars using additional decoupage. We hope that you have learned a lot of new things! I wish you success! At the very beginning video:
You can find out the rules for selecting decor from our article.
You can use the following materials for this kind of handicraft: basic glass jars, simple dishes, some kind of bowls, glass, and jars of chips and cava. Try to make decoupage jars for the kitchen, decoupage plastic jars and you will see how great it looks on the police or on the table.

Sense of this technique - pasting with cut out cutlery, cut out little ones, selected dishes or any interior item. After gluing, usually cover the entire surface with a ball of dry varnish. Whatever you want, the river will serve you longer.

Do not cut the cutout from the server, but simply cut off the edges.
Master class No. 1 – decoupage of enamel dishes
If you just want to try your hand at this technology, you will need more than serverets and cut-outs, viz from a glossy magazine, some kind of acrylic fabric, or basic stationery PVA glue.
Varnish for decoupage (if you buy it from a special store - the price is steep) you can buy it at a repair store, or you can make it yourself. There are two options for self-polishing varnish.
How to create Mod Podge (varnish) based on glue:
- 225 ml PVA glue.
- 112.5 ml water.
- 2 tablespoons of water-based varnish (for the jars).
We mix everything in one bowl, crush it and cover it with a lid. The varnish is ready.
How to make Mod Podge based on boroshn:
- 1 ½ (210 grams) bottles of Boroshna
- ¼ bottle (56.25 g) of lemon juice.
- 1 bottle (225 ml) cold water.
- ¼ teaspoon olive oil (per eggplant)
- ¼ teaspoon otstu (per bazhannyam)
Mix all the ingredients in a bowl, beat the crumbs with a fork, don’t forget about the mixture. Turn on medium heat and bring to a boil. If you drive too thickly. Bring to a boil, stir, remove from heat. Check it when it’s cold and pour it into a jar with a lid.


You can start a master class for cobs. We choose the surface that we want to decorate and prepare the materials. The dishes can be decorated with small items, for example, cards, burning paper, magazine clips, leaflets, servettes, etc.
The image will be rendered only on a laser printer, and will be covered with a jet stench.
For robots you will need:
- White acrylic farb.
- Sandpaper (emery paper).
- Brown acrylic farbe.
- Penzlik.
- Varnish Mod Podge or do it yourself with 2 options.
- Sponge
- PVA glue (dilute with water 1:1).
- A can, a glechik, a kuhol - whatever the enamel dishes.
We have a working pocket: put down the newspaper and paper. Lighten the surface (weep with water, then you can wipe with alcohol or cologne).

We rip pictures and view them. We make sure to display all the pictures under the image so that the varnish will appear more beautifully.

Take a foam sponge (you can use a sponge for dishes) and blot the piles of pictures with brown cotton wool. We place the plate near the water for 1-2 minutes. We need to remove the top ball, on which there is a drawing. There are many ways to make a picture look.
You can simply split it (for example, cardboard), or you can, by placing the picture upside down, “roll” the top ball with your fingertips.
Another “dry” way to split papier is to use additional tape. The baby from the collar side is firmly glued across or along the sides with tape. It's better to take wide tape. Press down some scotch tape and paper so that the stench sticks out better. Starting from the mound, loosen the paper ball and carefully tighten the top ball. Just do not tear too quickly, otherwise the babies may be torn.


Apply PVA glue to the place, frame for the picture, apply the picture to the place, and then coat it with glue. After 30 hvilins, the animal is coated with decoupage varnish or self-made varnish (a better recipe). We put it aside and check that when the varnish is dry (2-3 years), you can go through it again, the remainder. From the old can we got a vase.

Master class No. 2 – decoupage of a glass jar
This decoupage of master-class glass jars is made from original glass jars, from which you can make vases or stands for spoons and bowls. Decoupage of glass jars must be started by soaking them in warm water, then removing the old labels.

Decoupage of a glass jar is a great idea. For the robot, we need everything that the first master class has; PVA glue can be replaced with decoupage varnish (Mod Podge or self-propelled). If you are using PVA glue, you need to dilute it with water 1:2 so as not to thicken it too much.

Also, we can separate pictures or view them from magazines, leaflets, servers, etc.
For robots we take:
- Acrylic fabrics – white and black.
- Emery paper.
- PVA glue.
- Decoupage varnish (can be replaced with self-propelled varnish: marvel at the sight).
- Promotions and excerpts from magazines.
- Penzlik, sponge.

Apply primer to the slope. If you have started, you can skip this moment, it’s enough to cover it with black paint.

Apply acrylic black farb to the bottle on the top of the jar. Let it dry as soon as possible.

We go through the dry sides and bulges of the glass jar with an emery paper. We need this for the antiquity effect.

We cut apart the pictures and cut out the fragments with scissors. Place the scraped fragment on the file, take a brush and decoupage varnish (self-propelled varnish number 1, cut with PVA glue: marvel at the sight). Rozchin is applied to the fragment. Check when dry and apply again, and so on up to 3 times.

Then we put the fragment in warm water for 5-10 minutes. Using a pen, apply PVA glue to the center of the jar. Carefully, so that the picture does not tear, apply it to the jar and remove the top ball.

From the top we cover the top of the picture with varnish, and then the whole jar. Dry and varnish again. This is how you can create decoupage of small and large curse jars.


Master class No. 3 – decorating the plaque
Next - we deflate and dry jars, bowls, metal cans, pots for kvitiv, zagalom everything that you are going to decorate. In this master class we work with decoupage of a tin can. You can sell canned fruits and vegetables in these jars.
Decoupage of cans begins with the need to handle any sharp edges or burrs. There are many ways to shape the edges: you can use pliers and bend the sharp edges in the middle, you can cut a wire with a diameter of 3-4 mm, and glue the vinyl top to the top of the jar:


After we have noticed and lightened the plaque with alcohol or cologne, and decorated the top, you need to apply a dark acrylic coating to the top of the jar. You can use a penzlik or a sponge. Chekaemo, if the farba is dry.

After drying the dark fabric, apply a ball of white acrylic. I can also check if it’s dry. You can coat it with white acrylic again.


Gluing pictures using the “file method”. We put the picture on the stationery file down to the bottom and pour water into the beast. Let's look at the pictures of 3 people near the water and read them after that. We pour water, apply it to the required place, press it, and remove the file. With your face we tear and twist the bulbs in the air, apply glue to the baby. Step by step we smooth out and straighten folds. Work from the center point to the edges. We go over the picture with a pencil of glue. Let it dry. Let's apply varnish. Sushimo. Let's repeat it one more time.

Professionals apply 25-30 balls of varnish on the surface, and then grind out 2-3 balls.

The curses of the jars and the dances are formed just like that. If the color of the glass is dark, you don’t need to cover it with dark acrylic. Just use white paint, and then sand it with an emery paper.
Master class No. 4 – decoupage of cans for bulk products
І another master class from the vicious packaging of chips. You can save tea, tsukor, and kava from her. Everything is repeated, as in the first two robots. As a result, you remove jars for gummy products.

Decoupage jars for kavi. Very cute and cute decor.


Tin cans are mostly thrown into the bucket for cleaning, but what do you know? What can you earn from cans??
This unattractive material is hiding a lot of waste, but let’s talk about the environmental side.
Ale, of course, the first thing to do is to put the tin can in the first place and you need to decorate it. We can’t figure out all the ways to decorate cans with our own hands, but we can only focus on one thing – decoupage.
Decoupage of a tin can- the same decoupage on a metal surface. It’s easy to learn how to do this for beginners, and today we have prepared for you a selection of master classes that will help you master this technique.
What can you make from ready-made decorated jars, up to you!
Of course, these ideal containers are not just for office supplies: clothespins, clothespins, and other household items will be in order and at hand.
Music to the wind, candlesticks, flowerpots for the garden - all this virobi from cans brighten up your butt.
A non-standard idea - tin cans are like trays for towels, talking about the fact that not all methods of curing plaques lie on the surface.
Hey, do you want to learn how to robotically decoupage cans?
Decoupage of a tin can. Maister-classy
1. Decoupage of a tin can. Meister class- original in English on the Hgtv website.
How to make decoupage of a tin can- Russian translation published on the "Women-on-line" website.
2. Decoupage on metal surface, master class on the website of decoupage lovers.
3. Decoupage metal cans from Aunt Tkachenka.
You can take a closer look at the photo on the collage by pressing it onto the label.